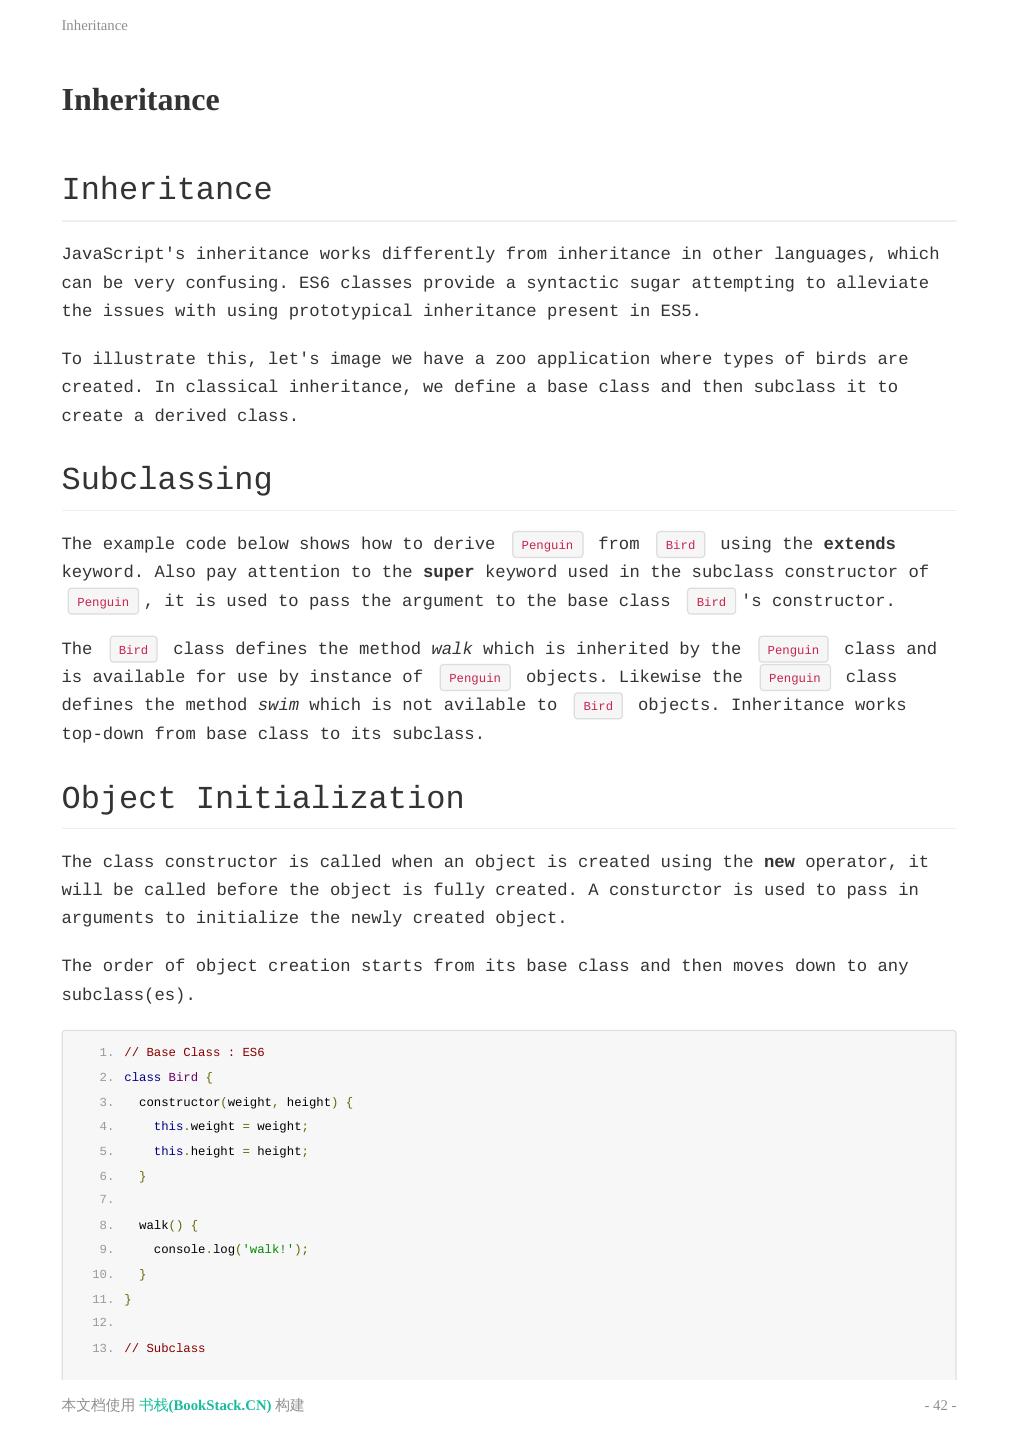
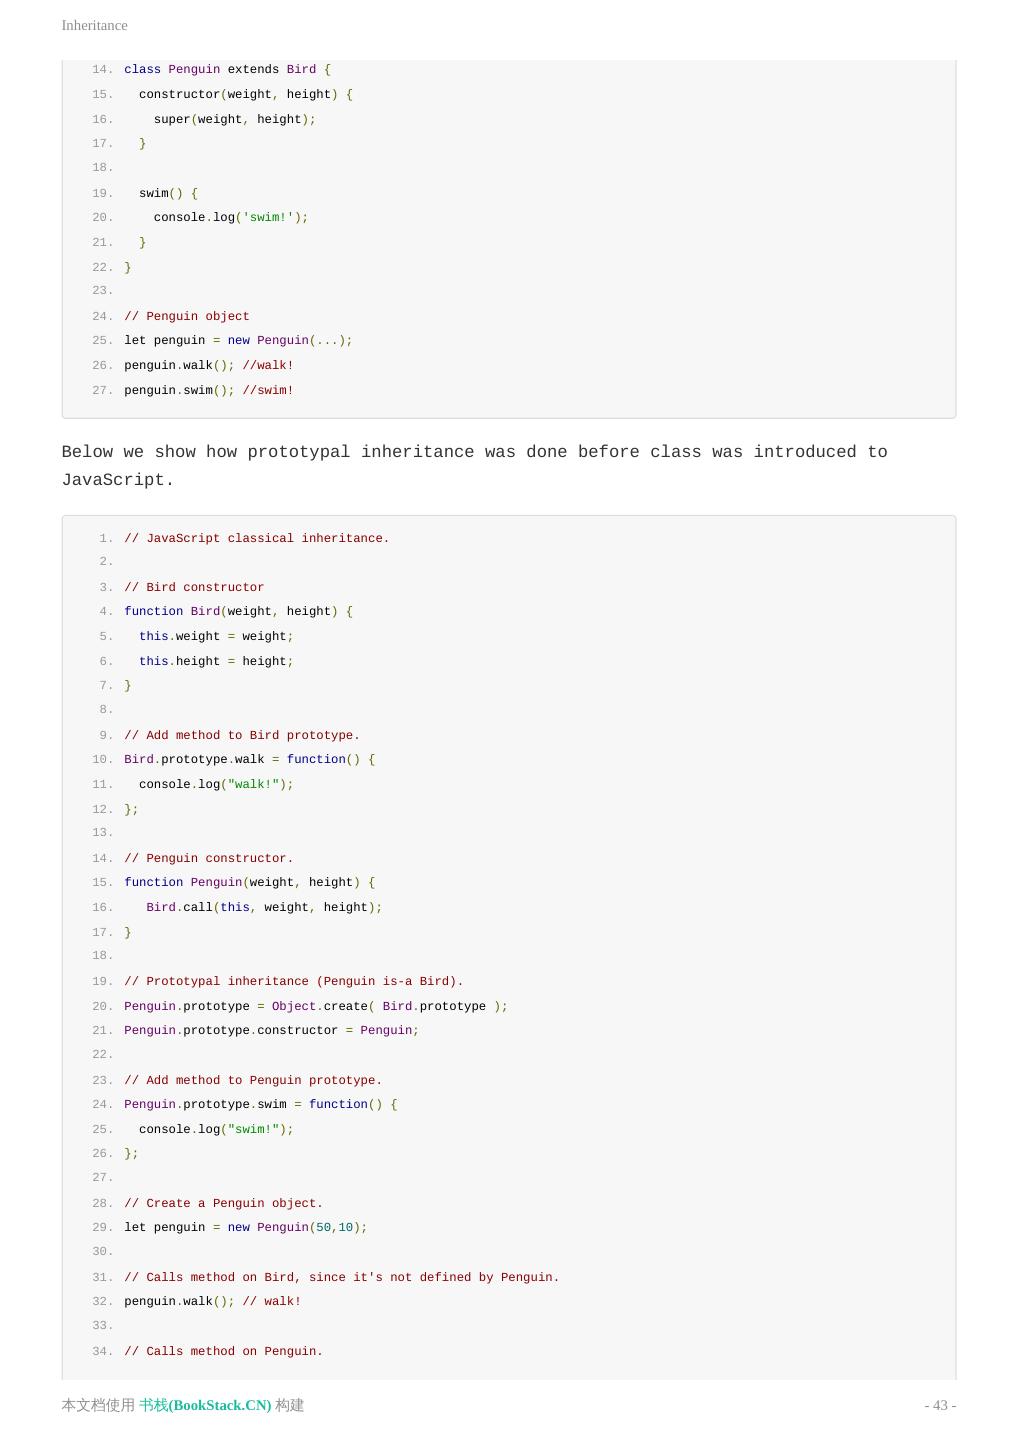
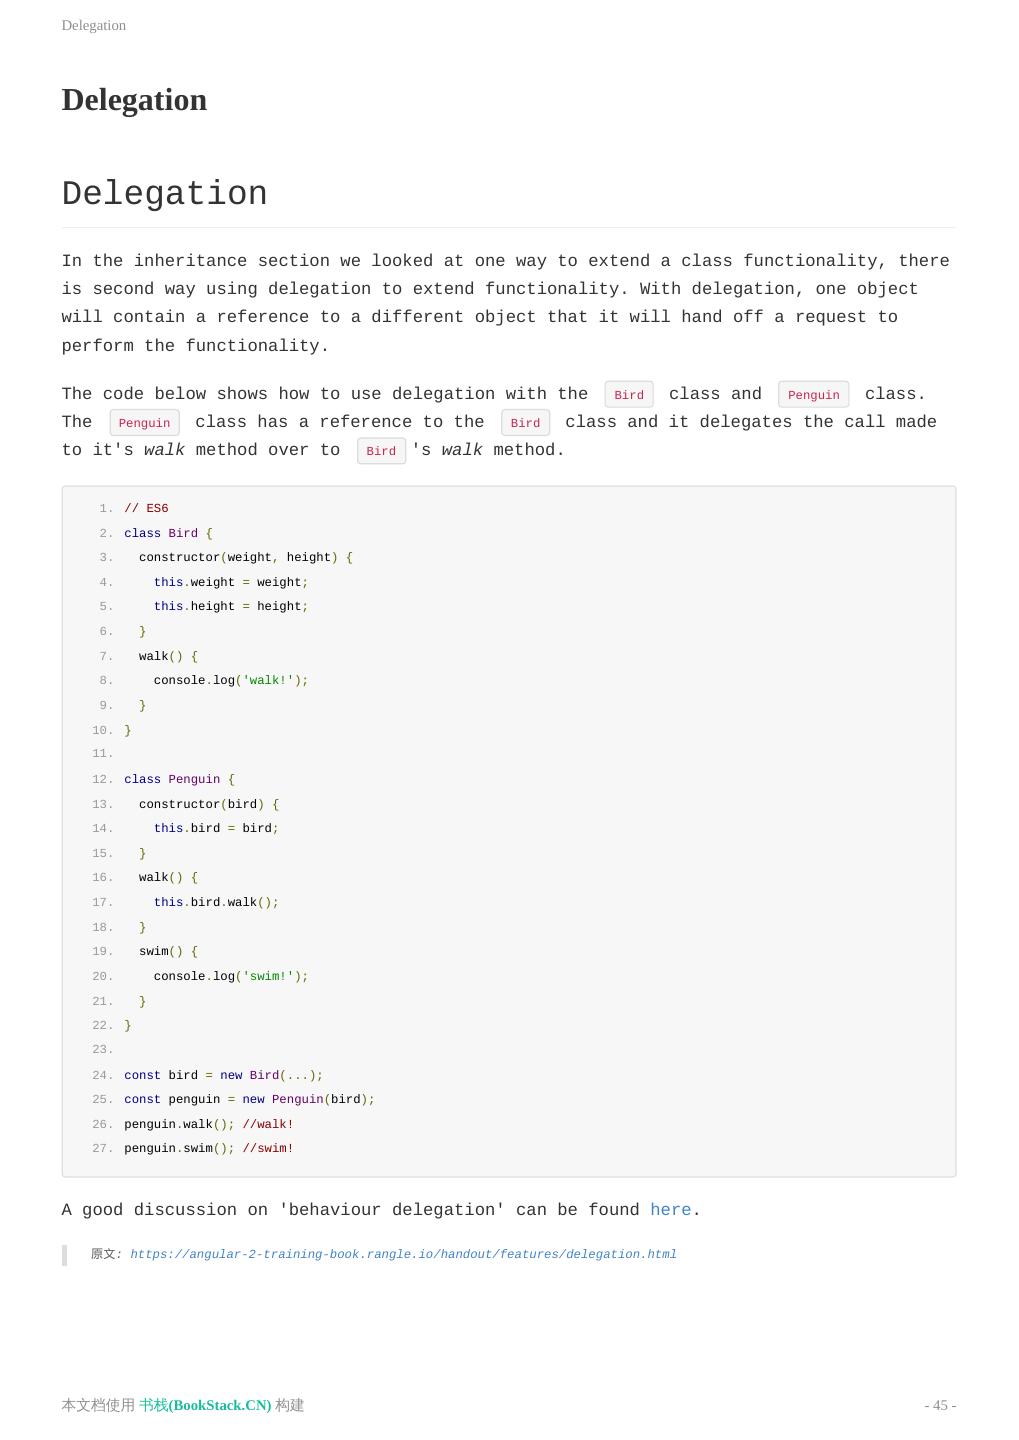
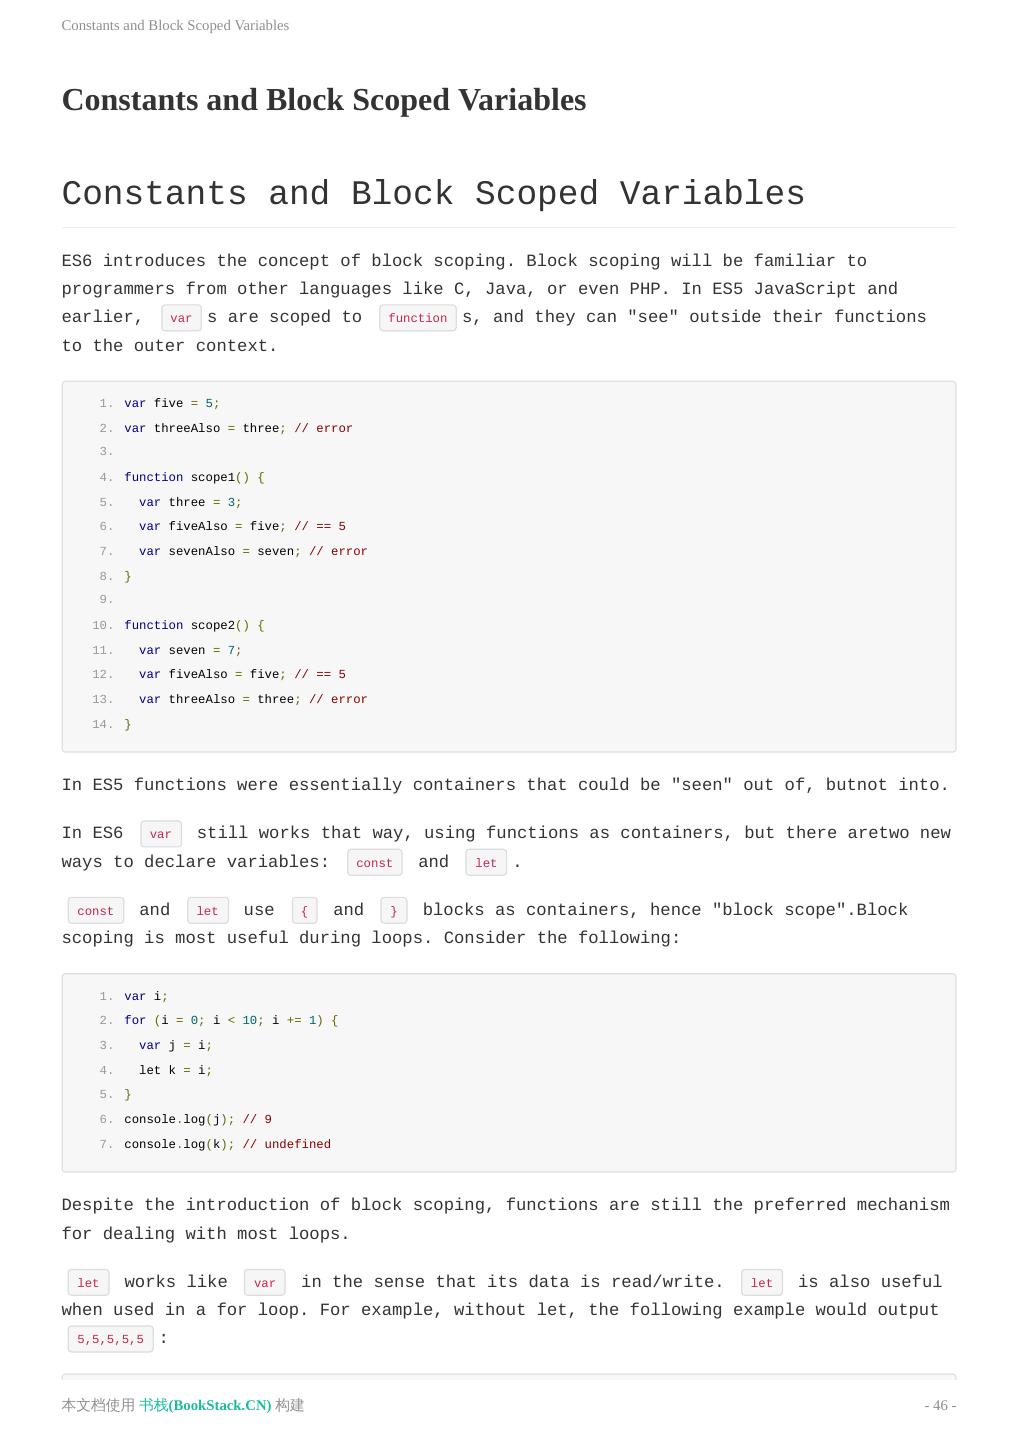
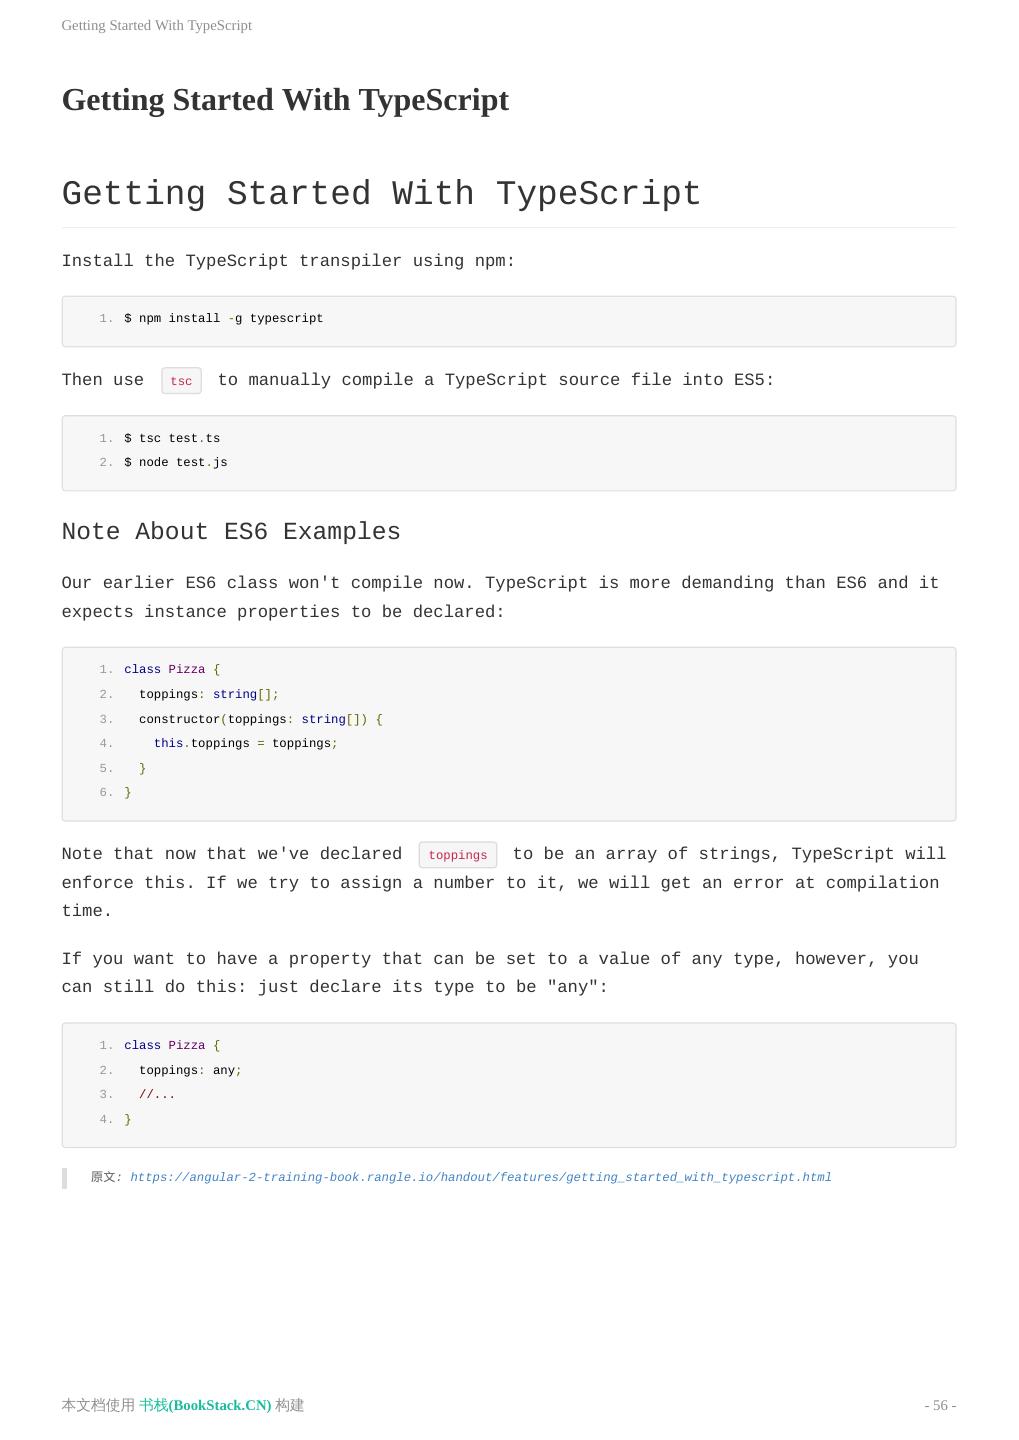
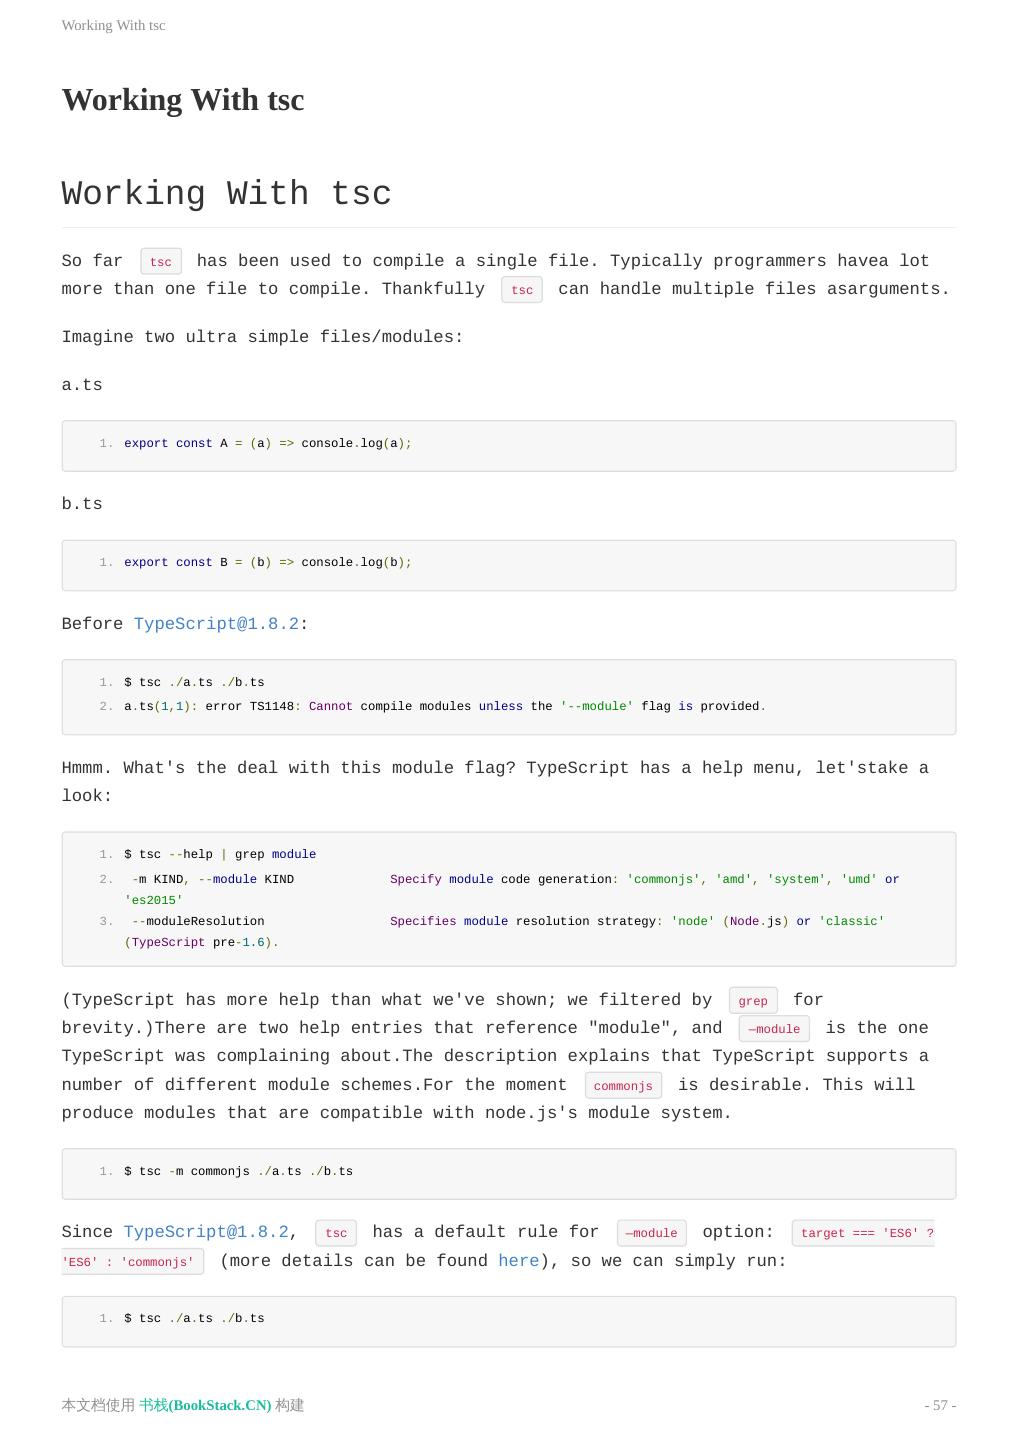
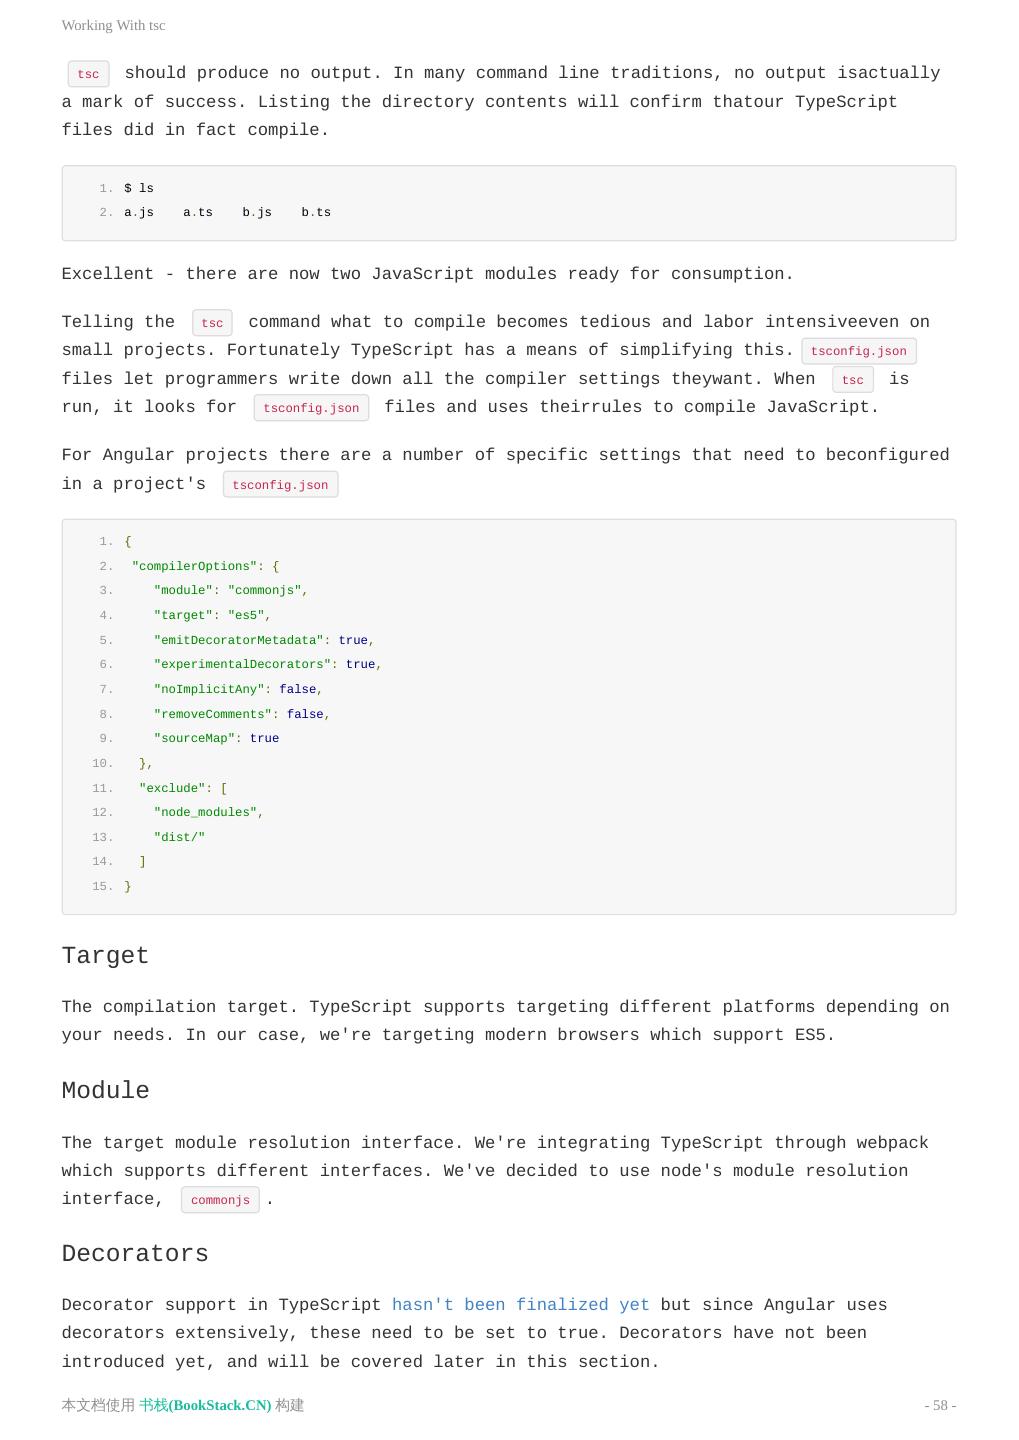
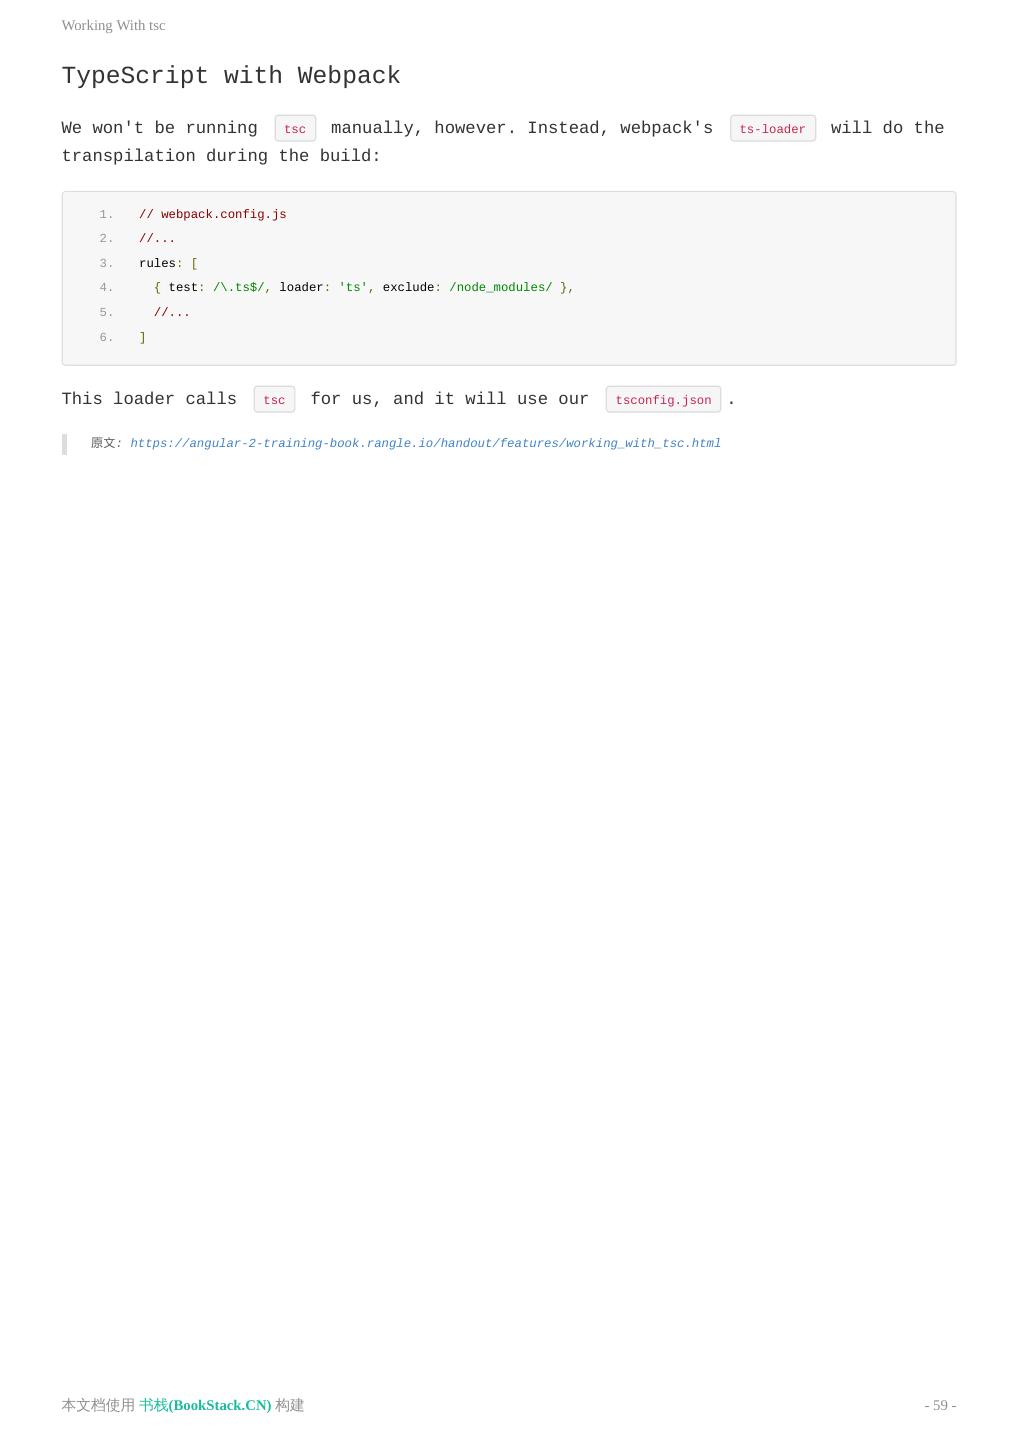
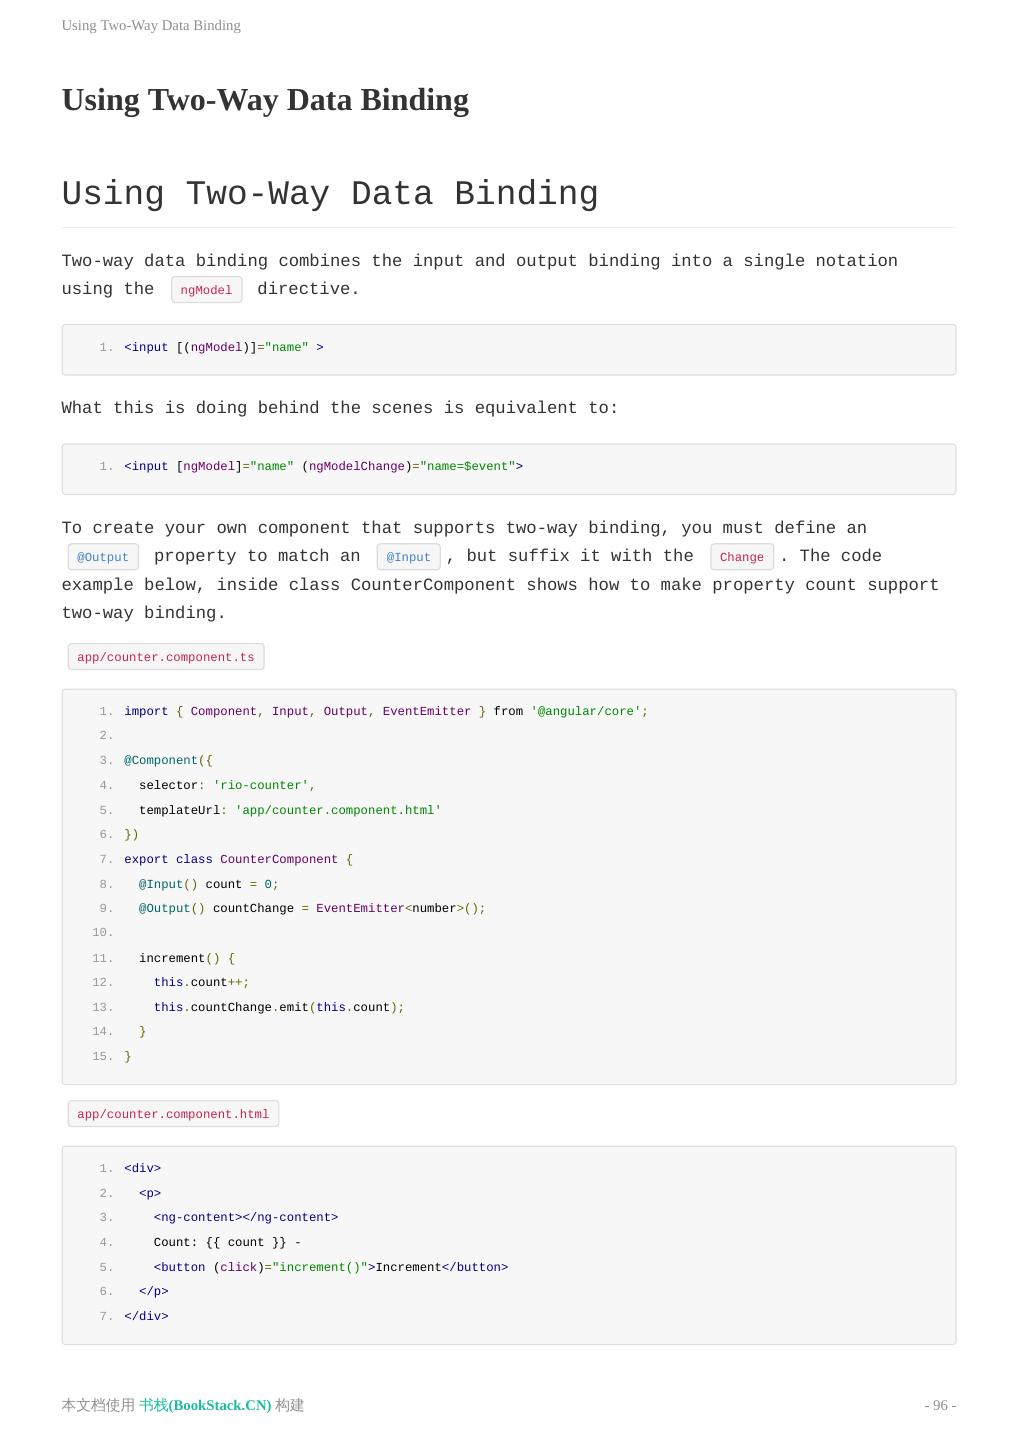
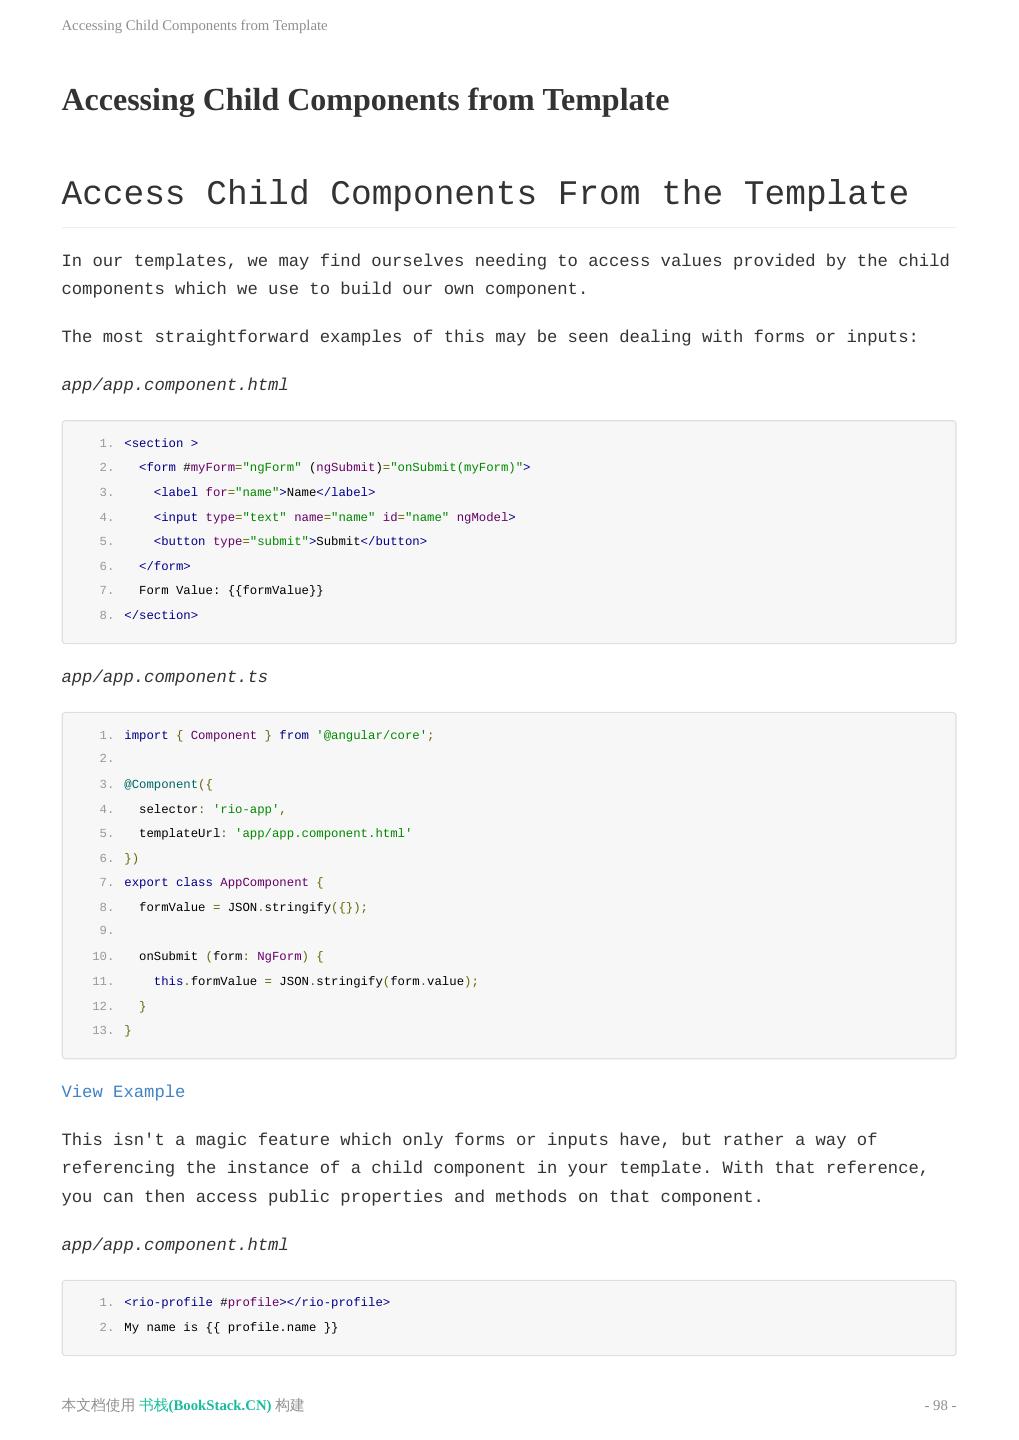
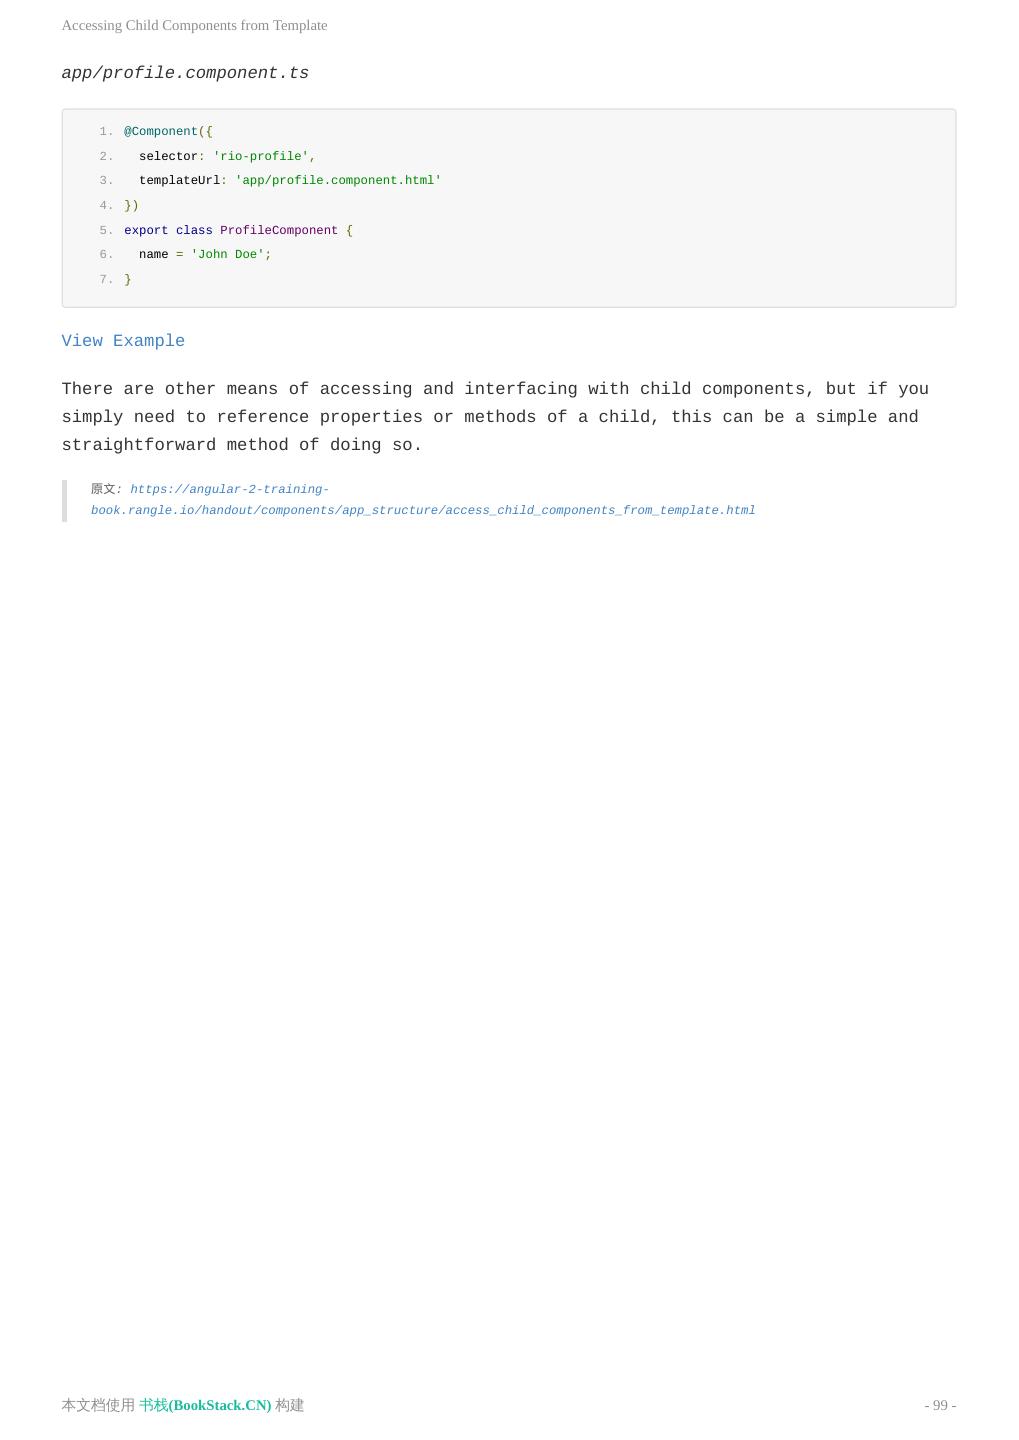
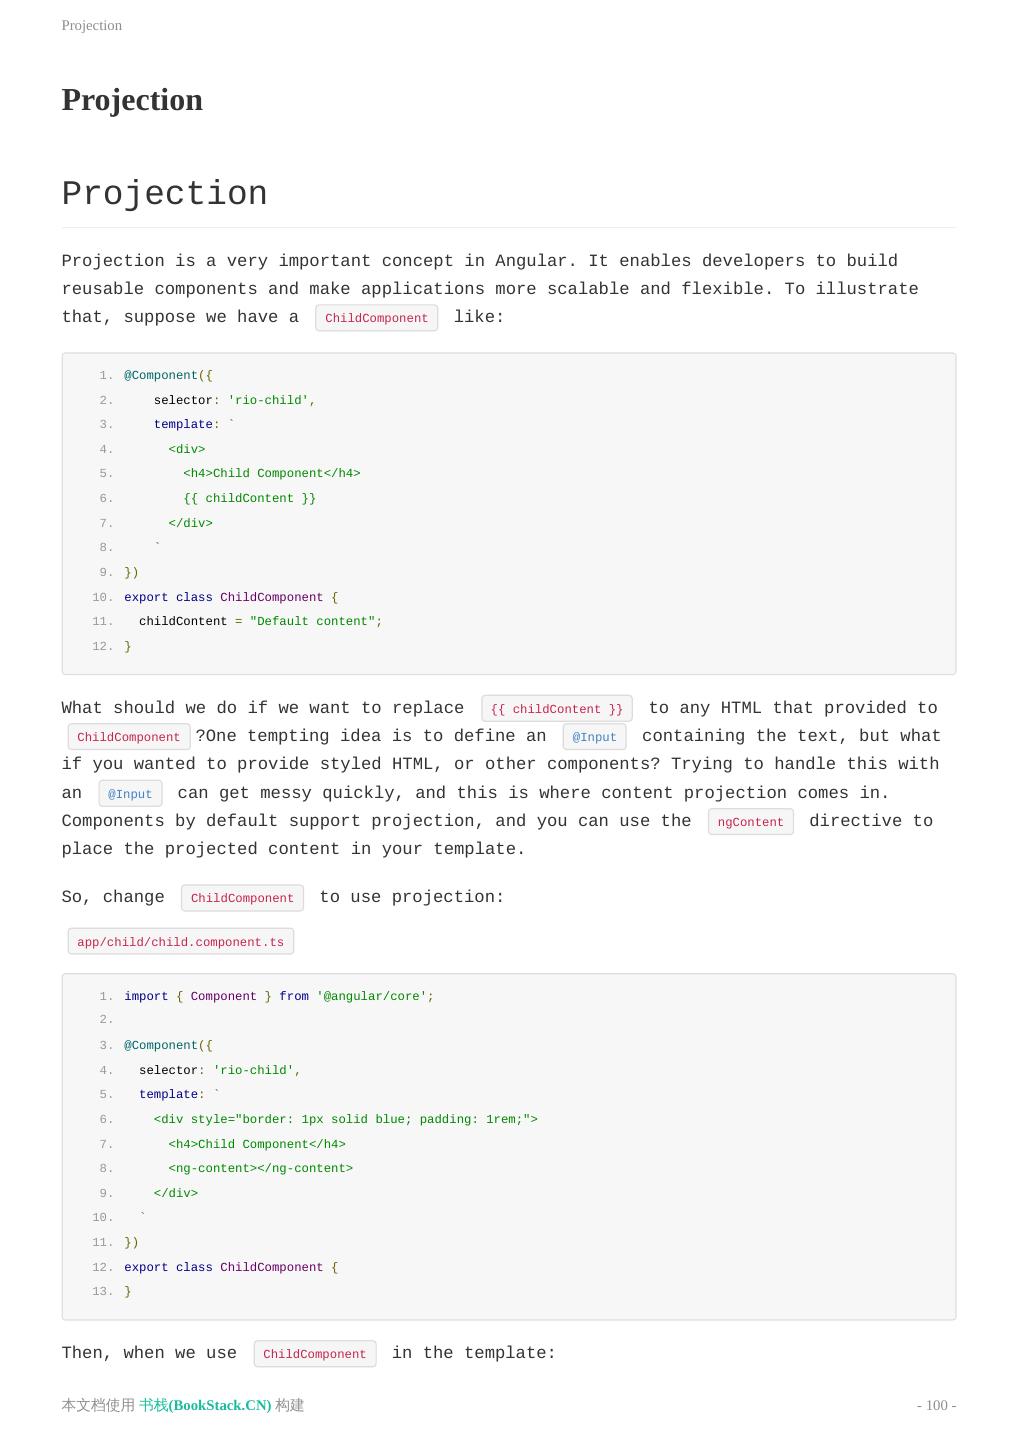
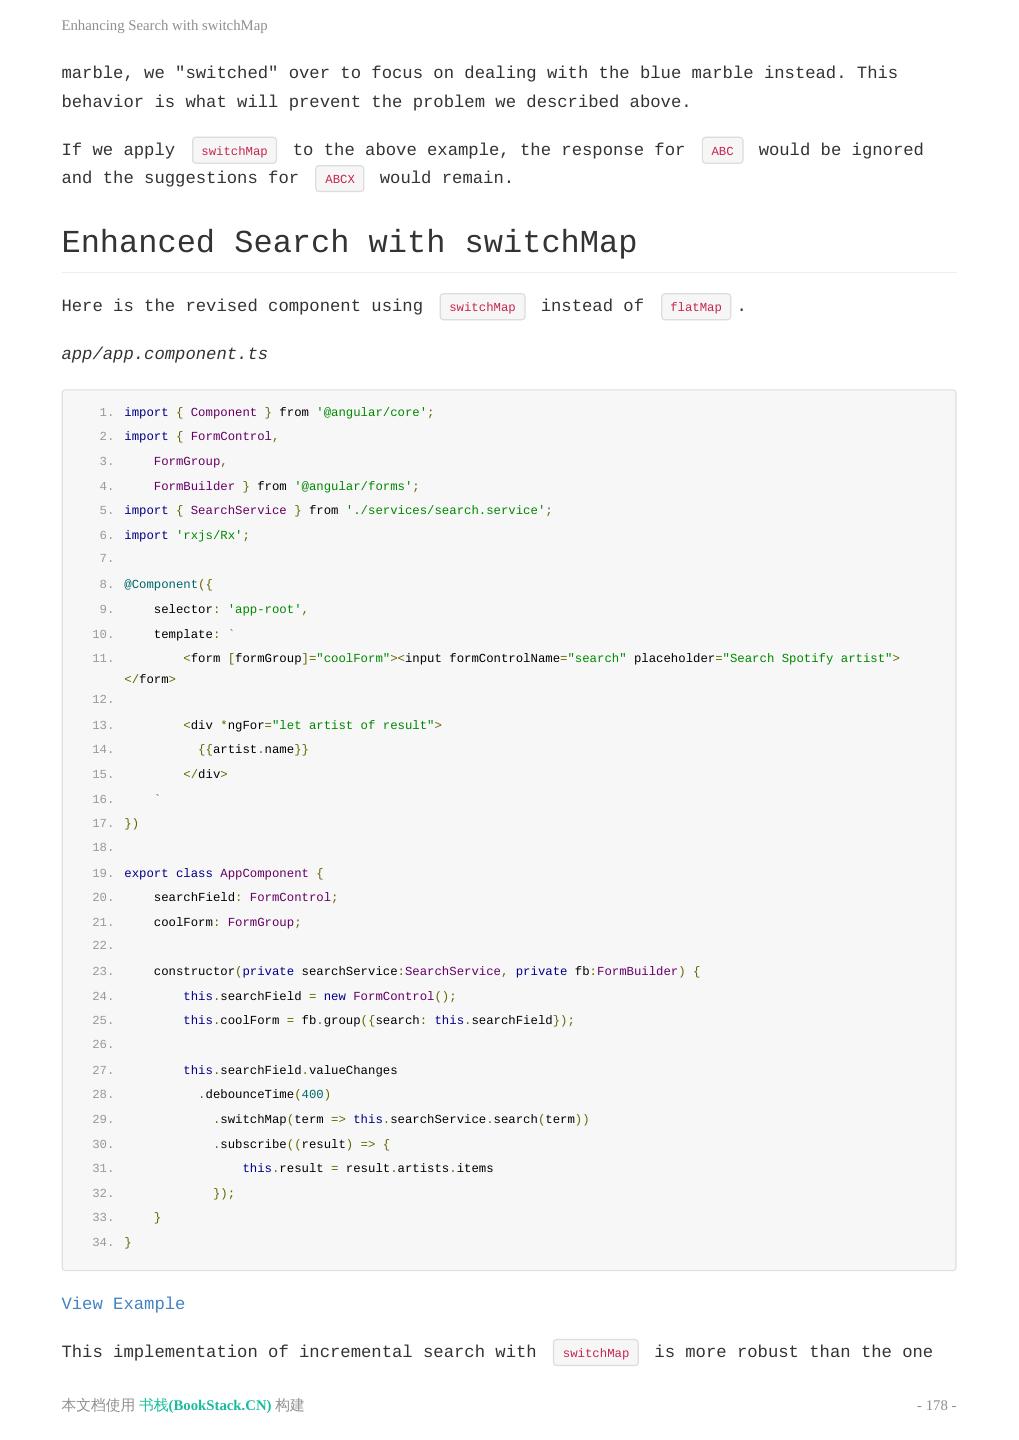
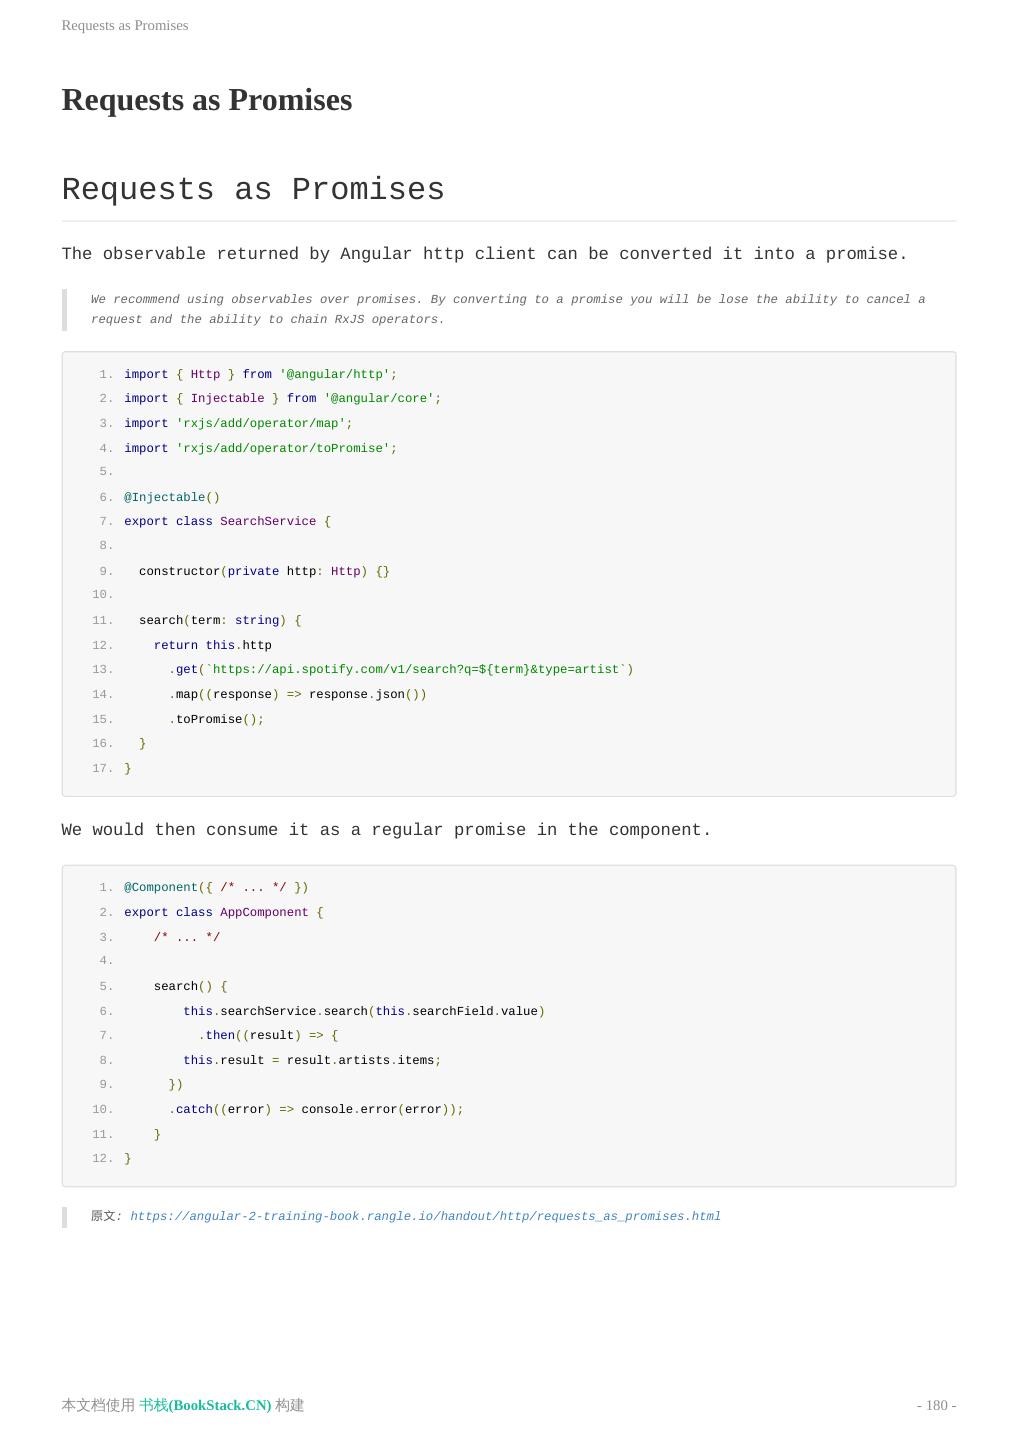
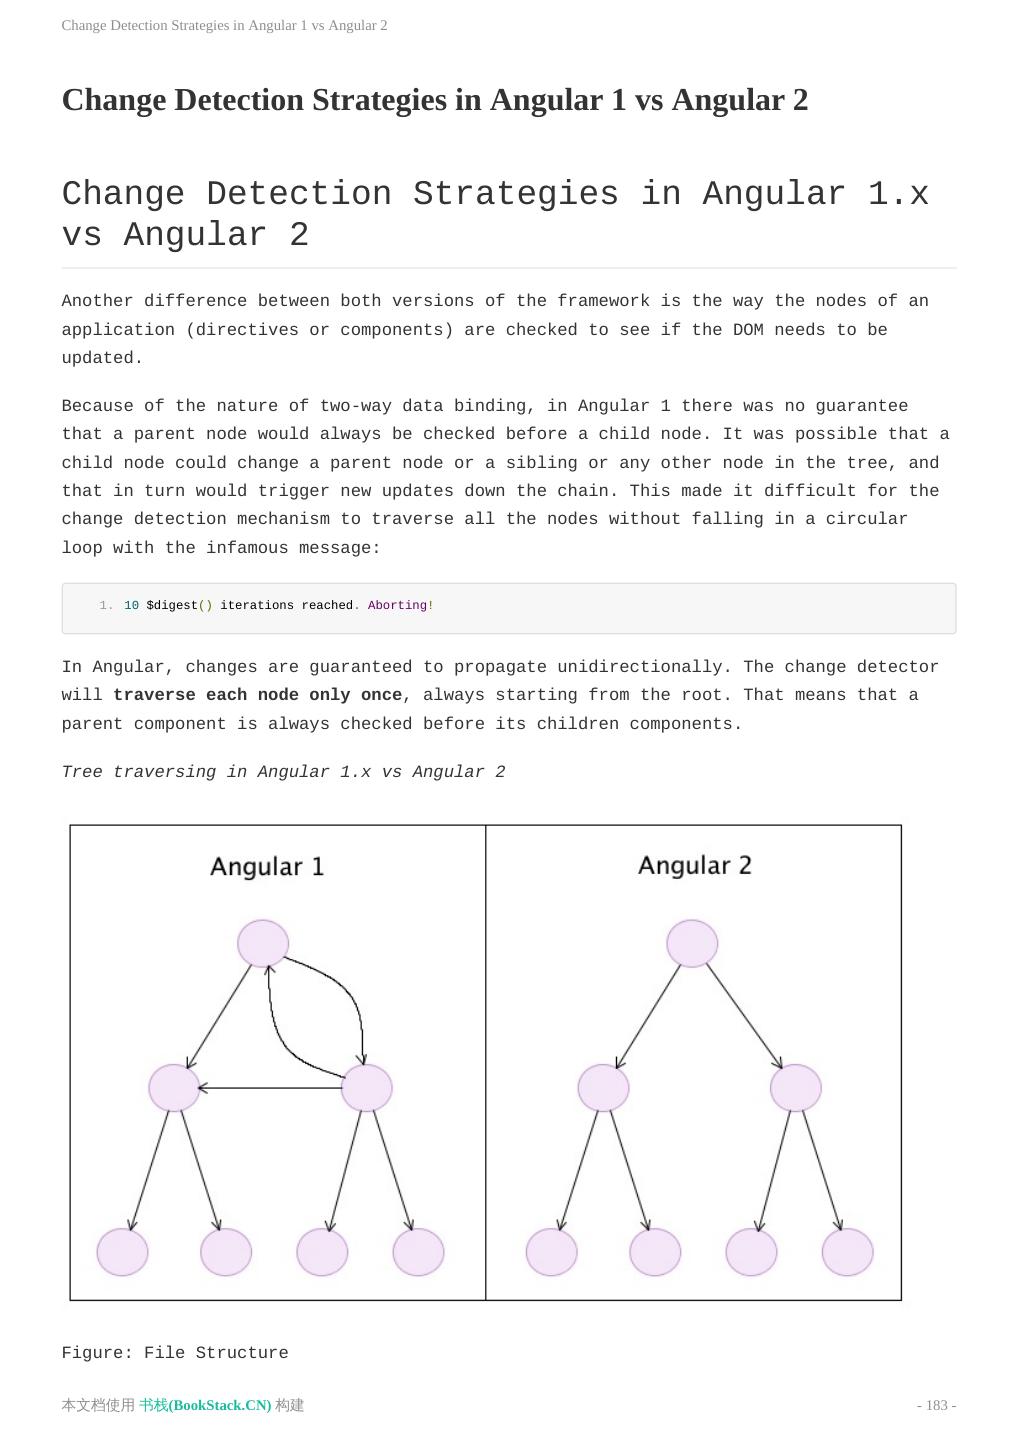
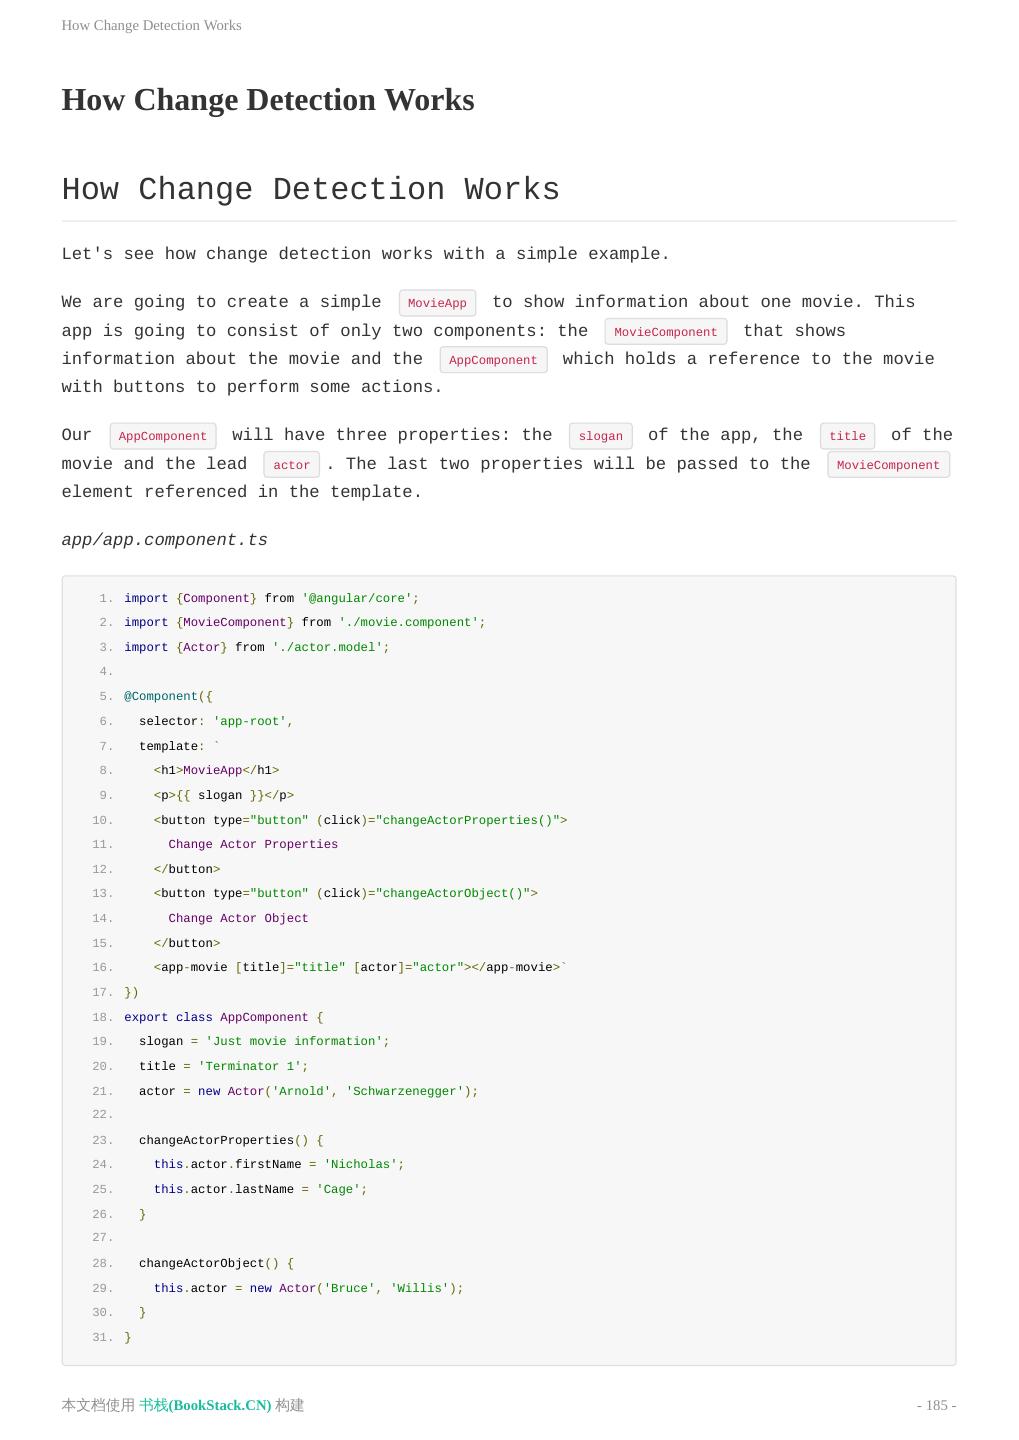
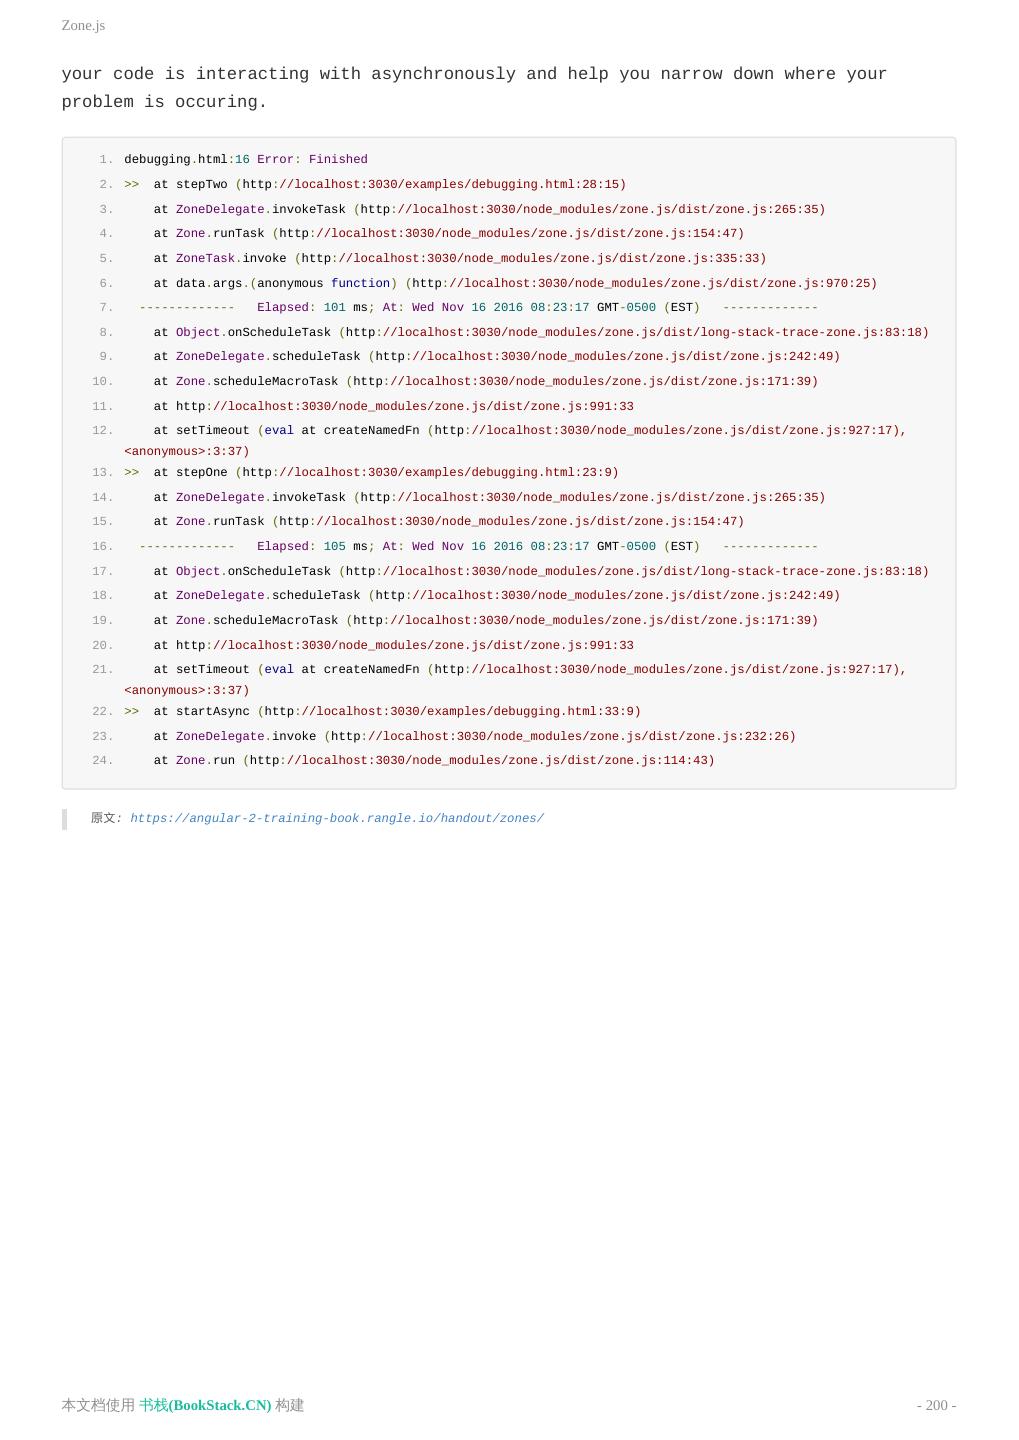
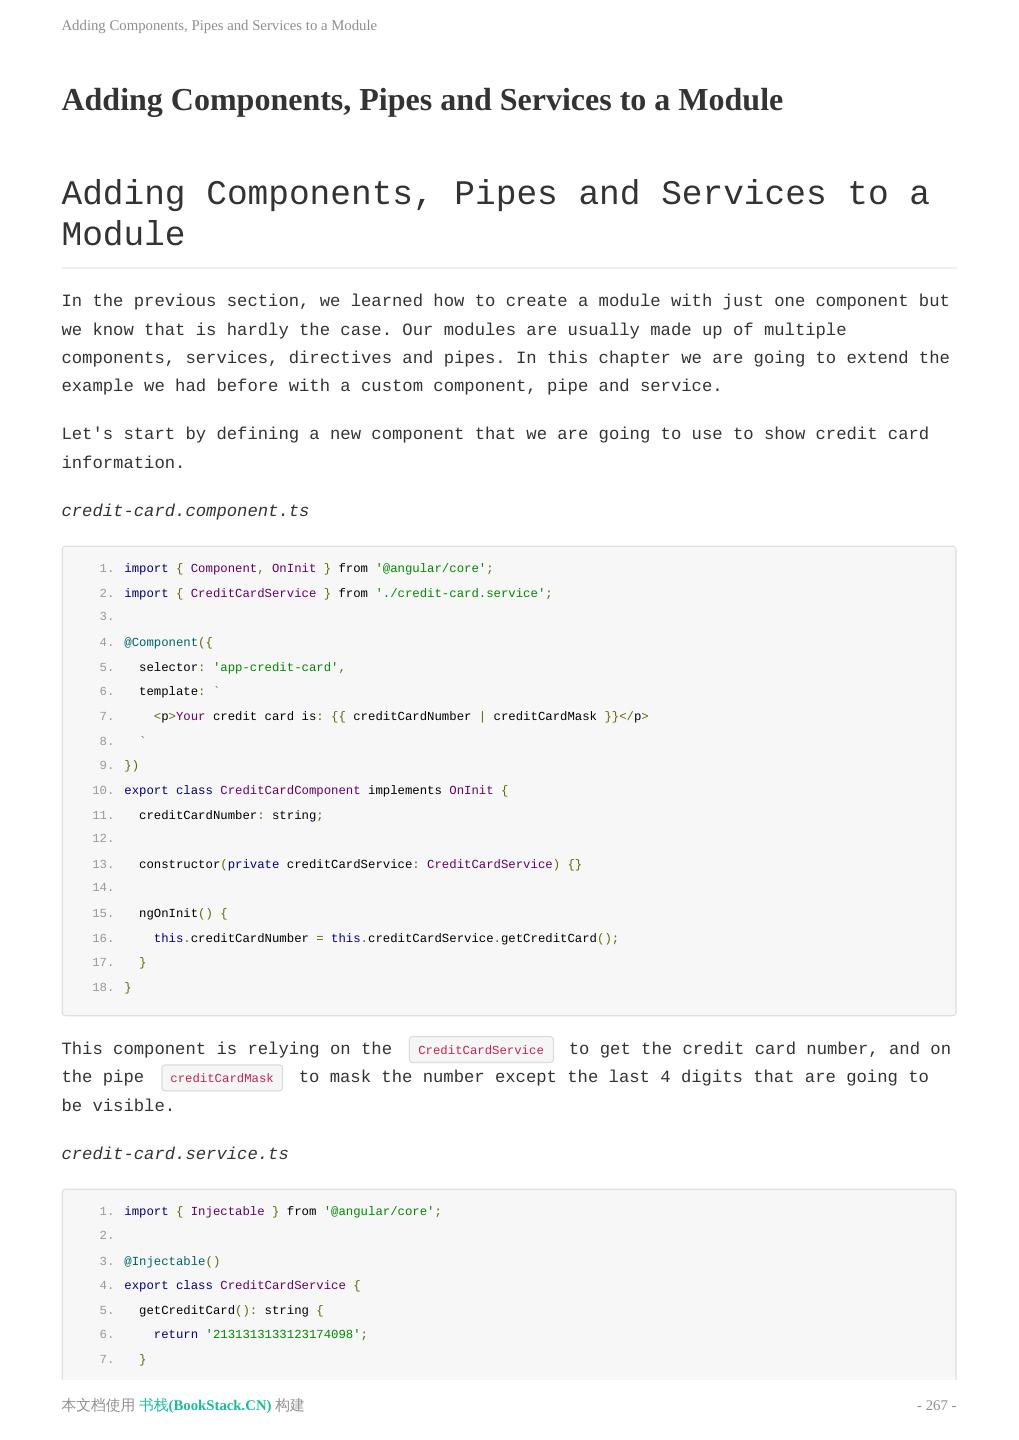
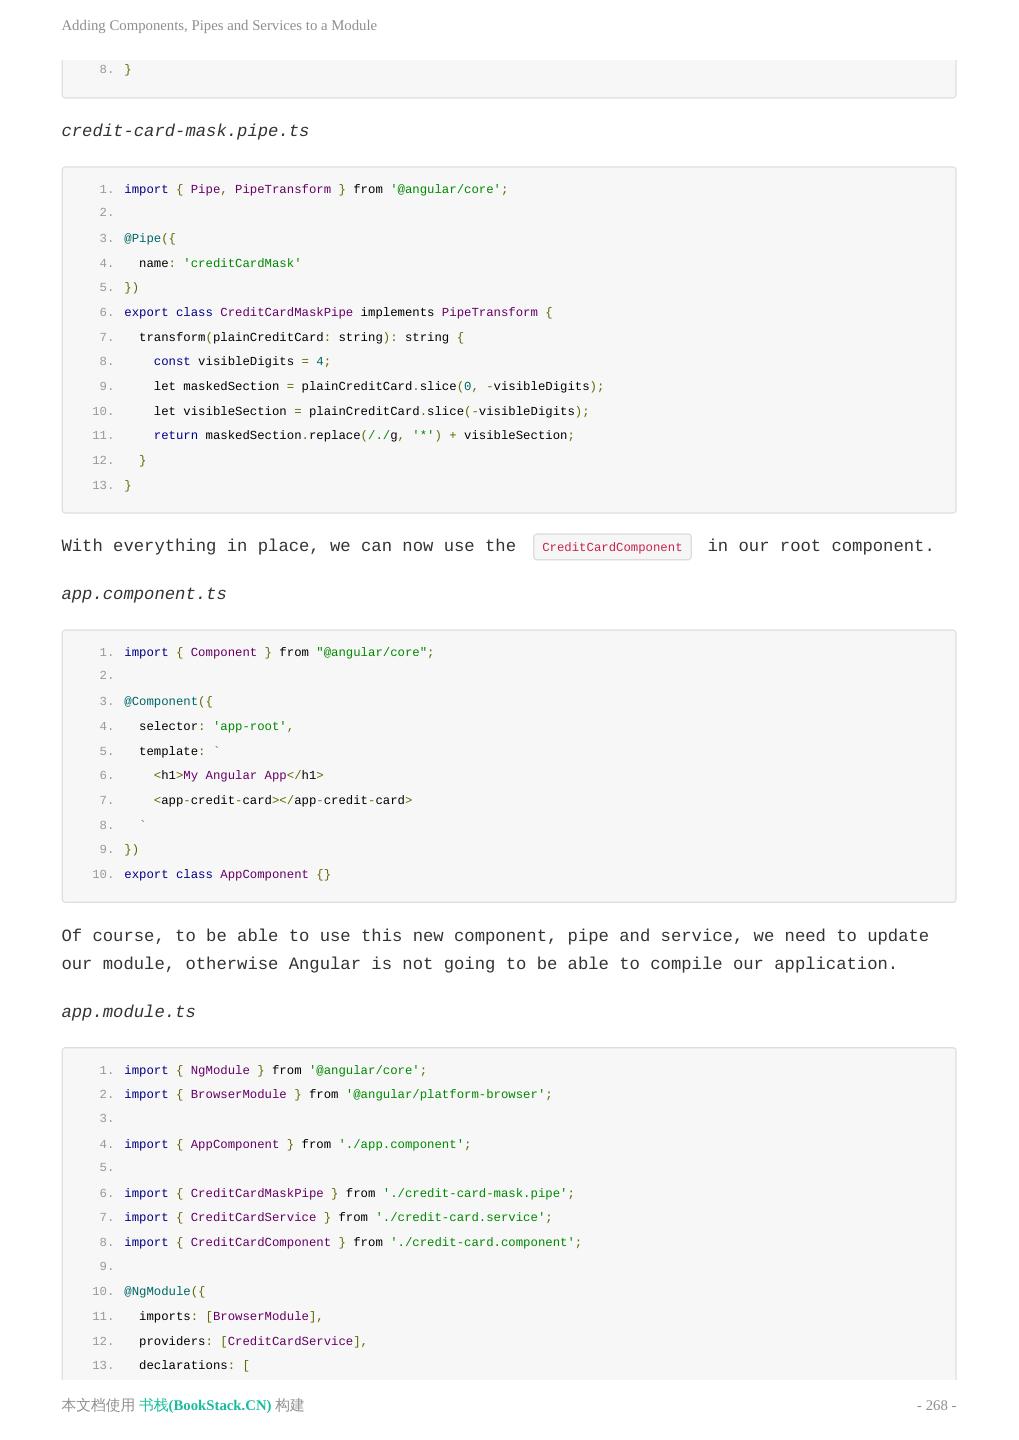
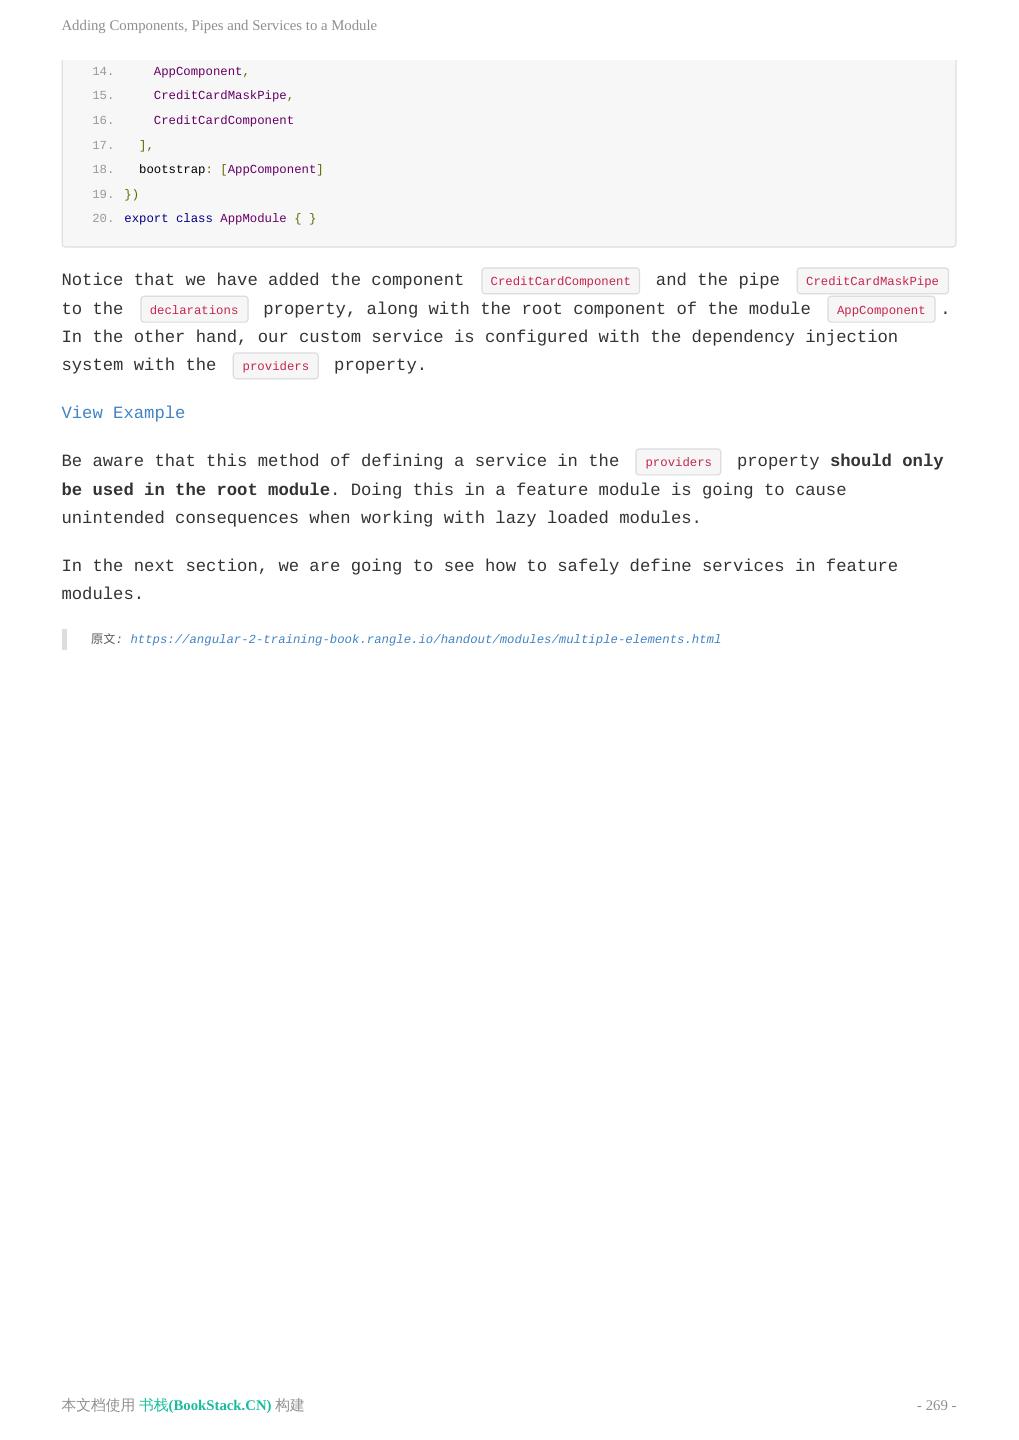
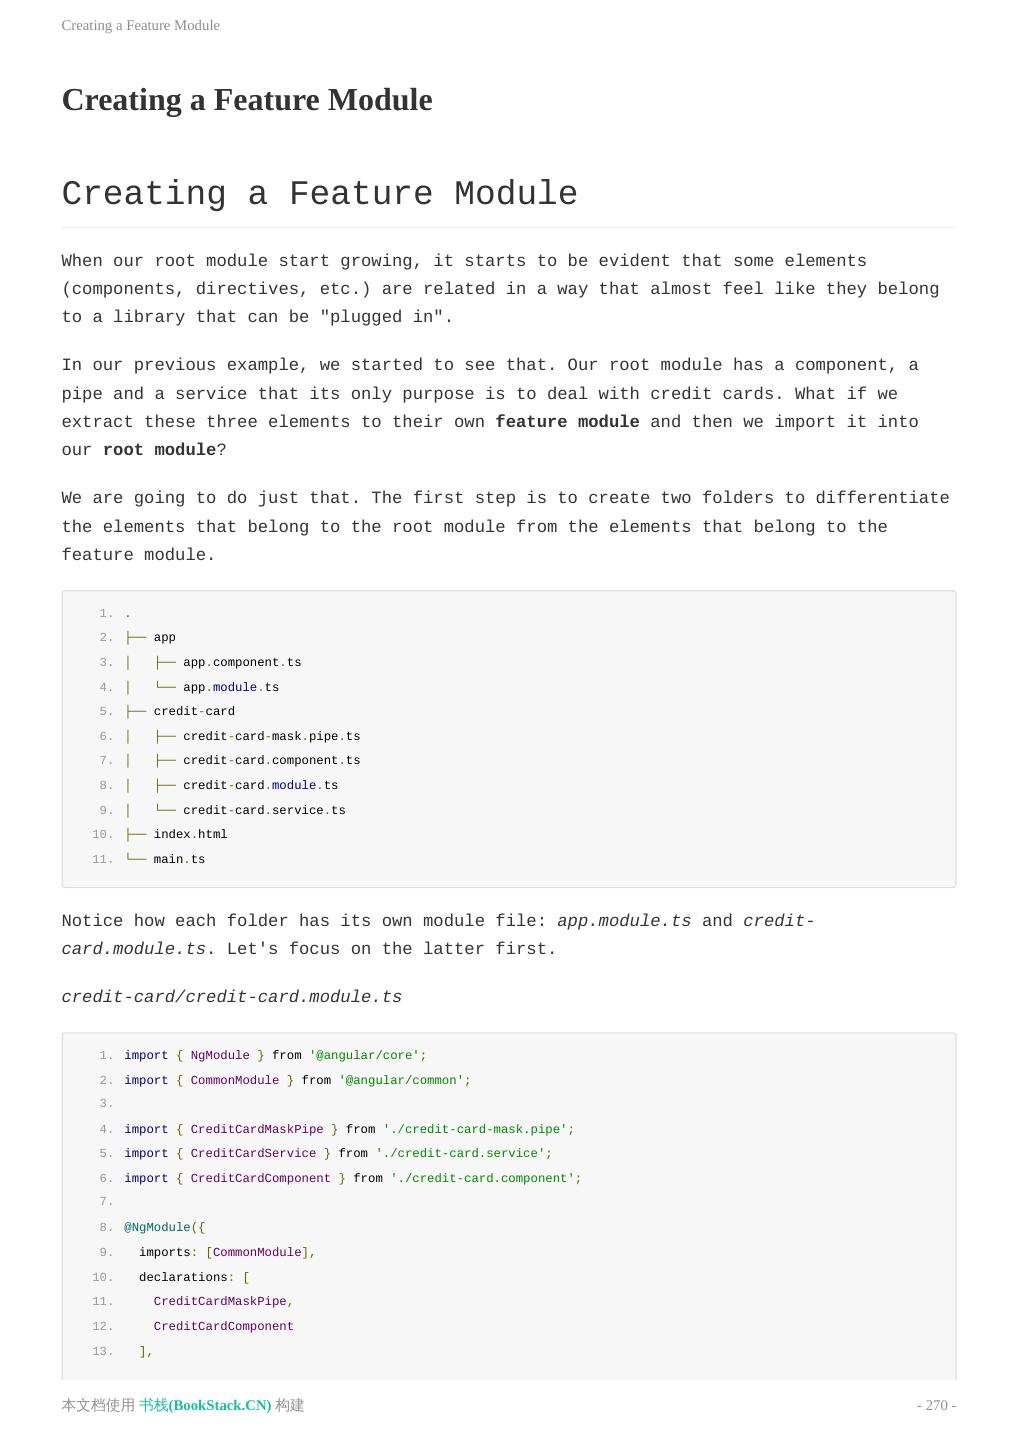
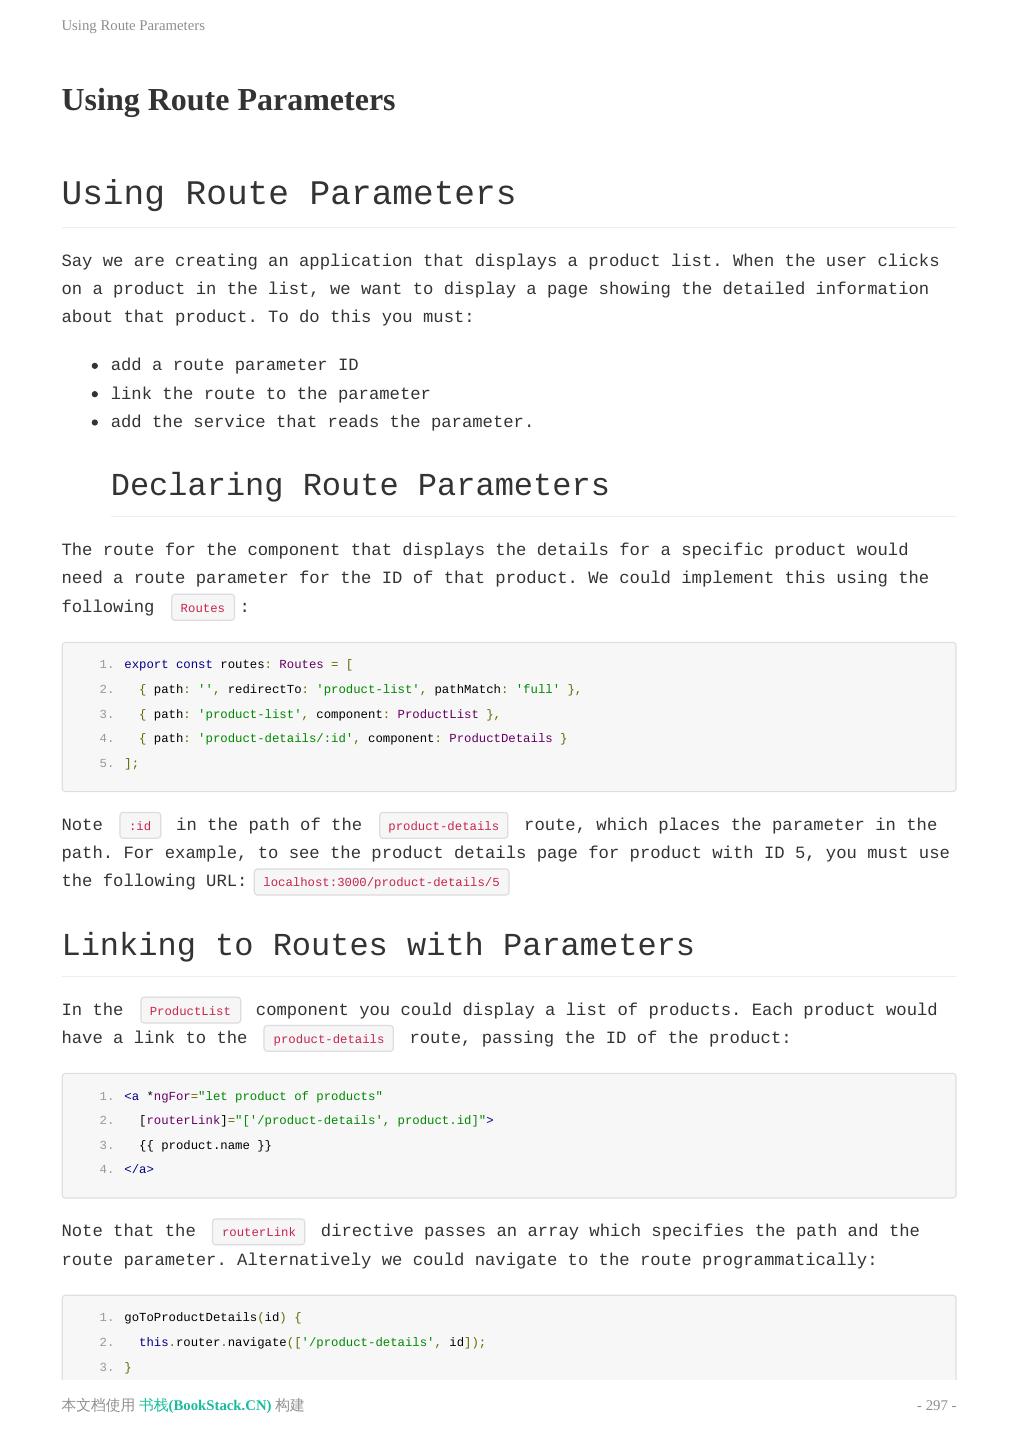
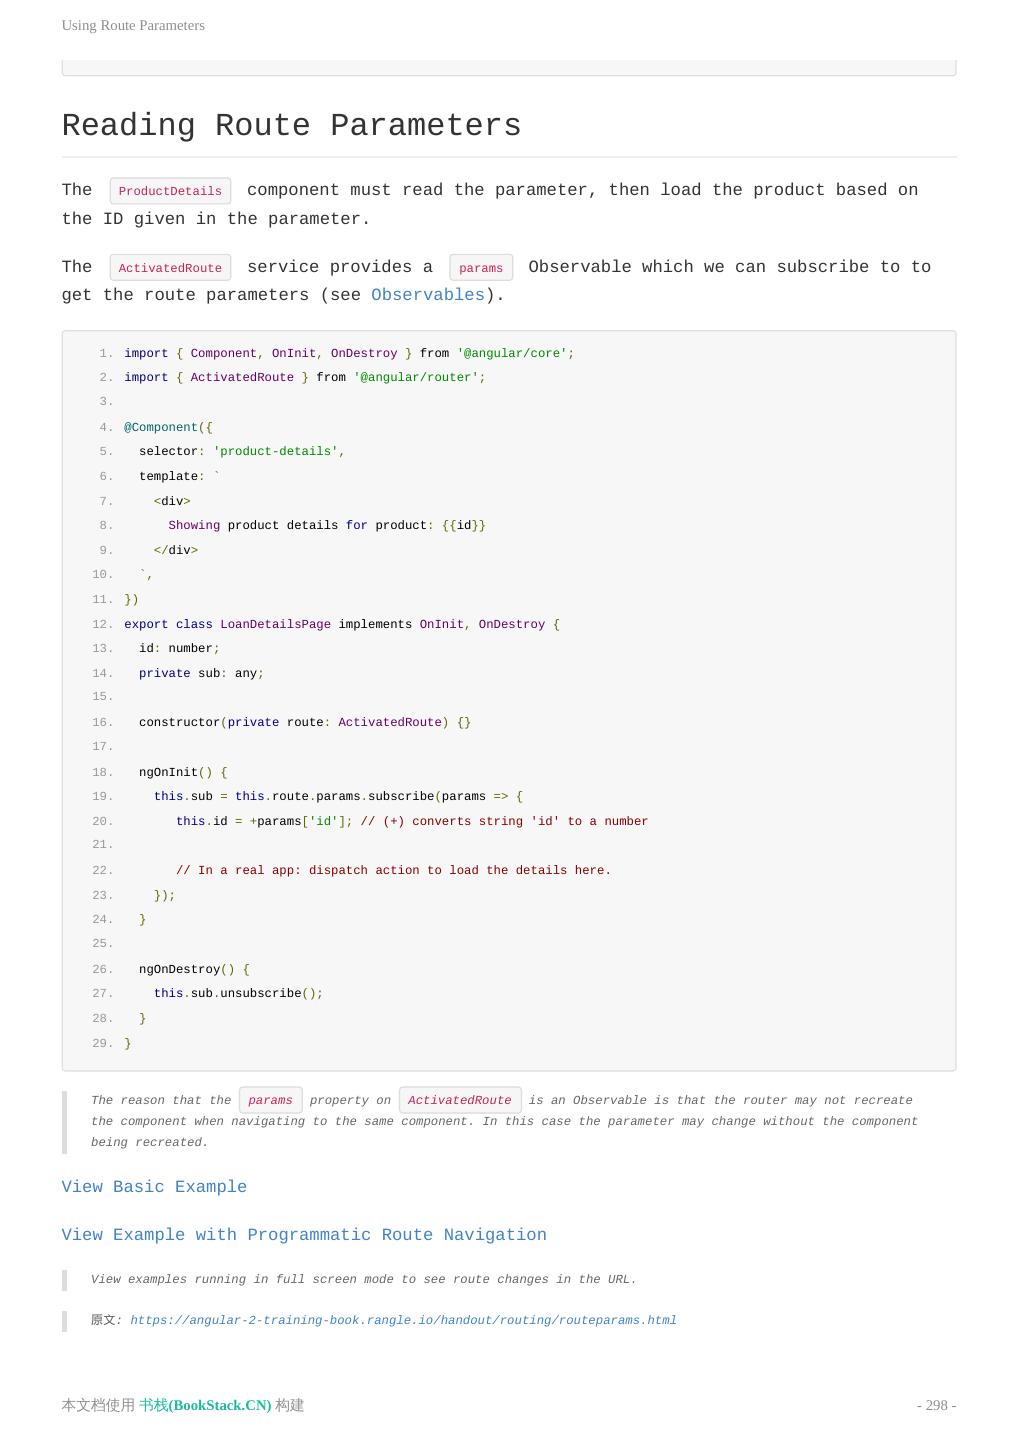
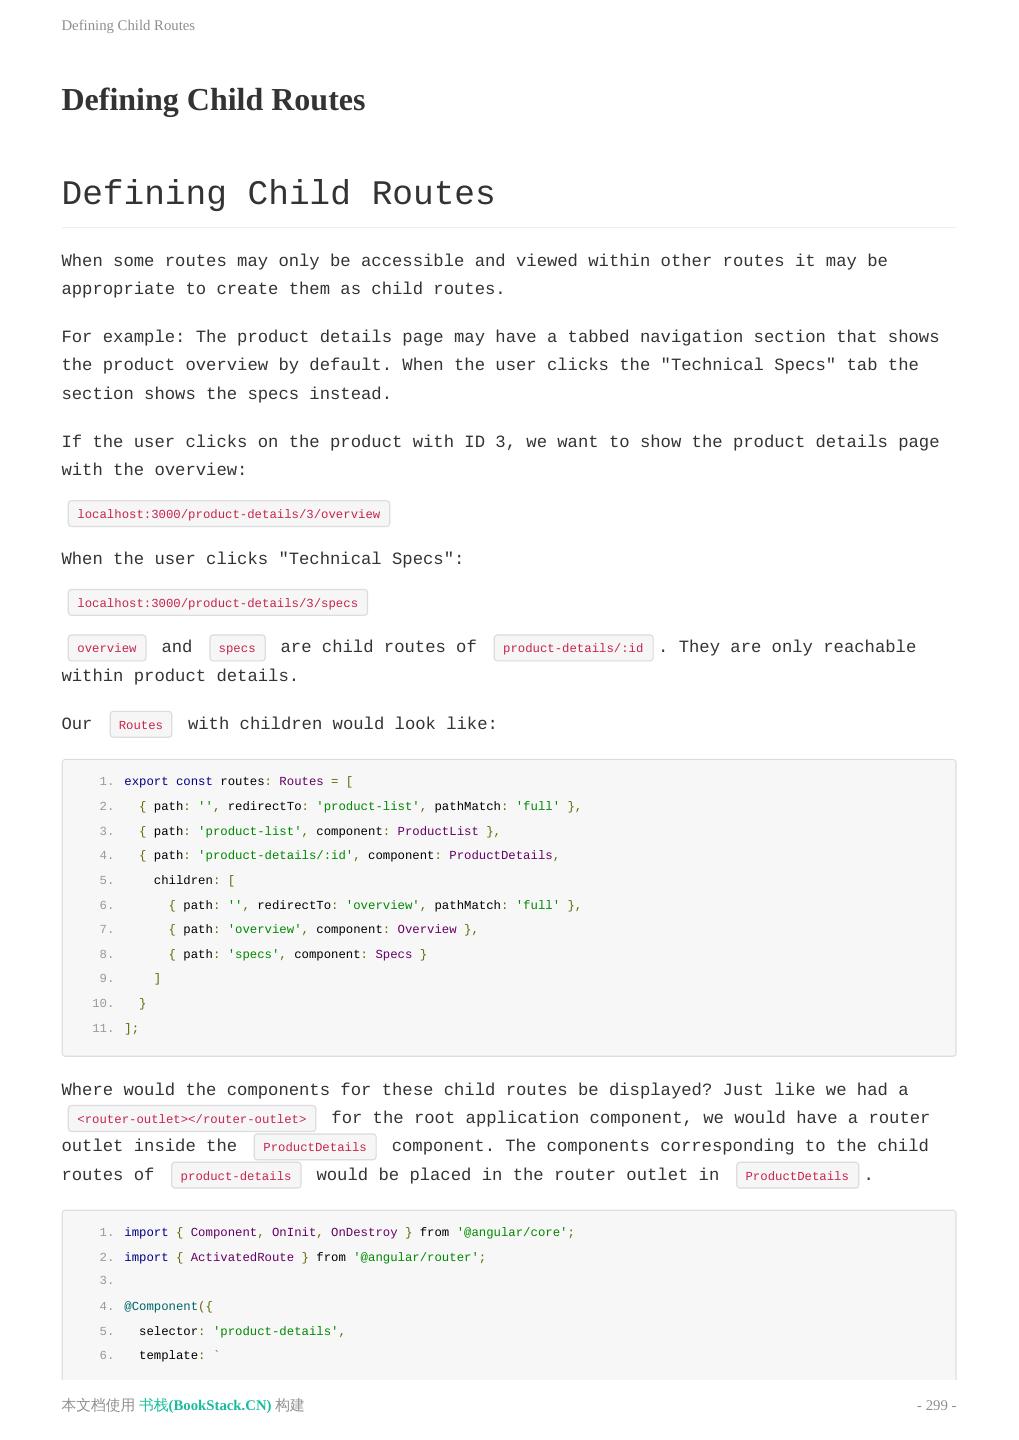
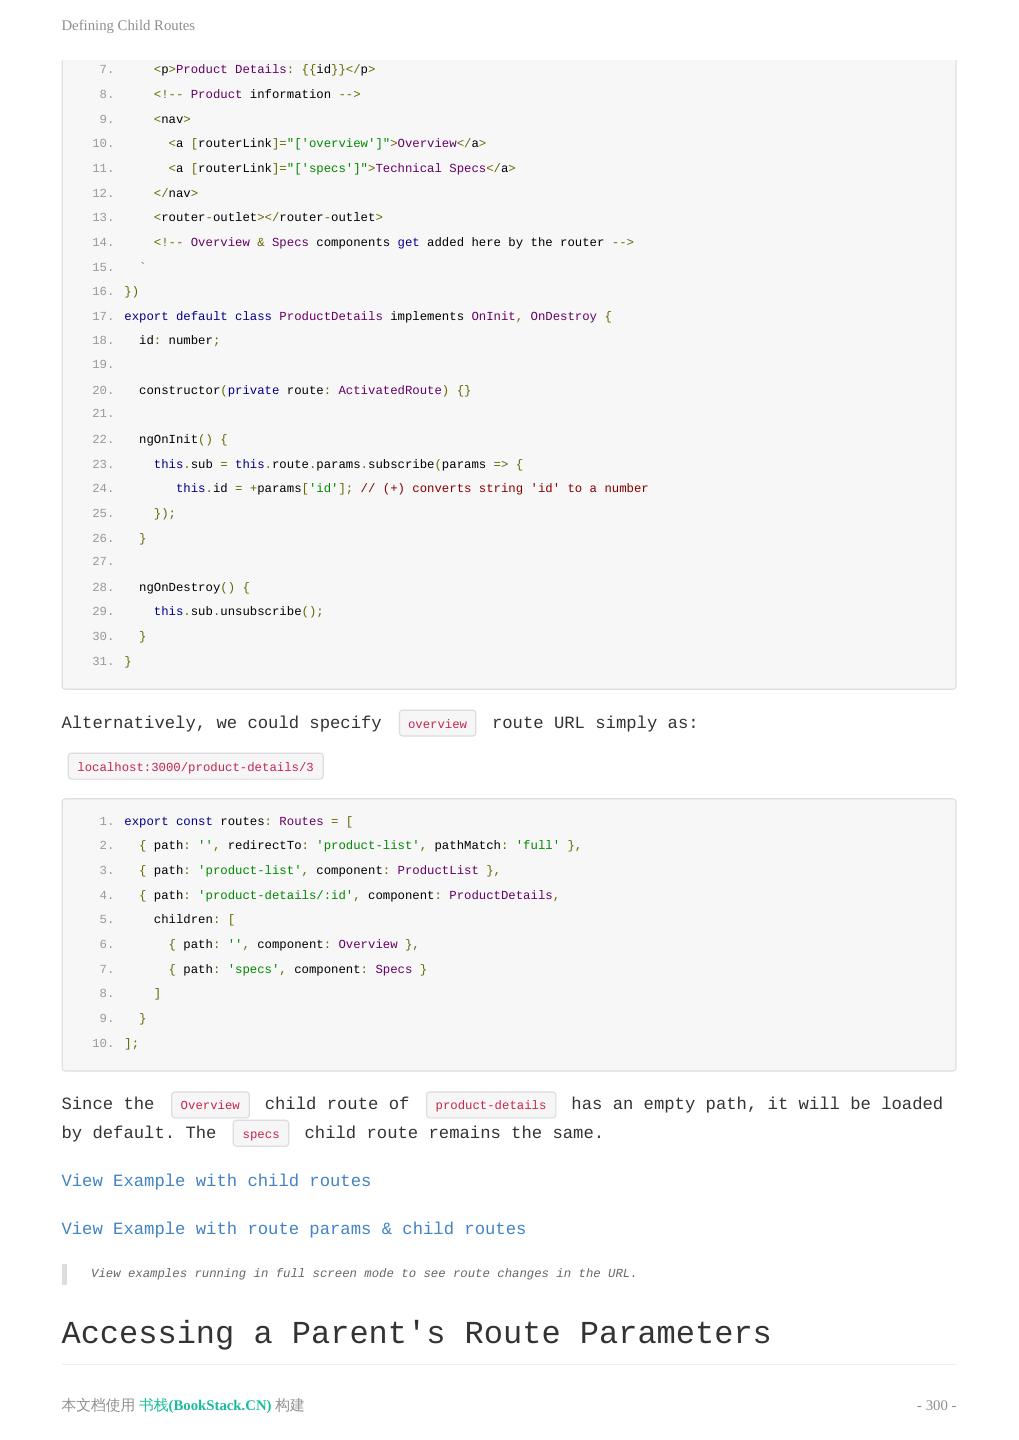
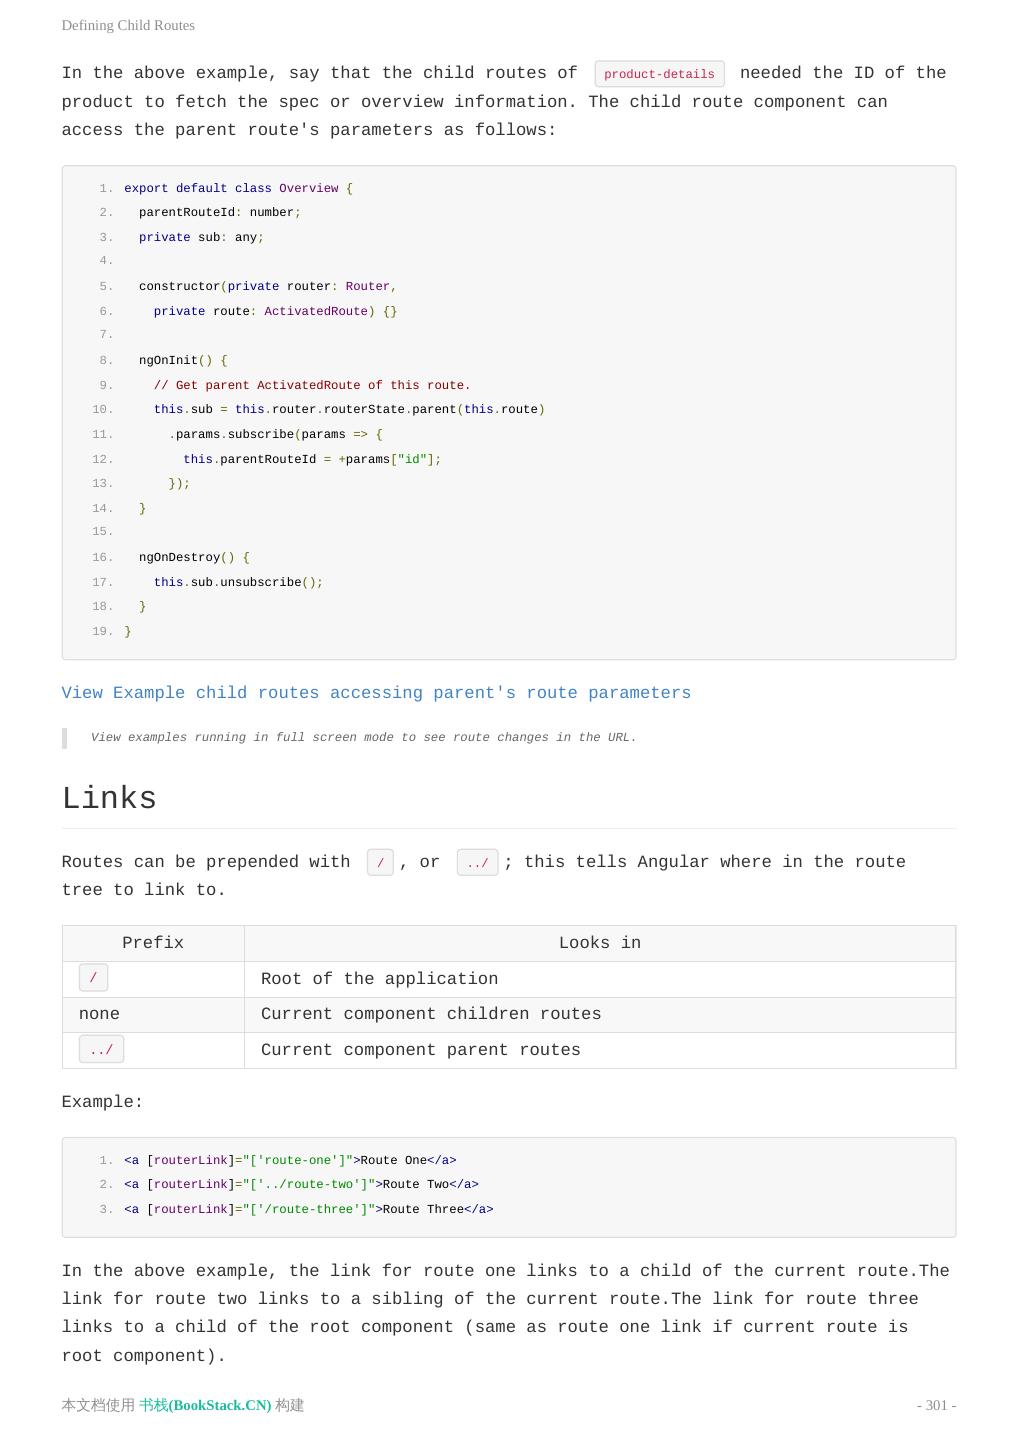
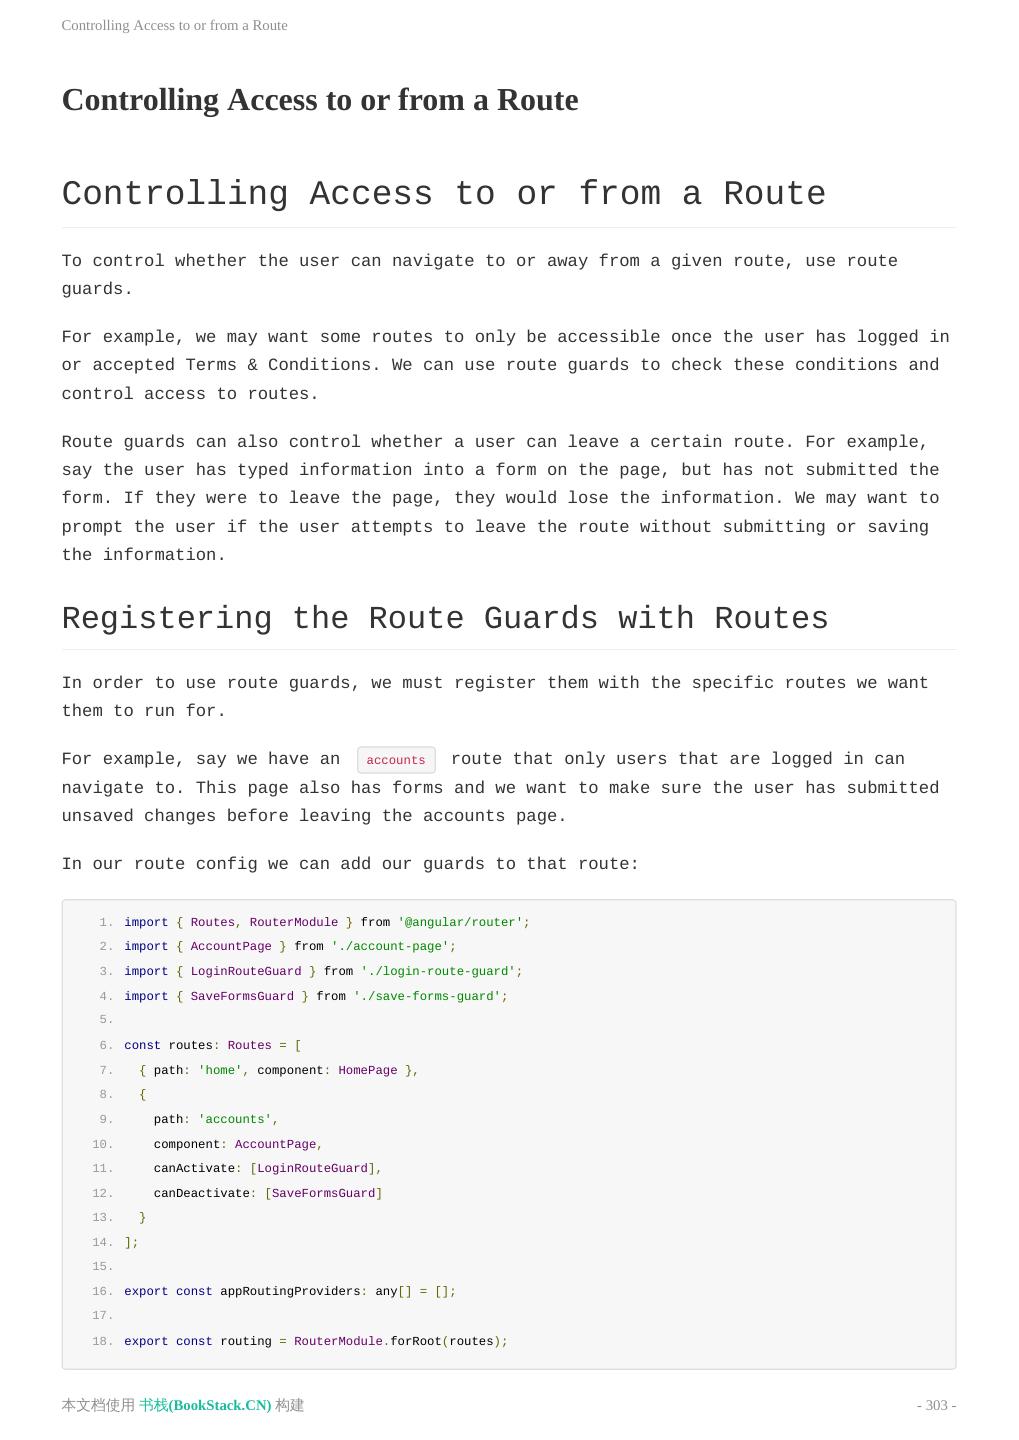
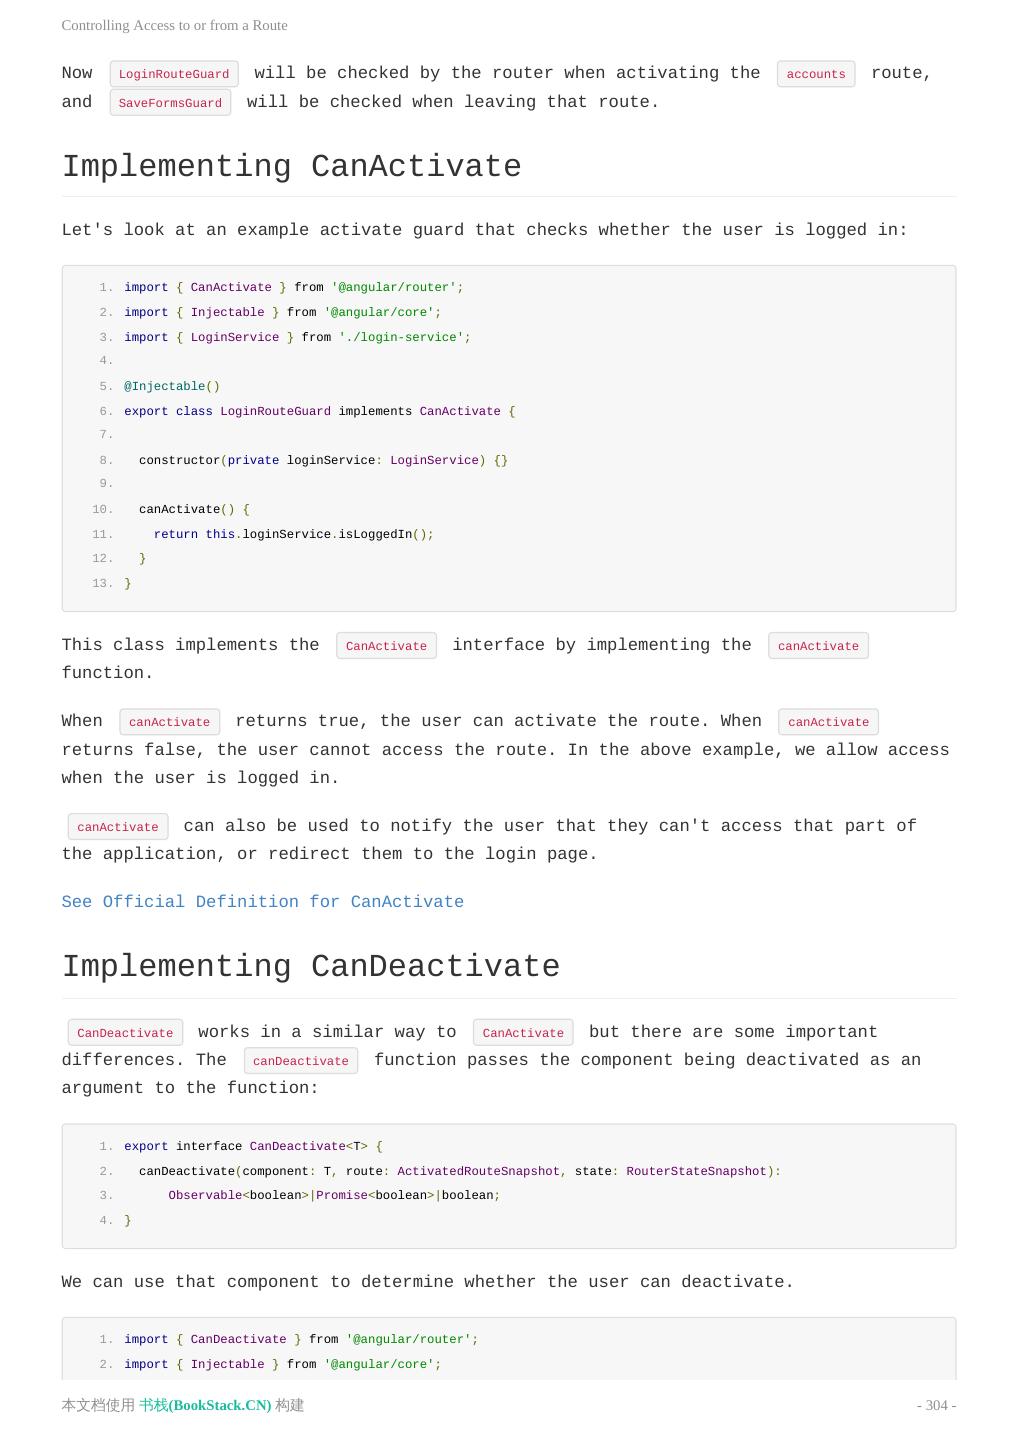
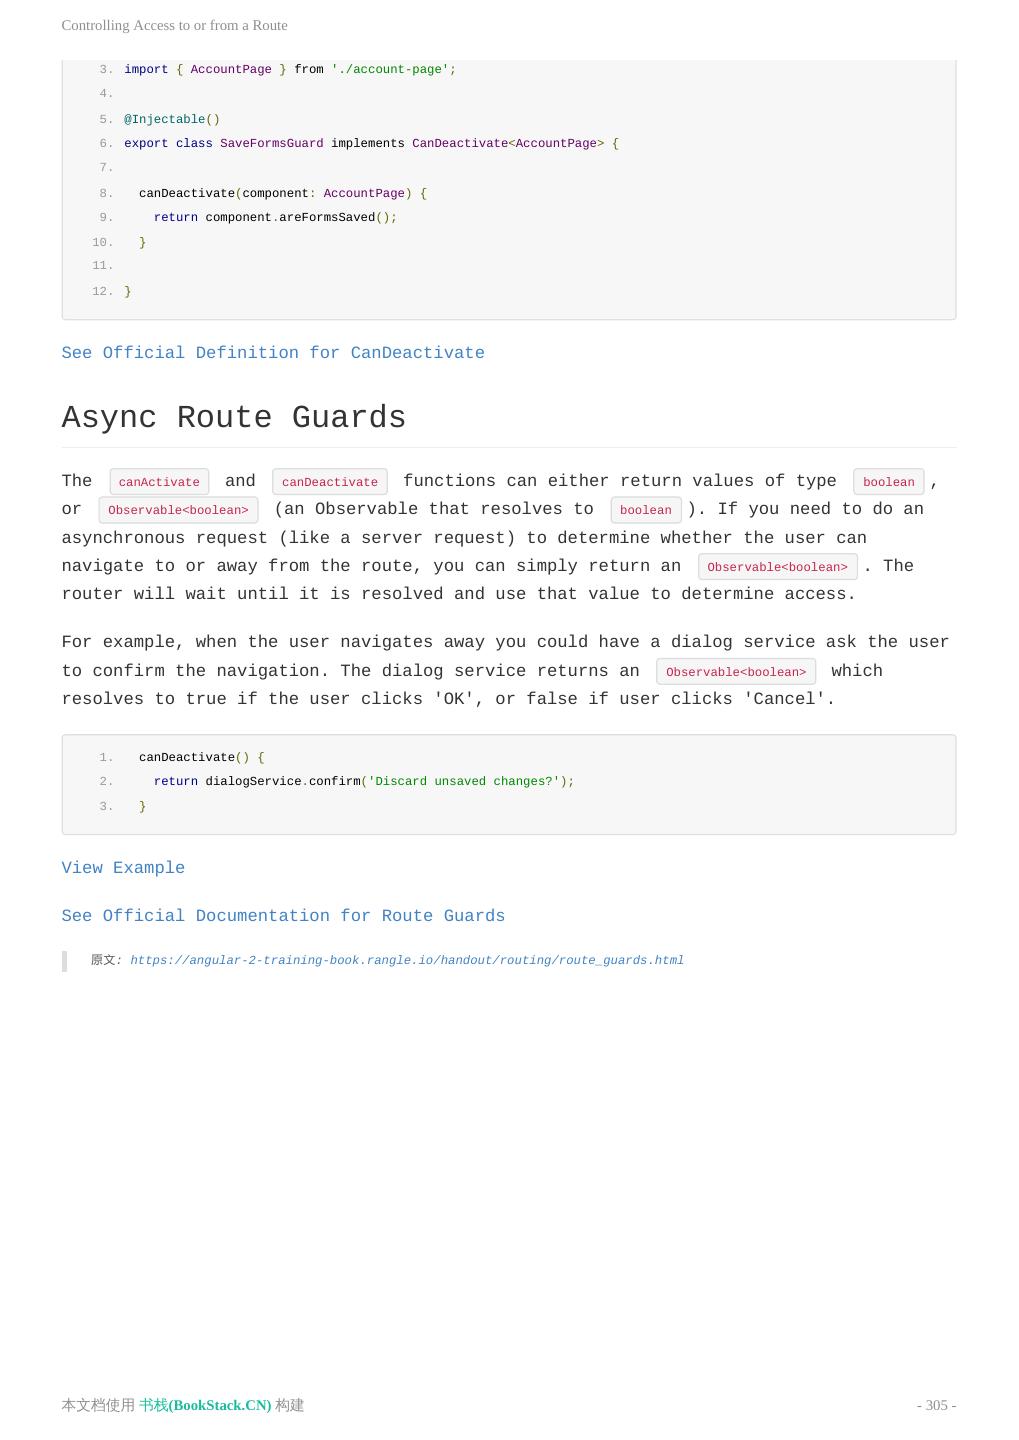
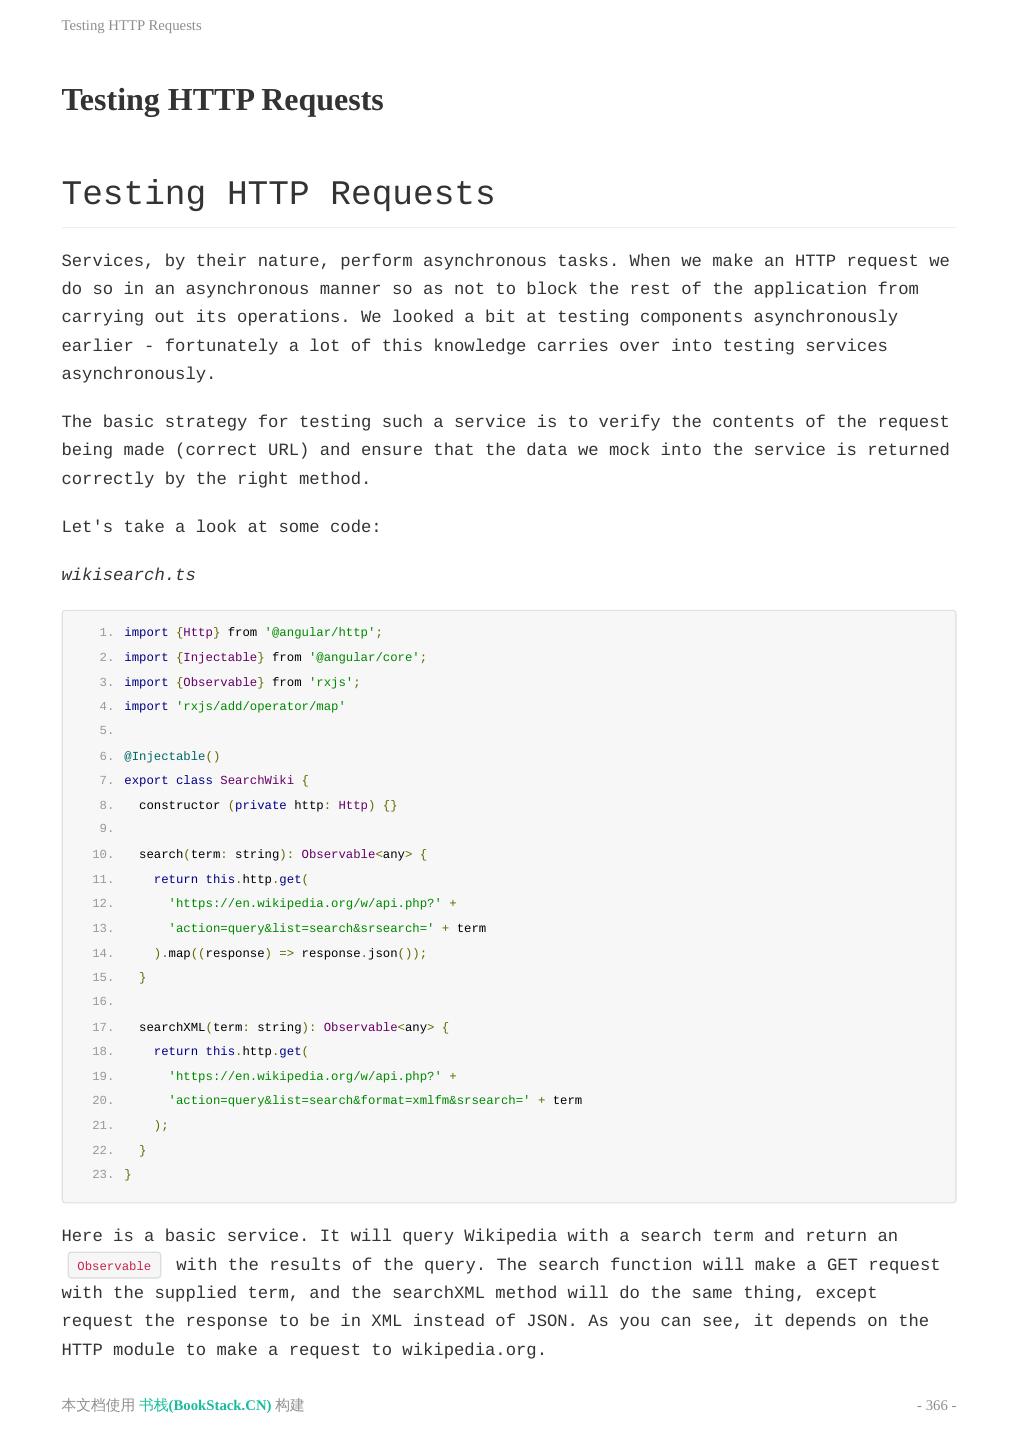
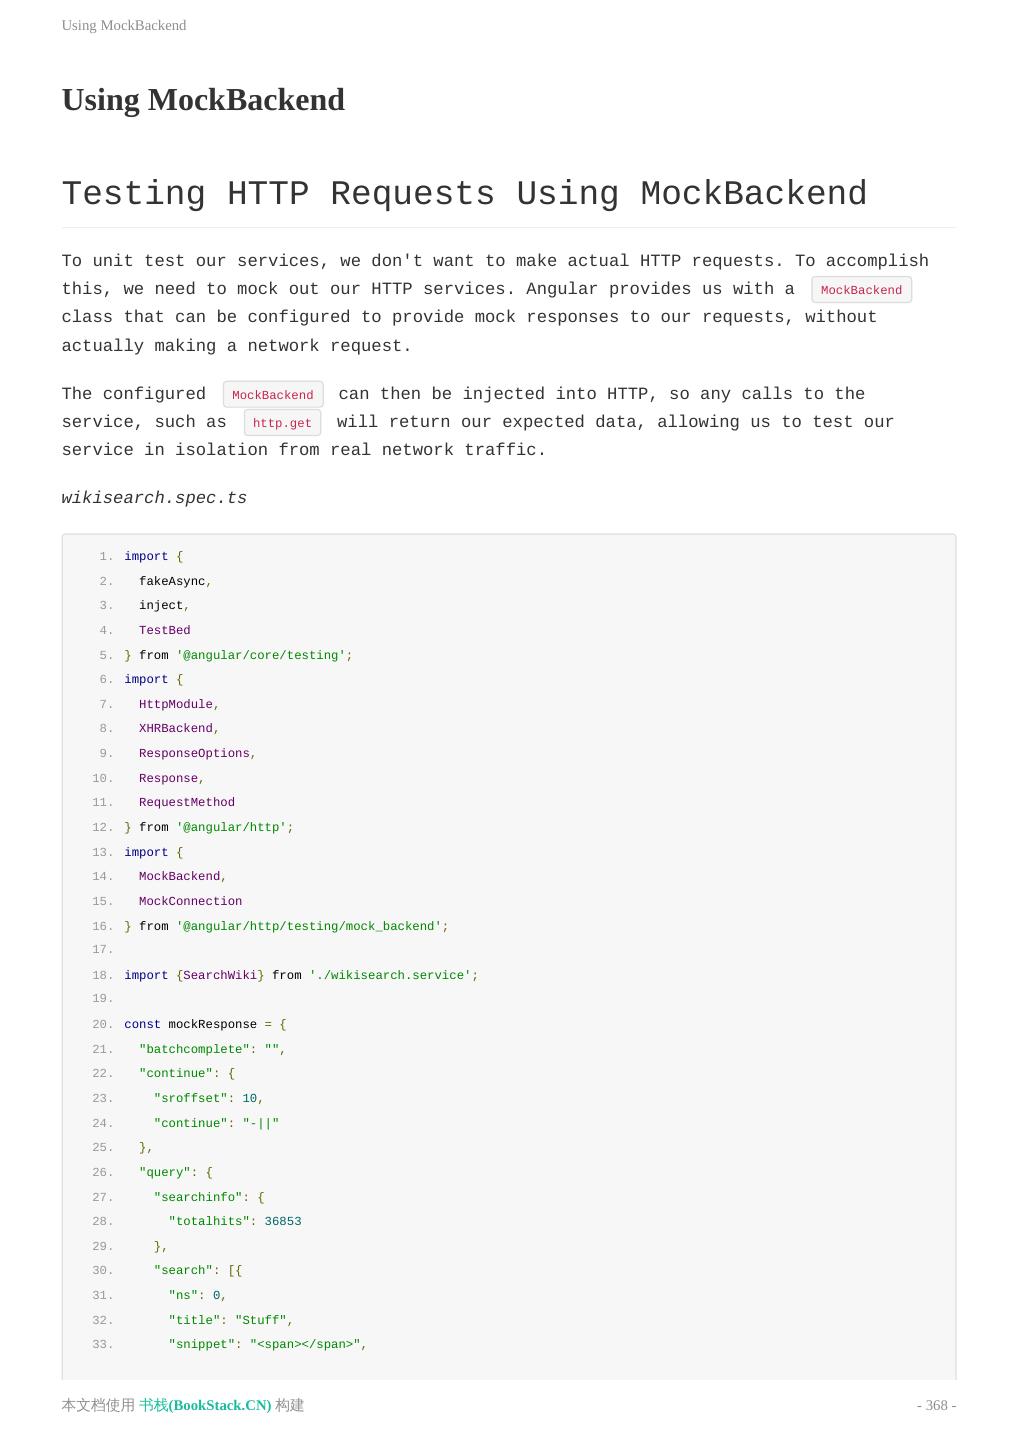
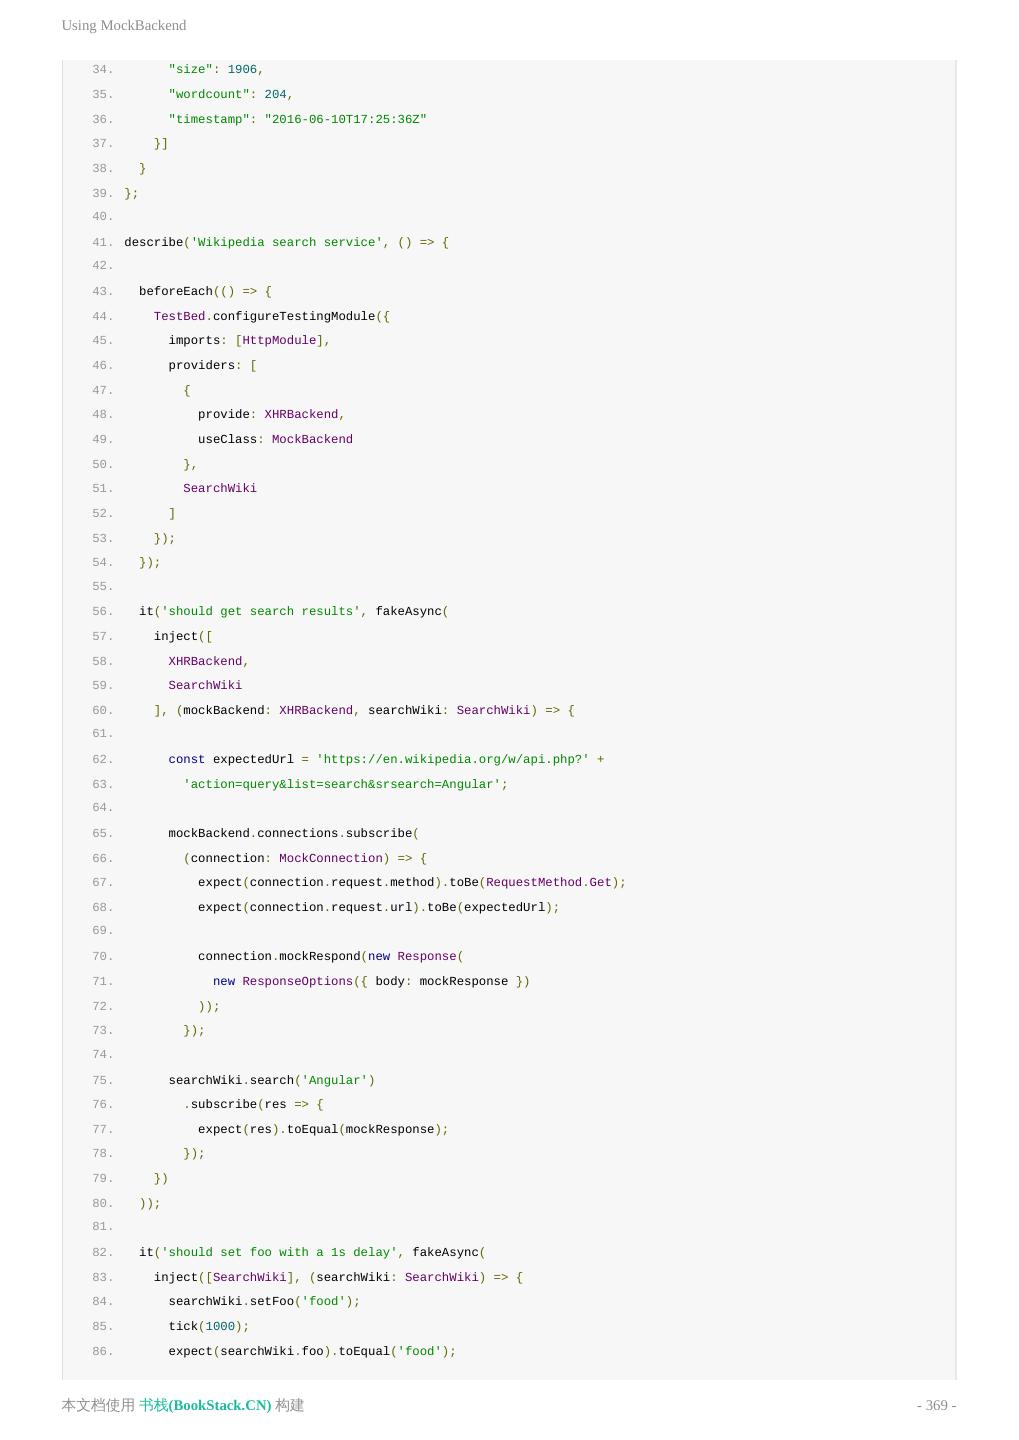
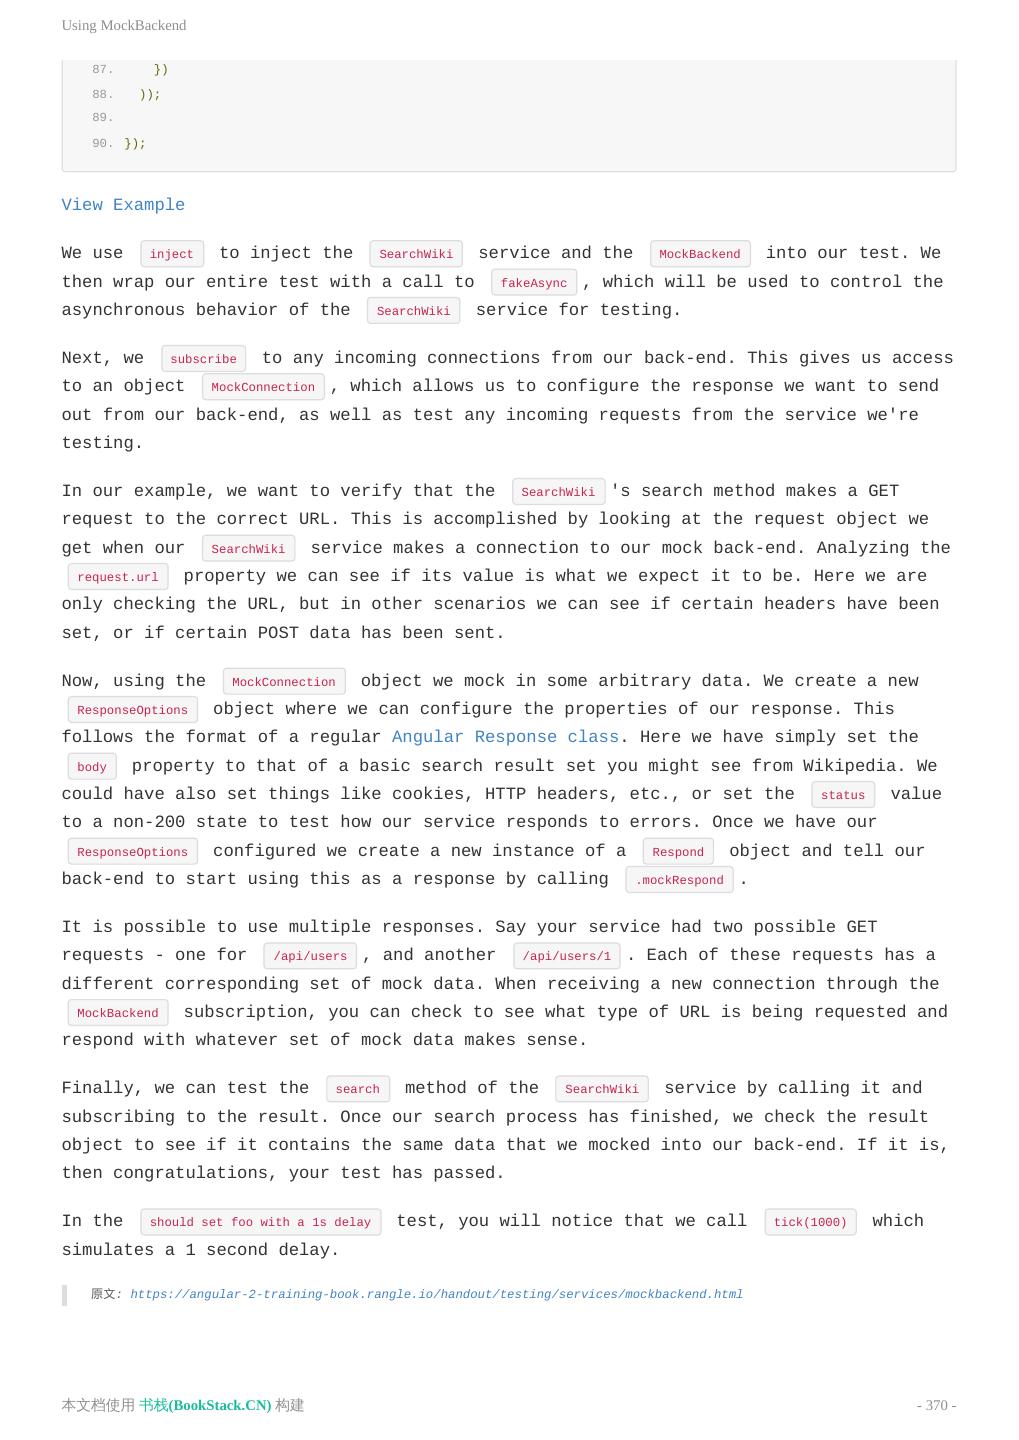
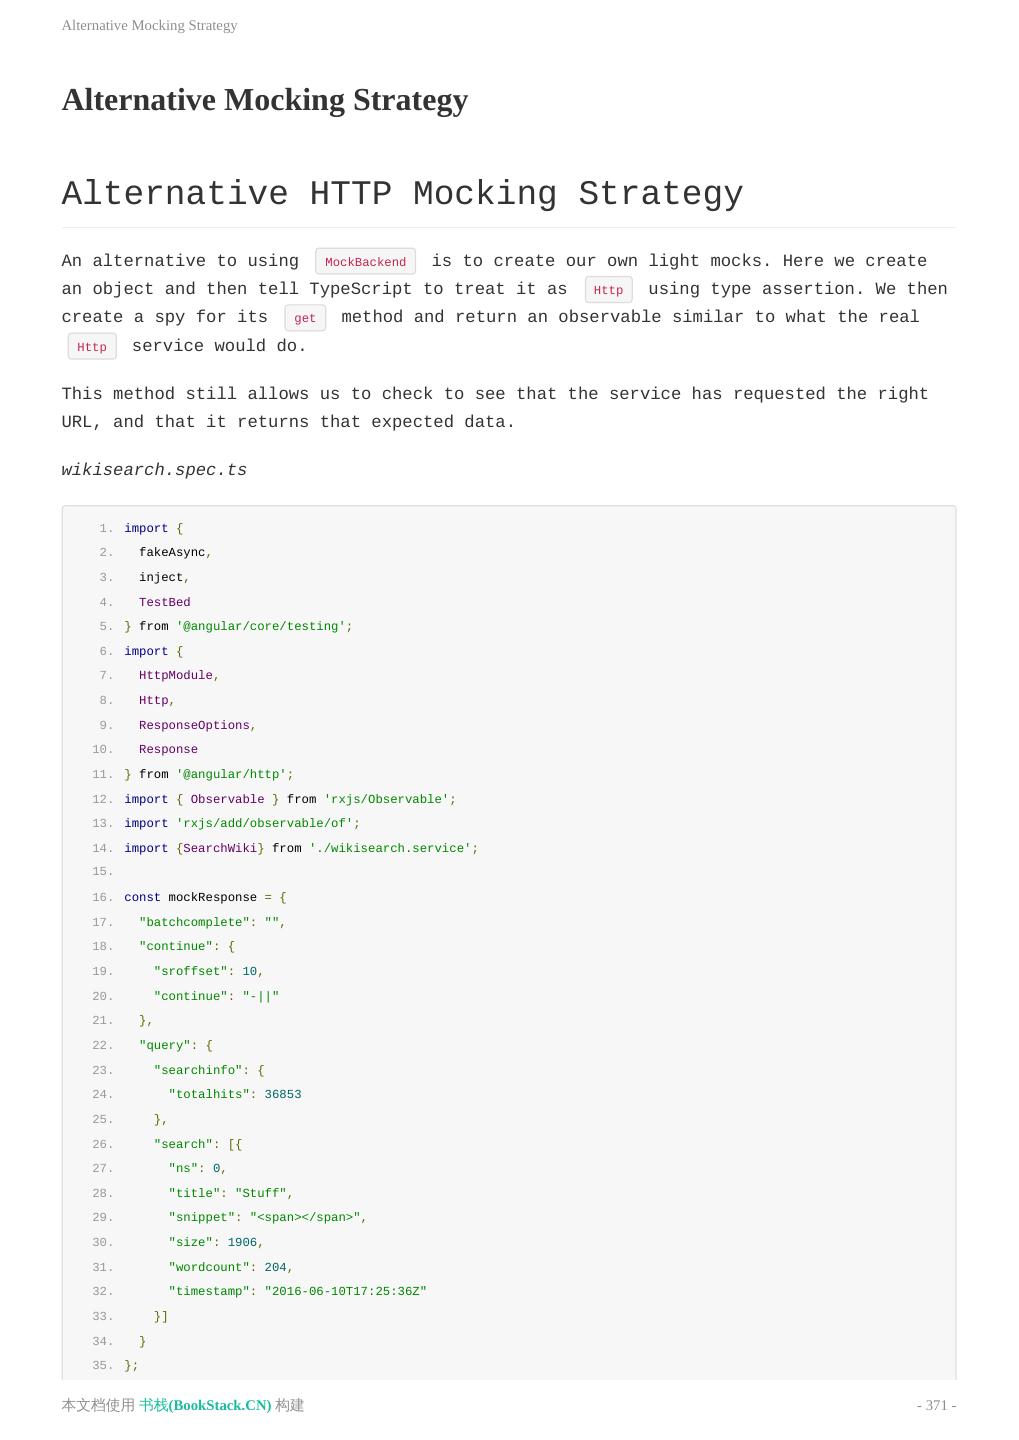
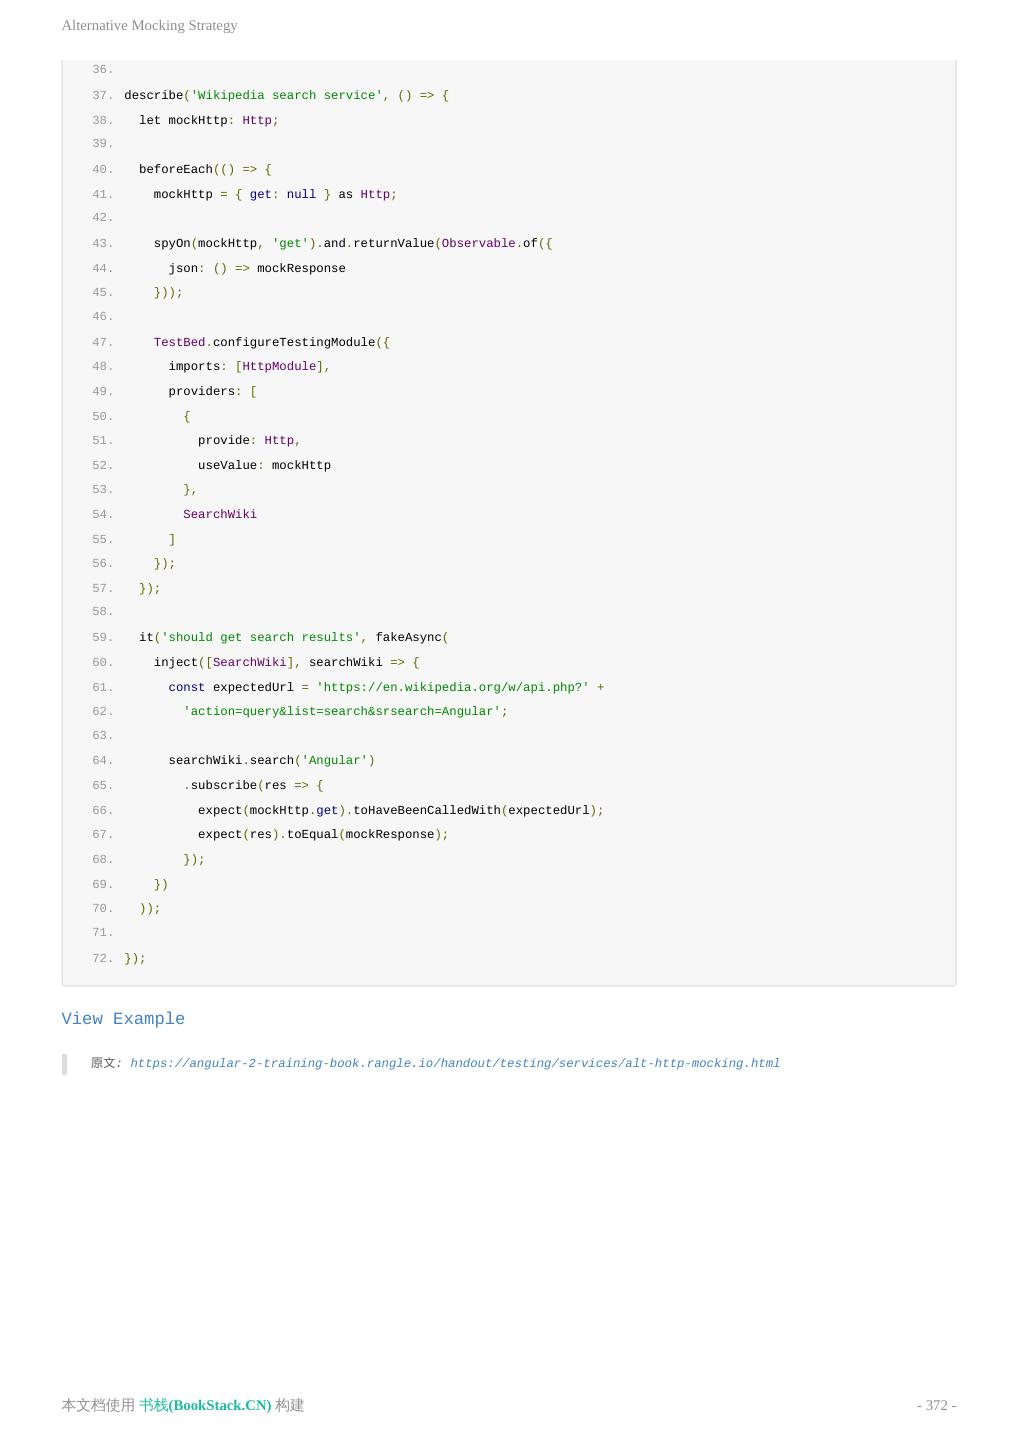
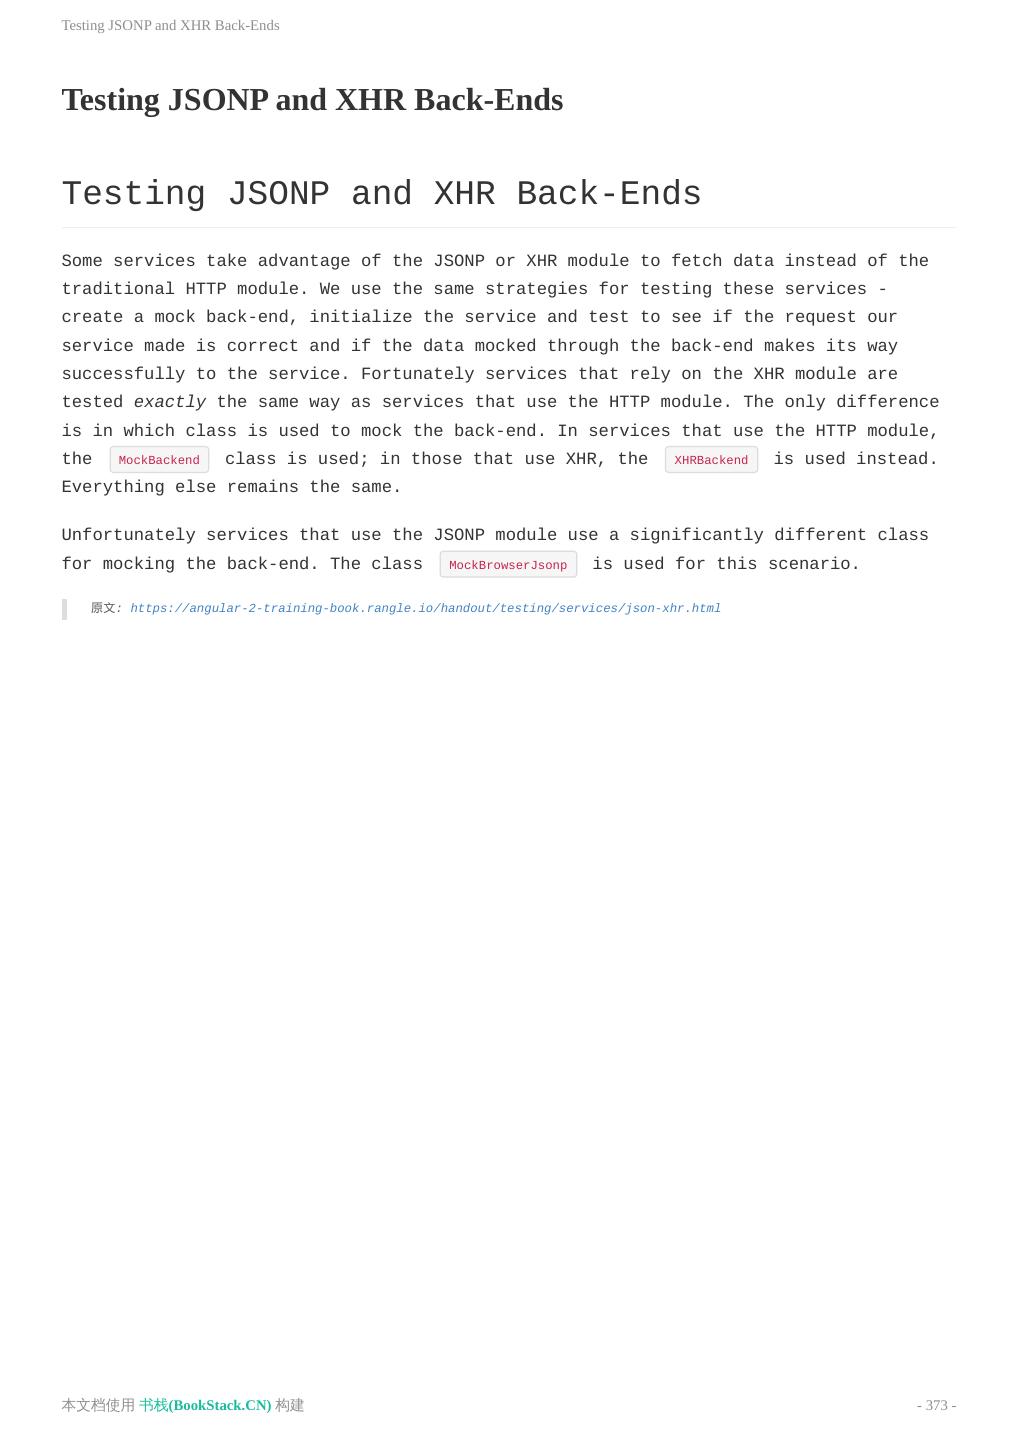
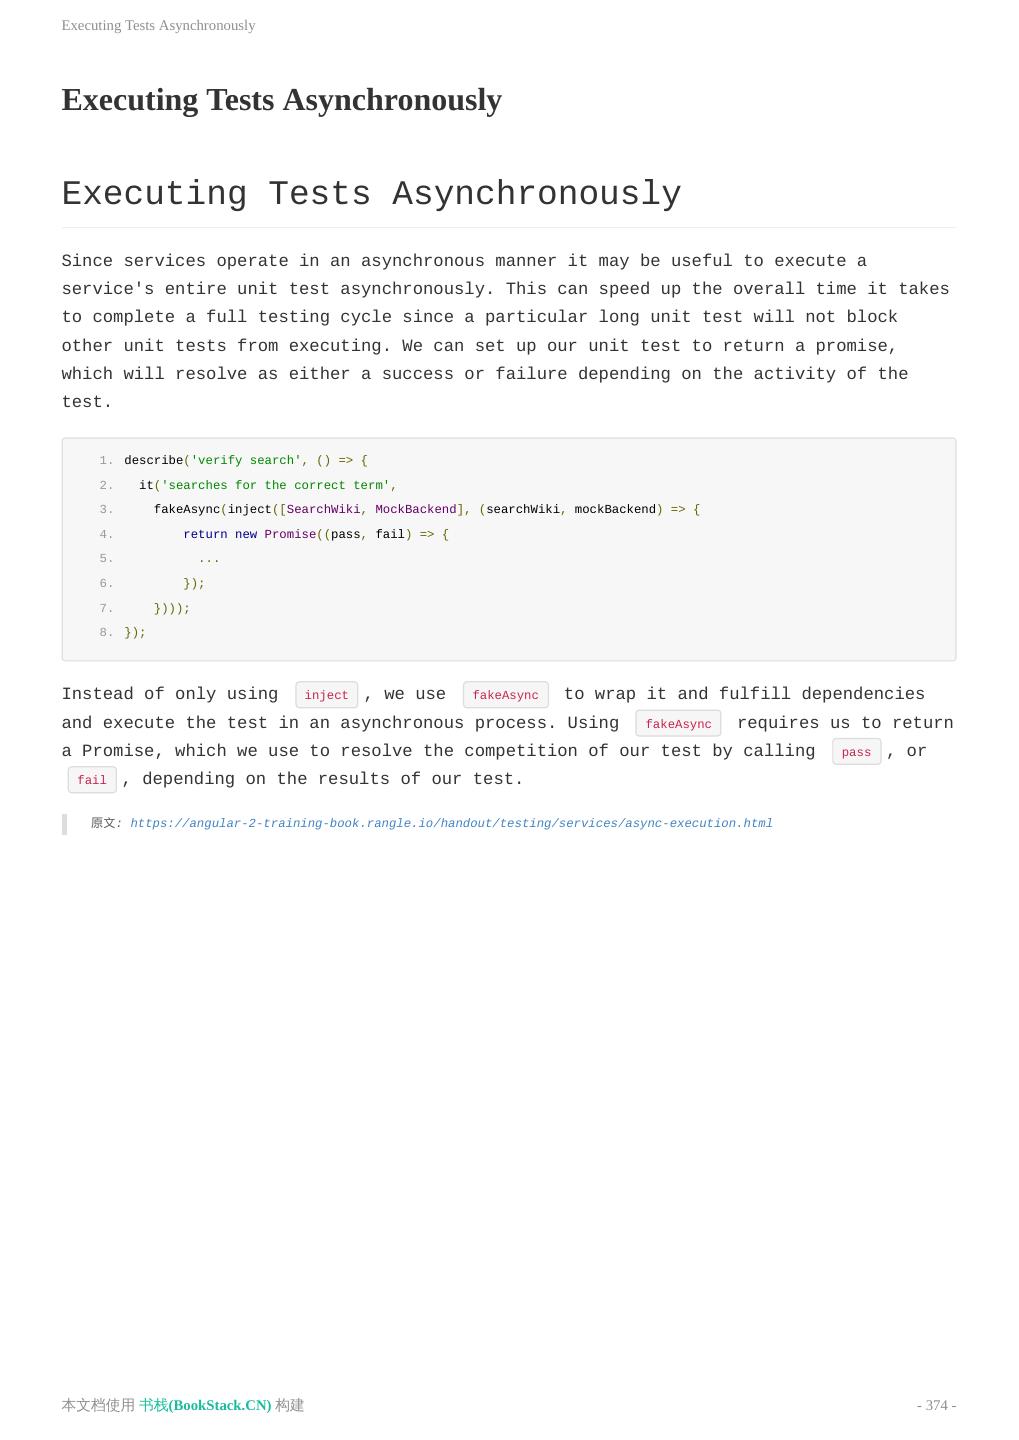
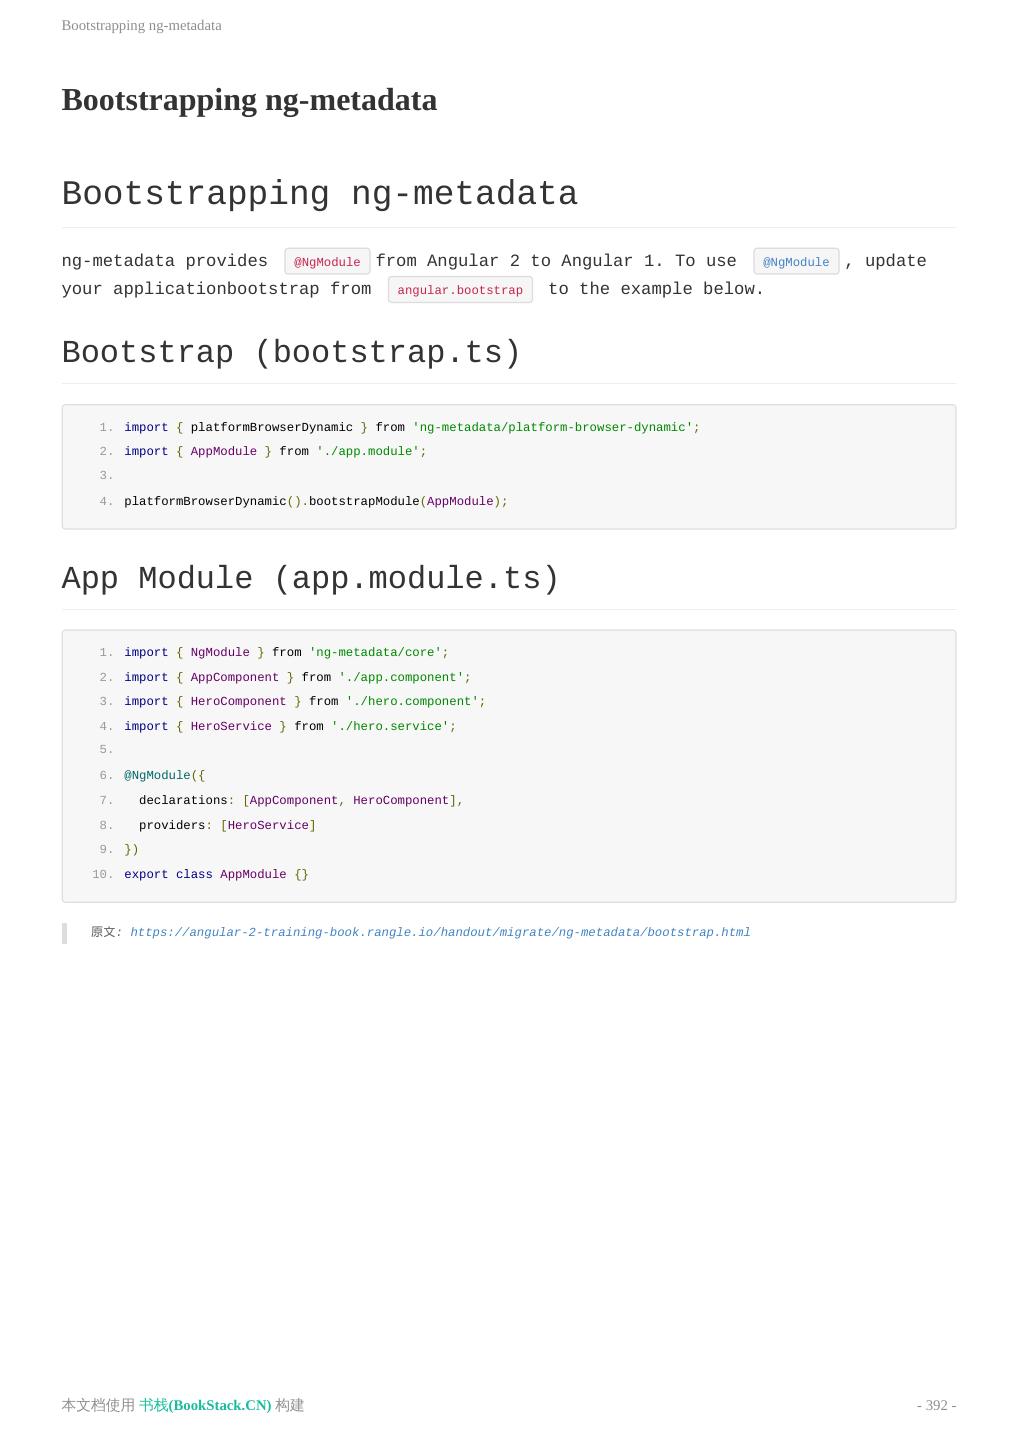
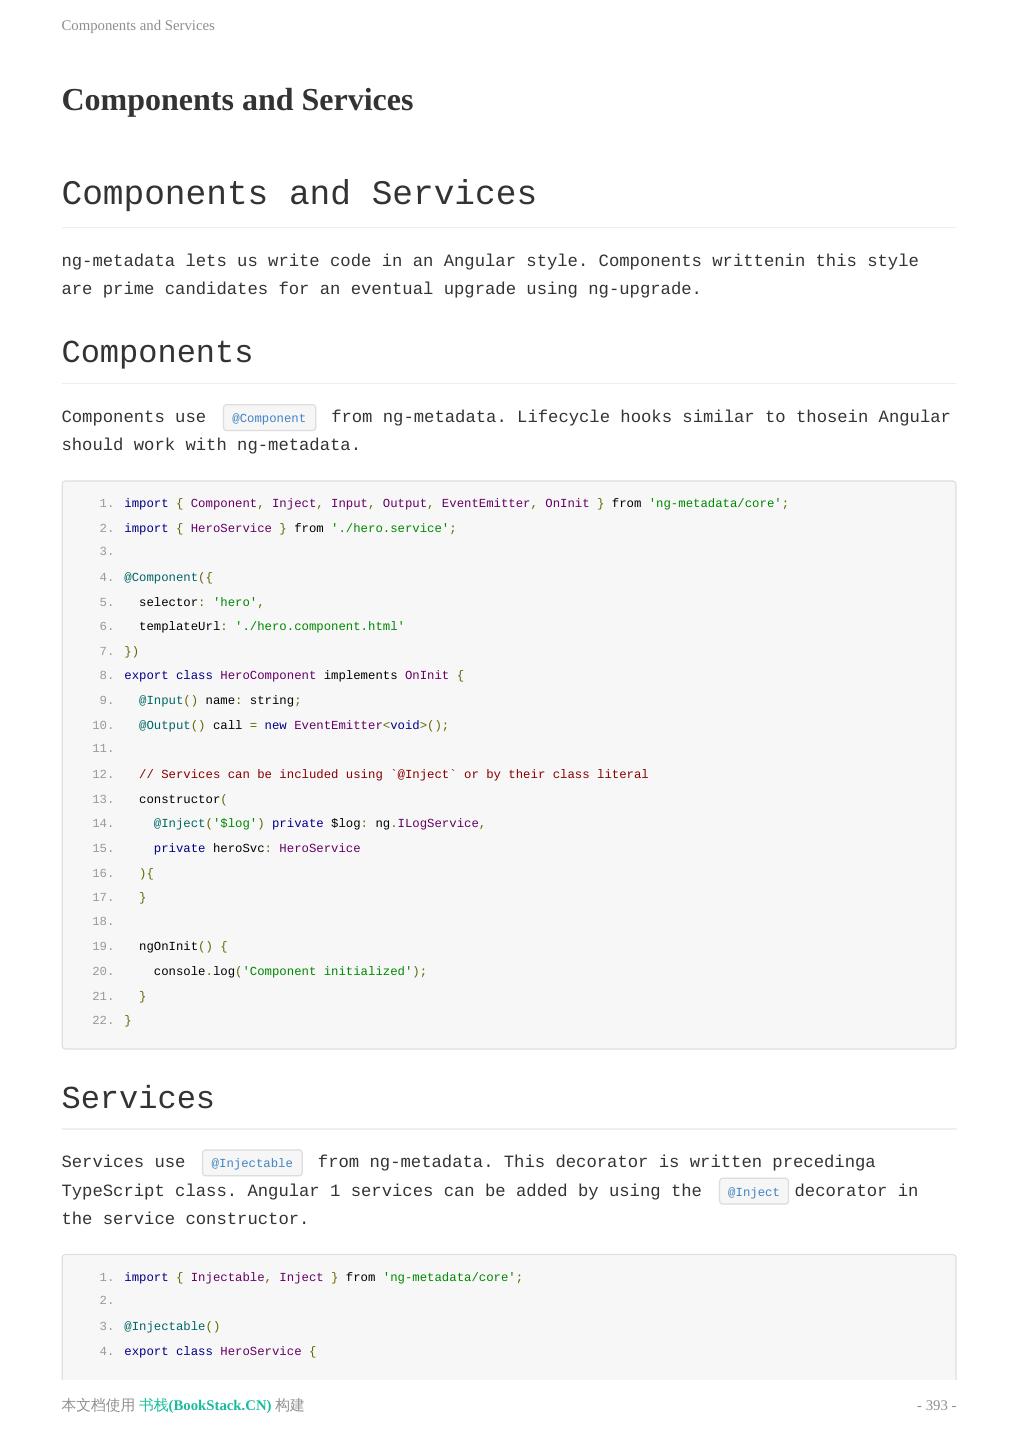
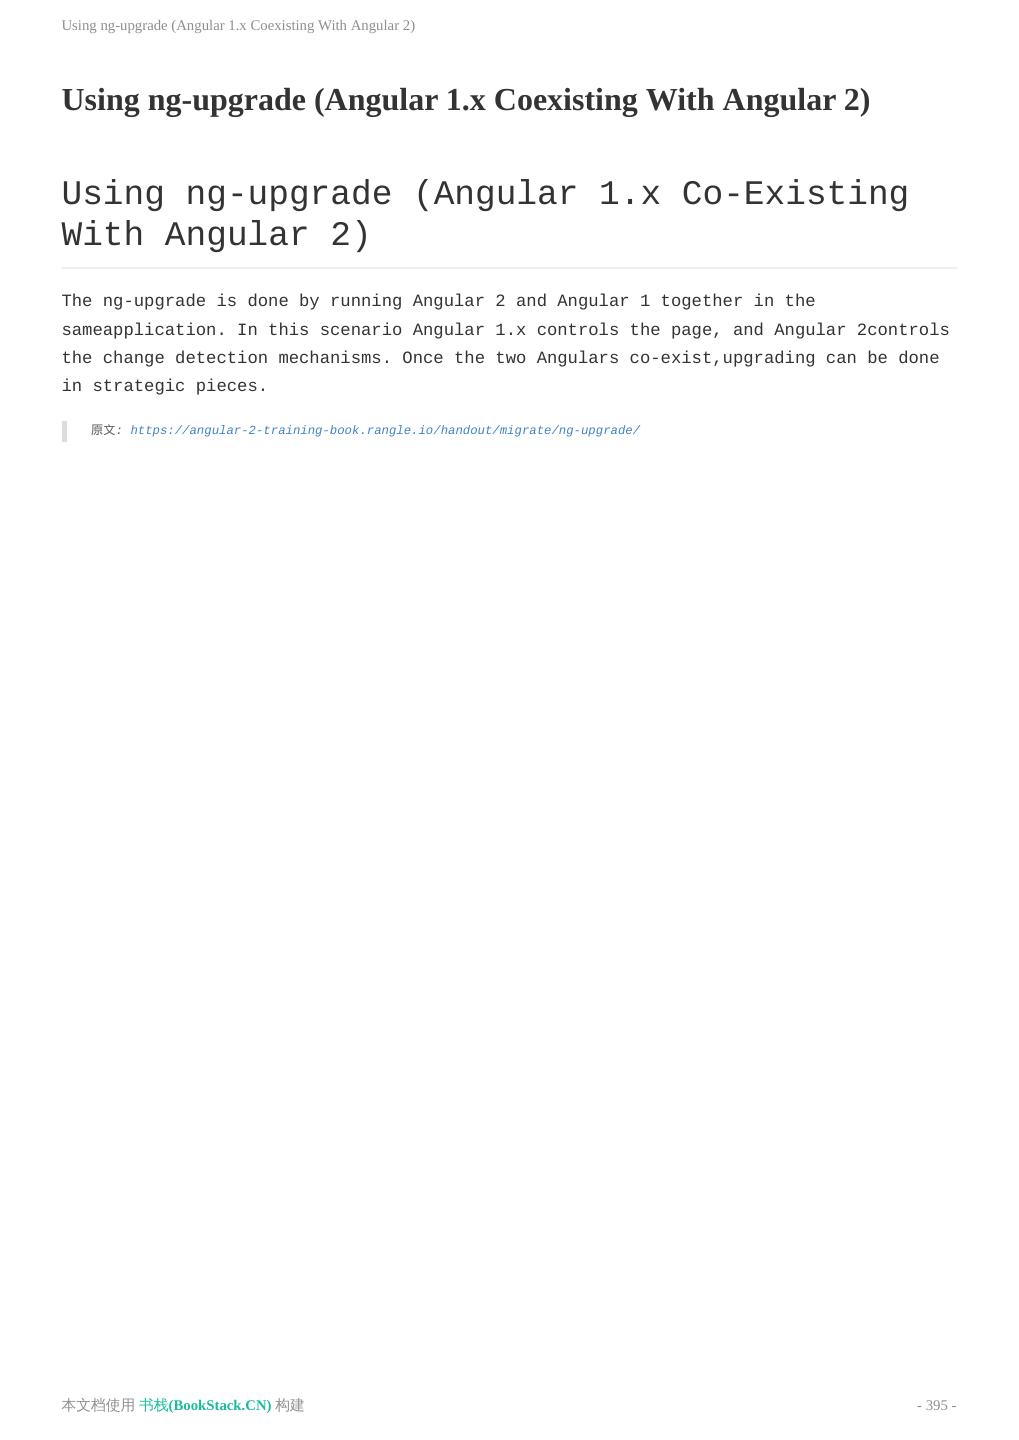
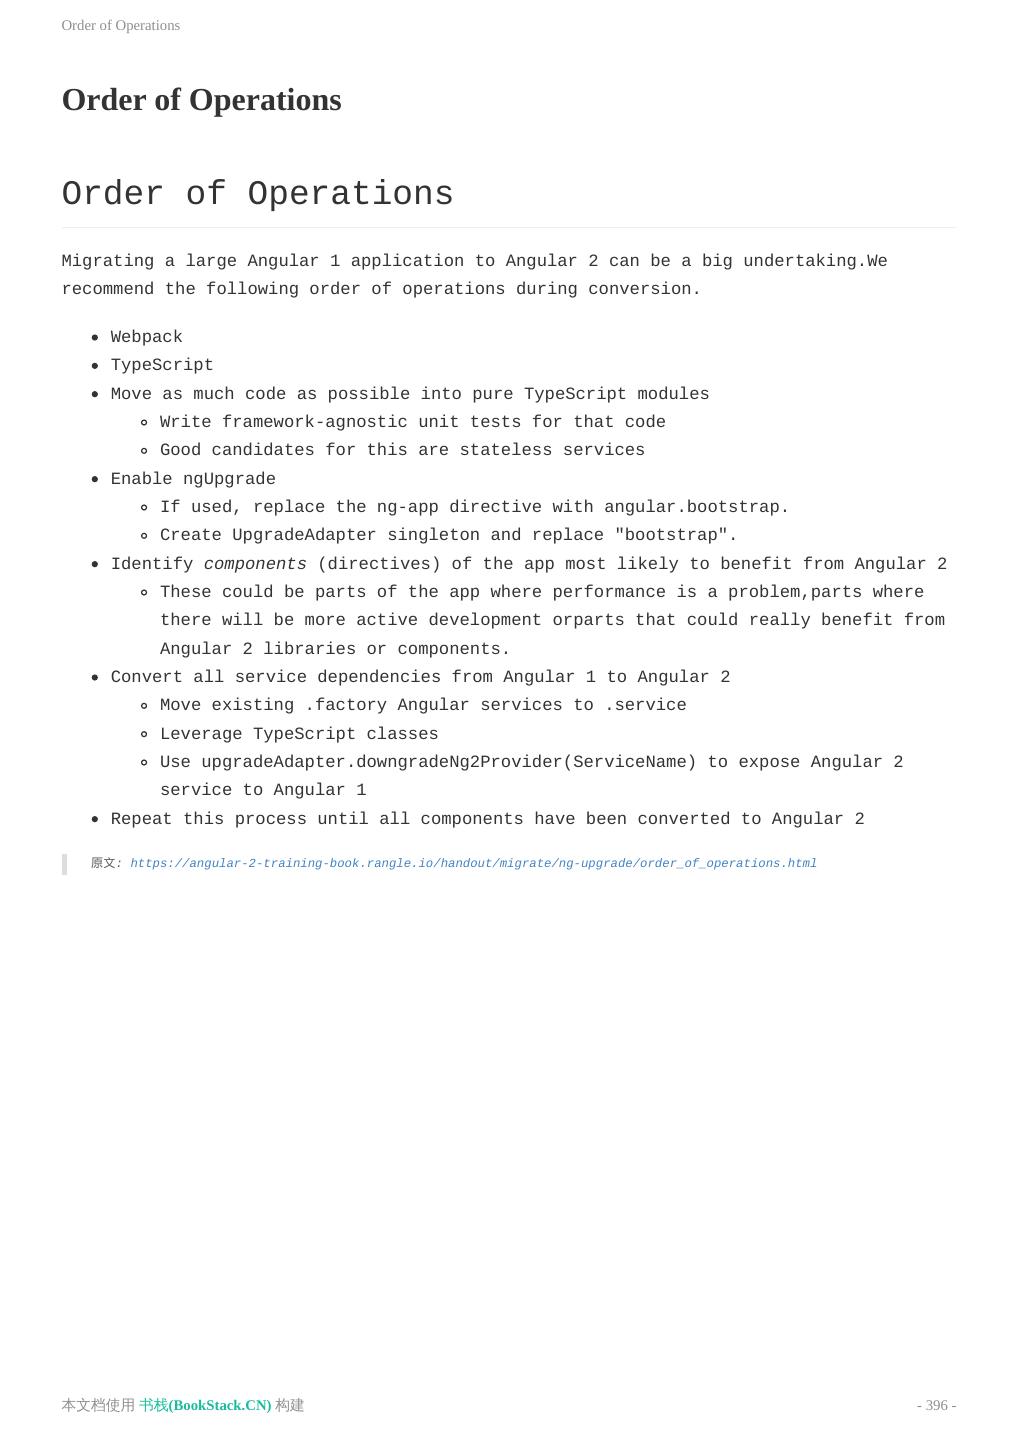
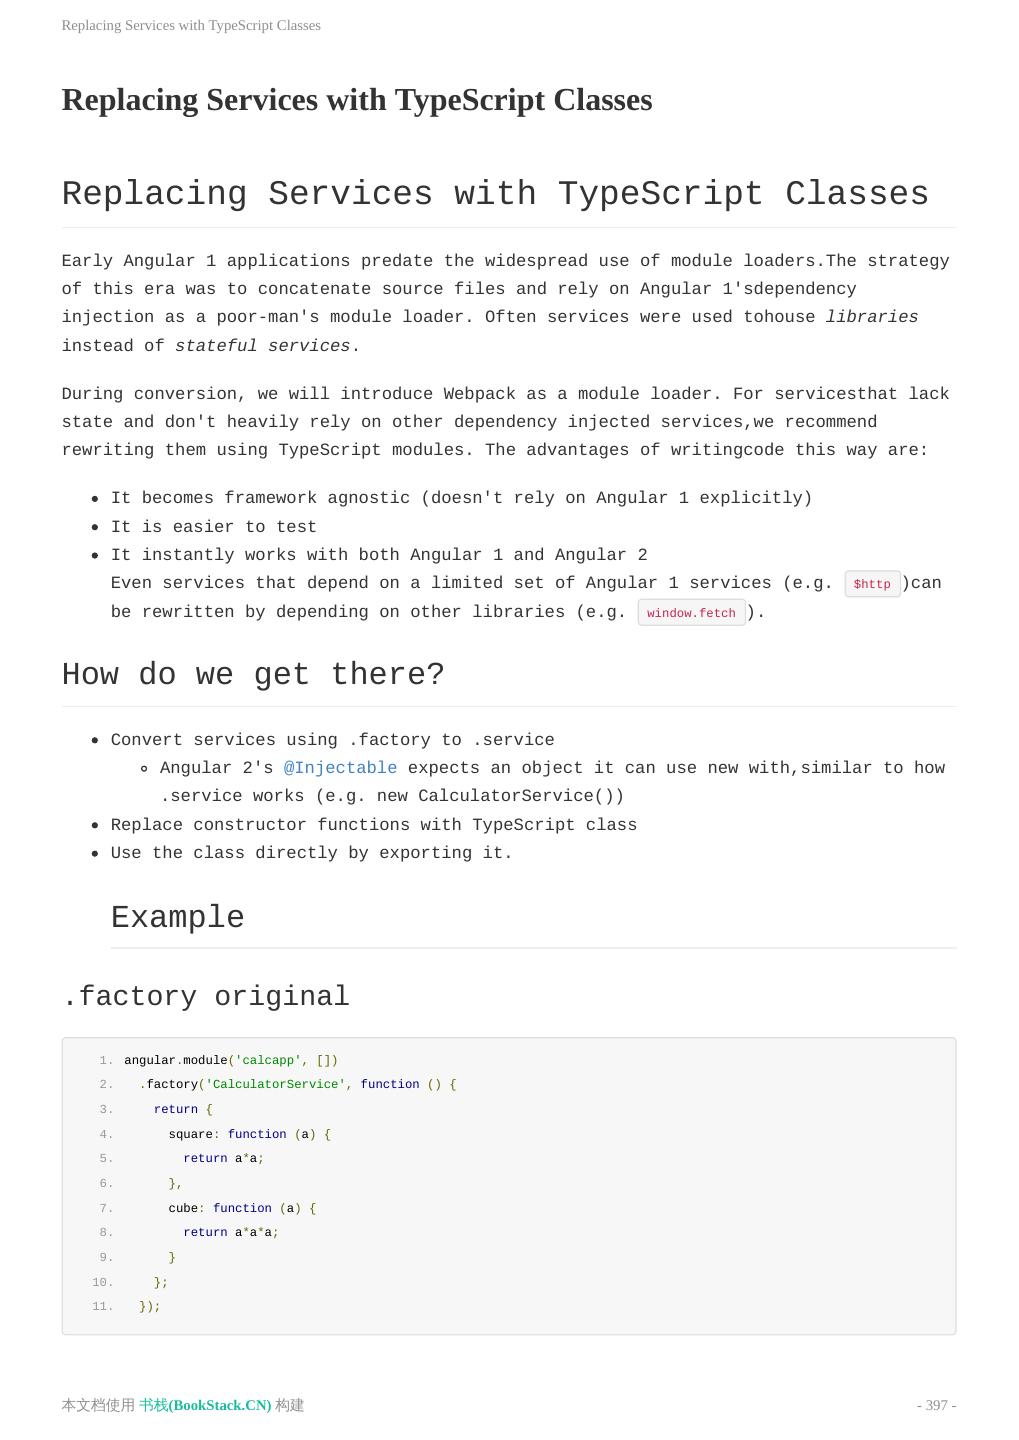
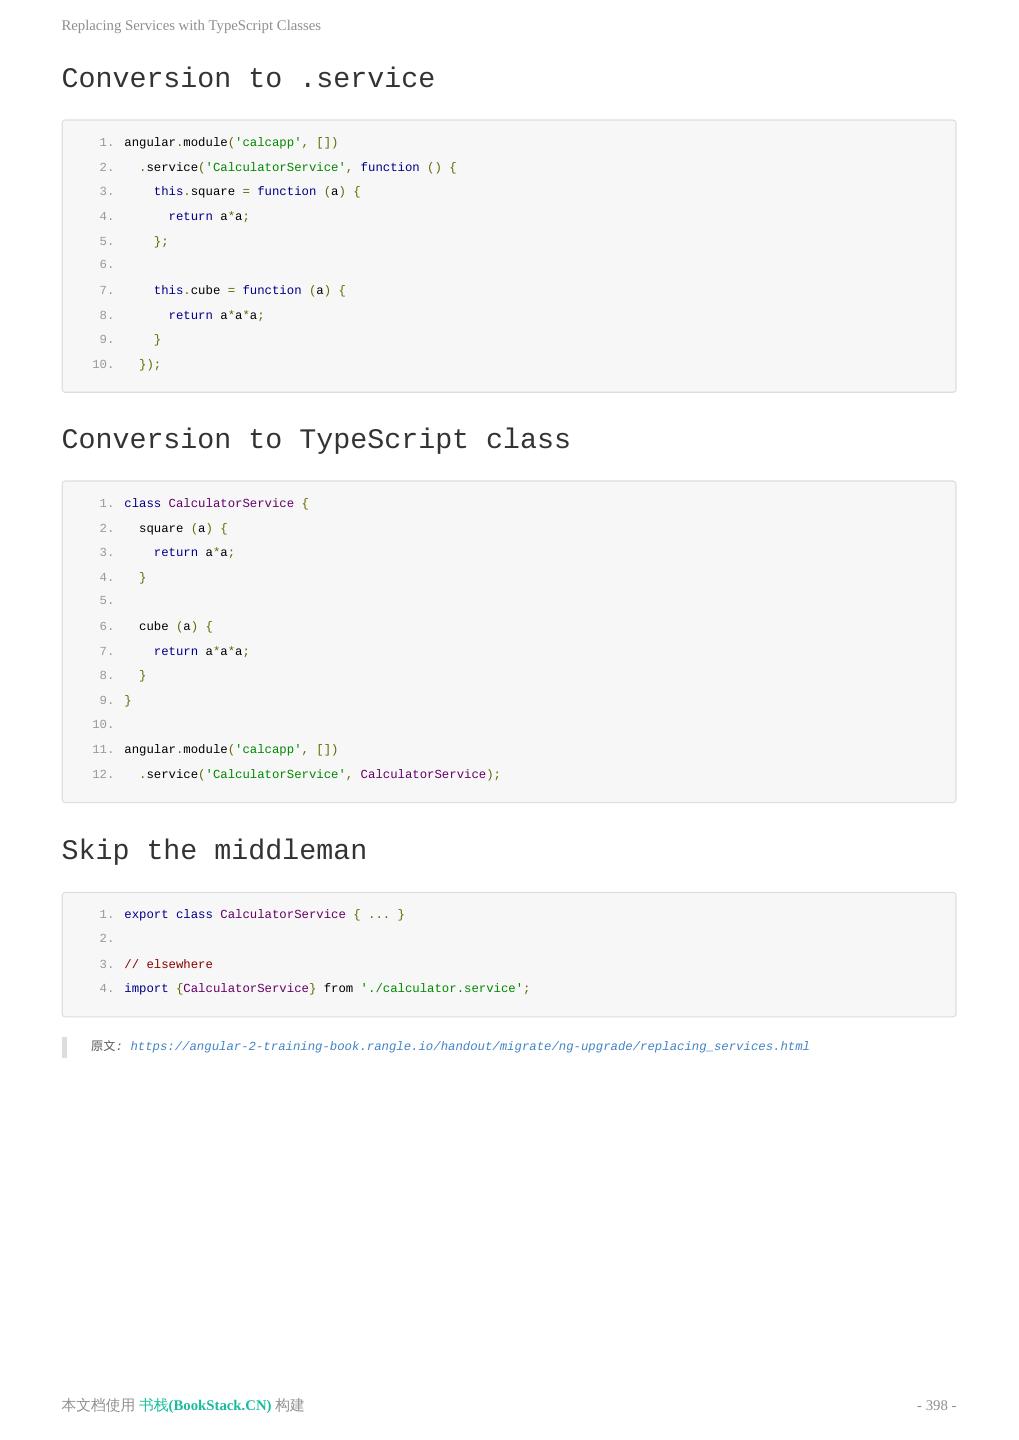
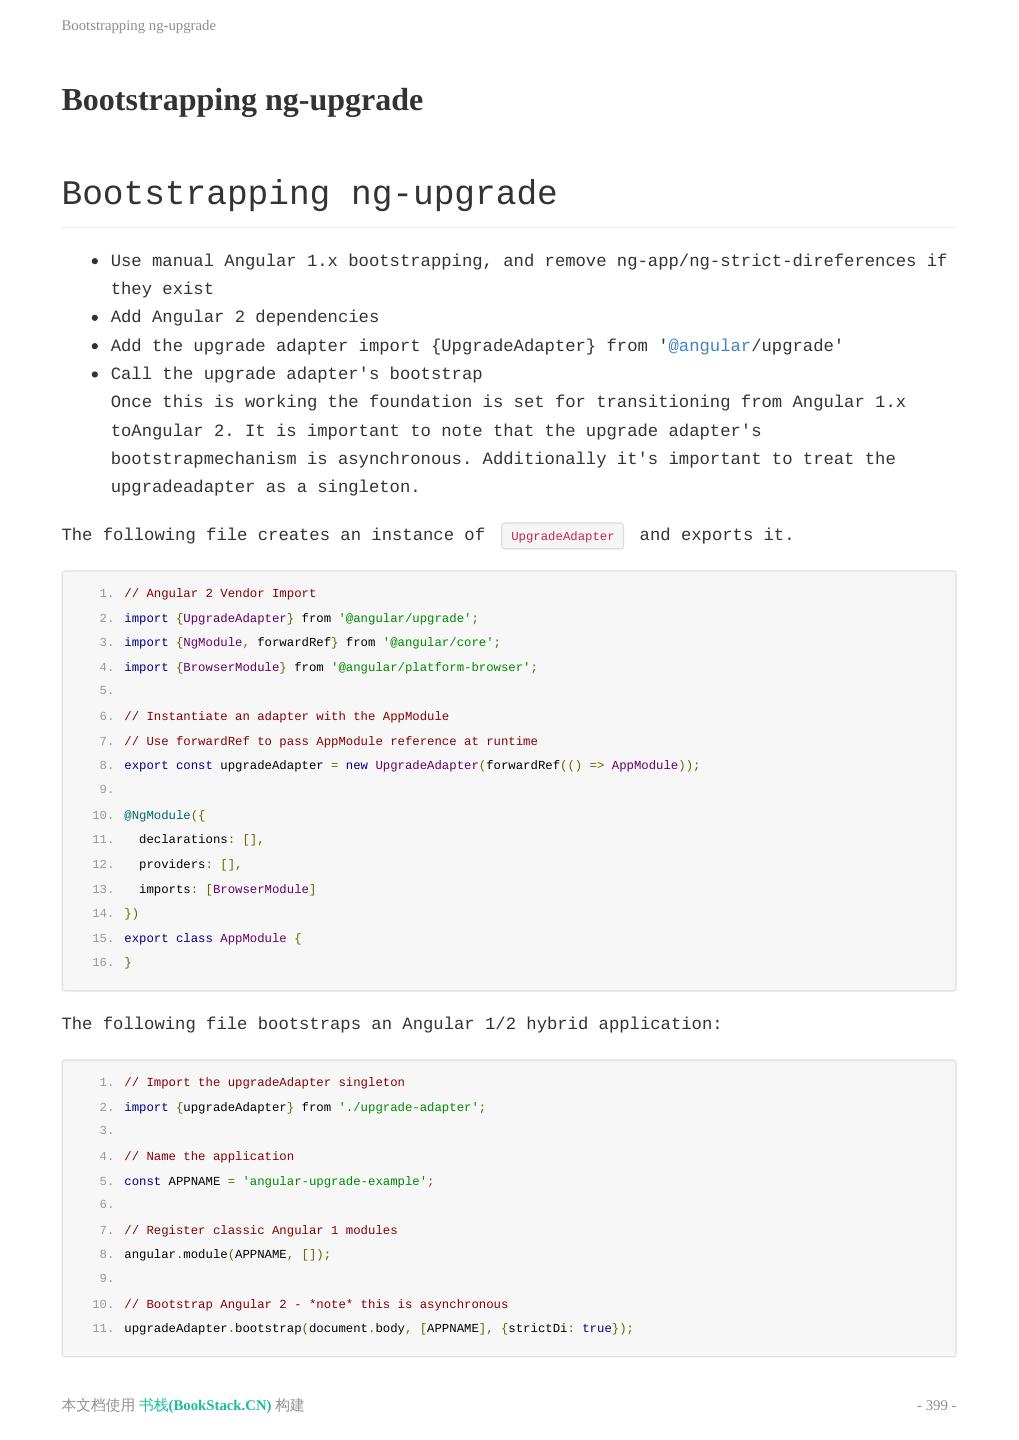
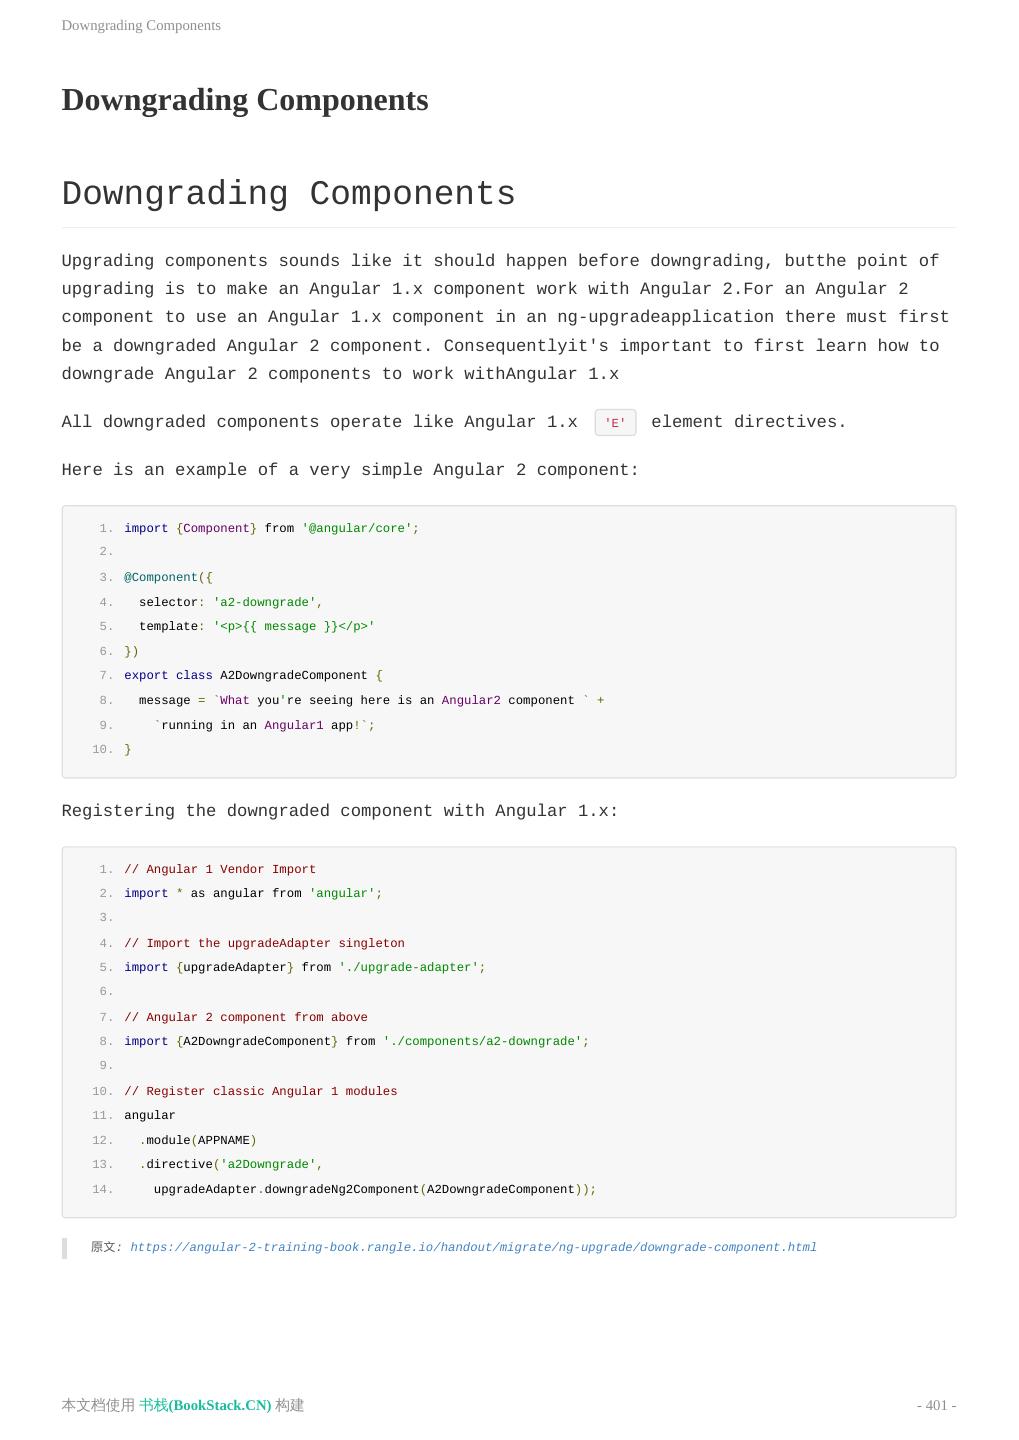
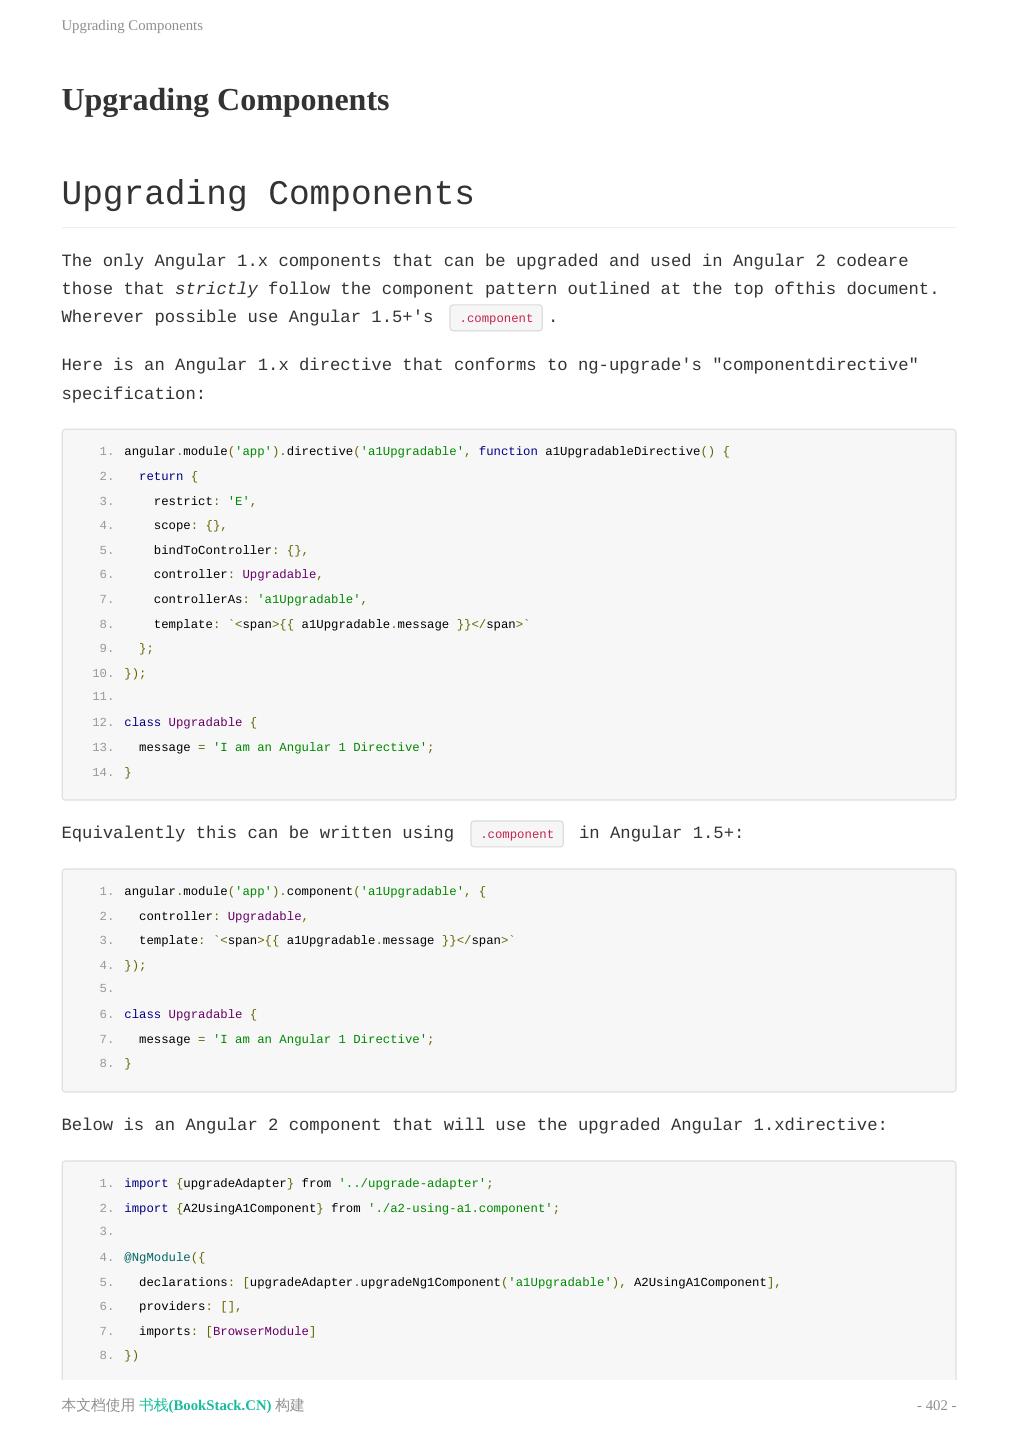
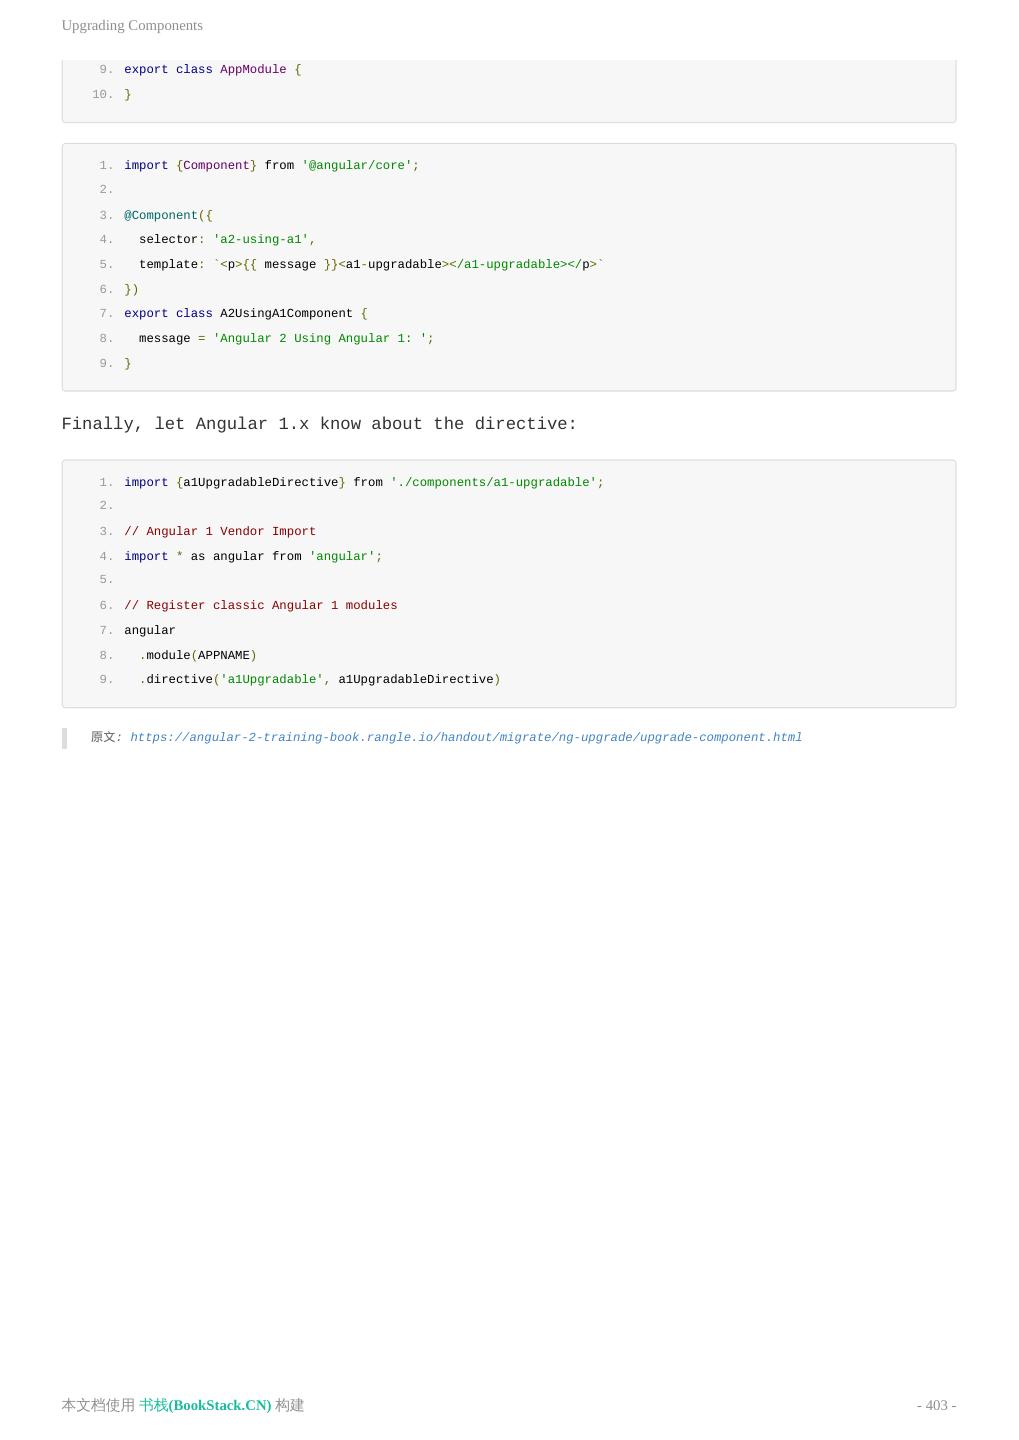
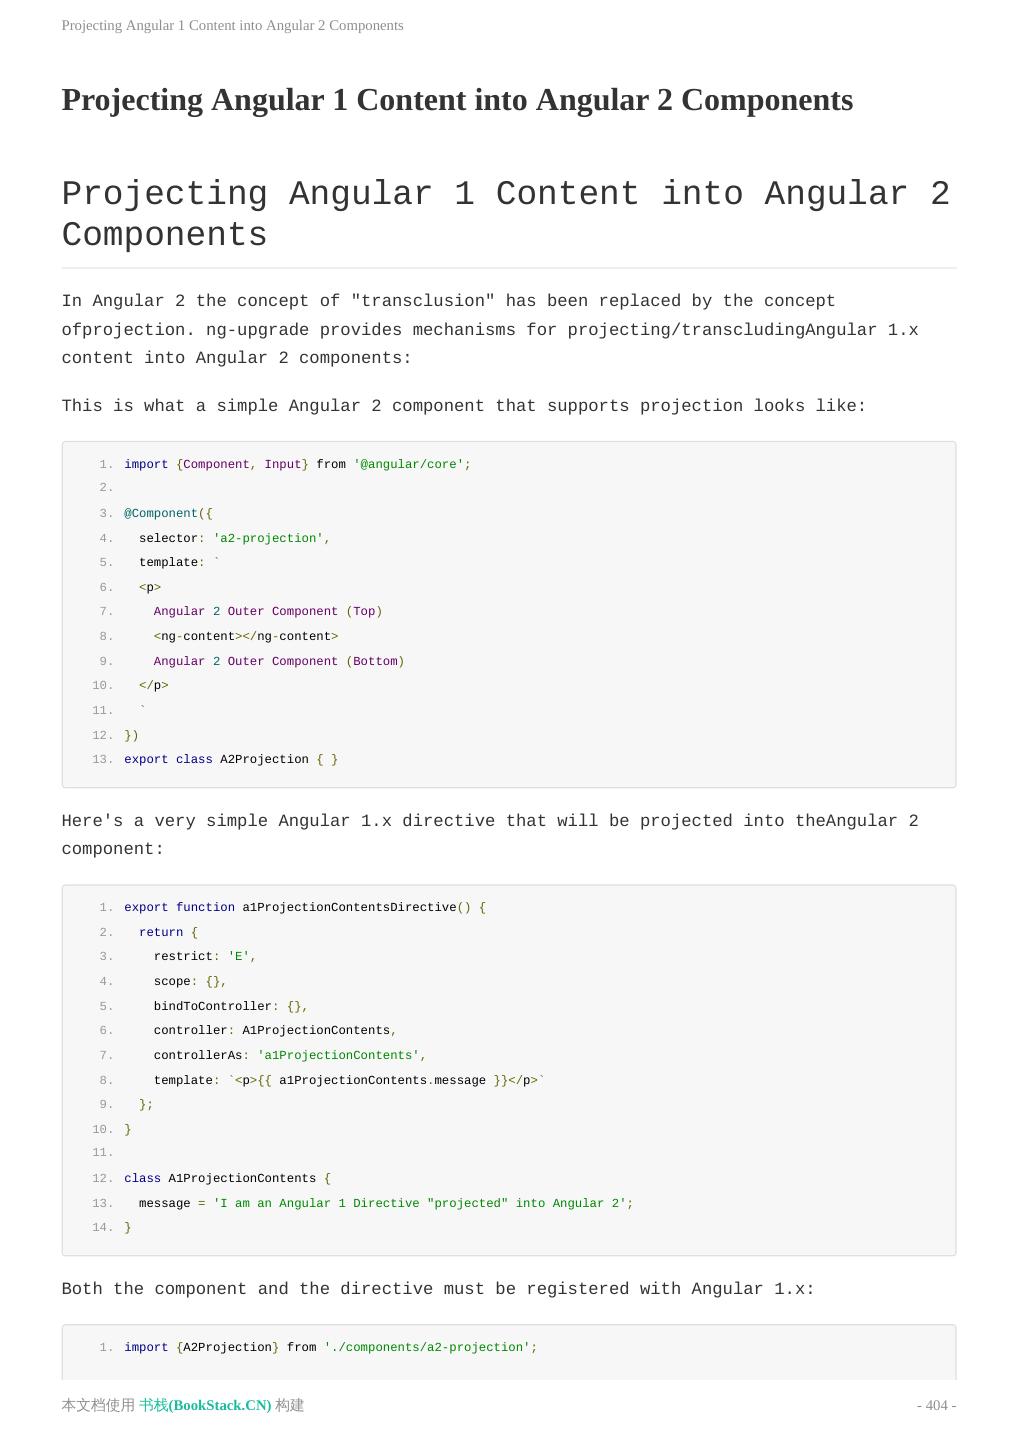
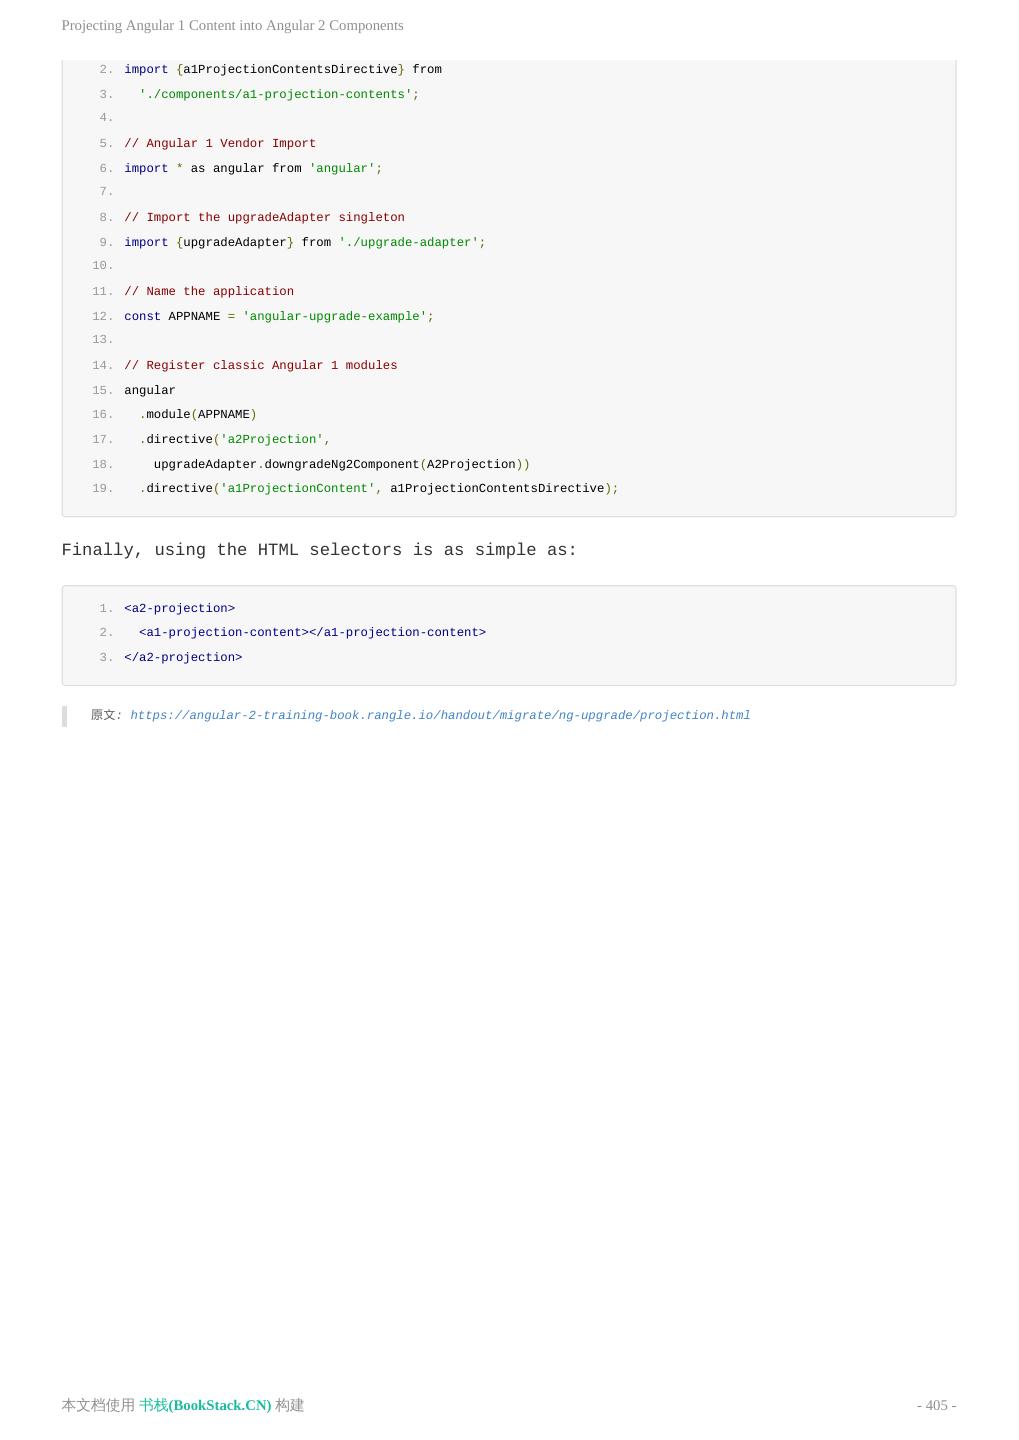
- 快召唤伙伴们来围观吧
- 微博 QQ QQ空间 贴吧
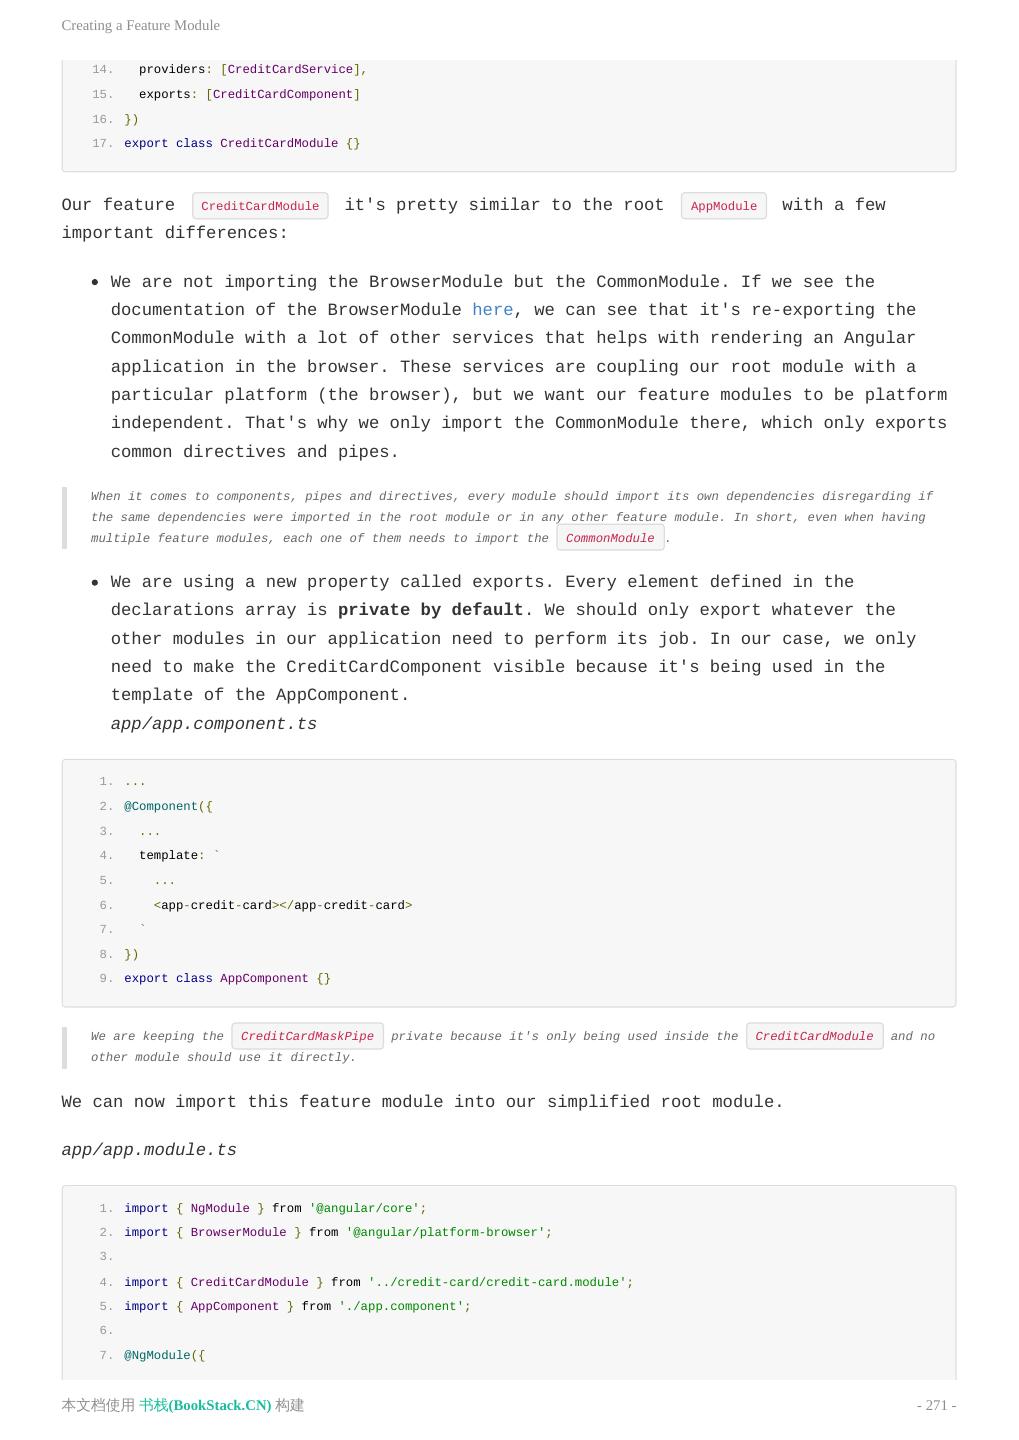
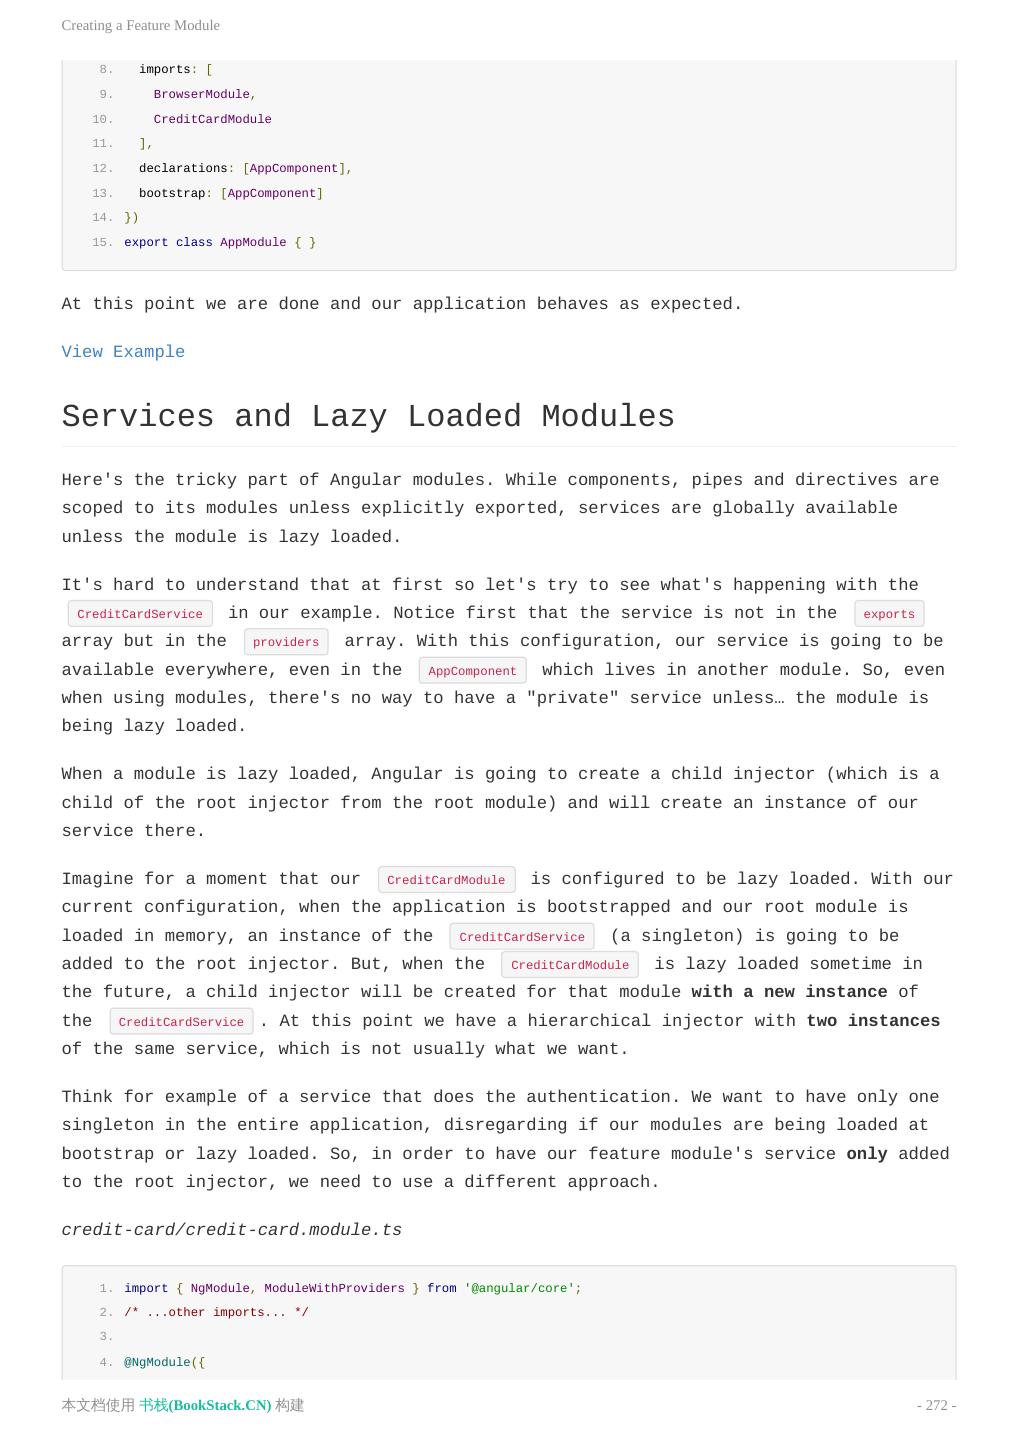
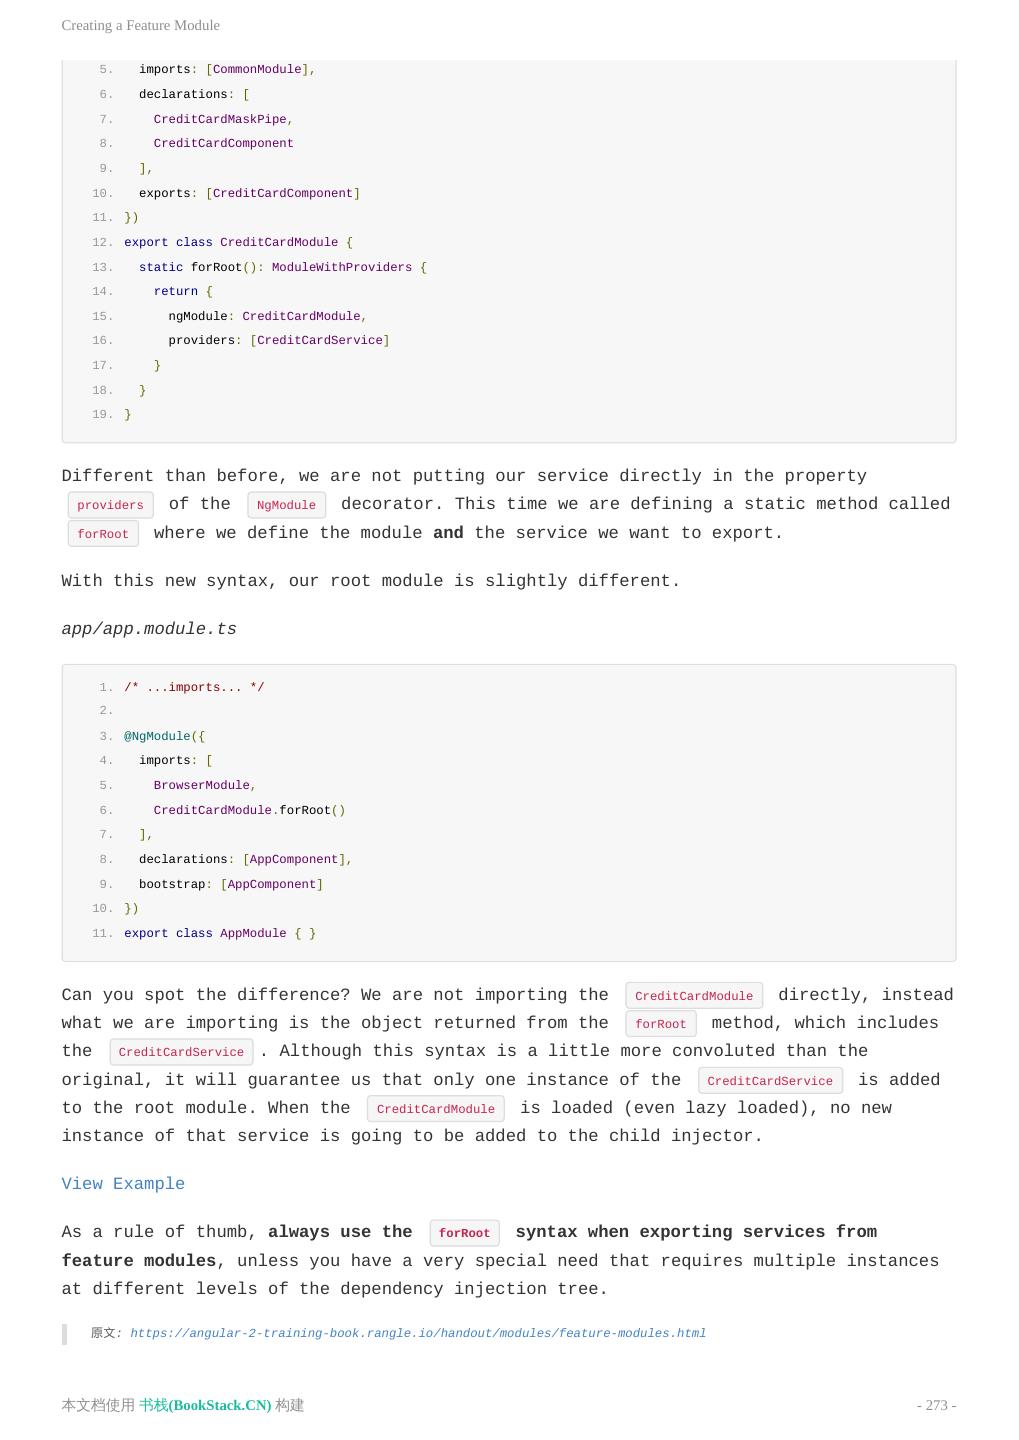
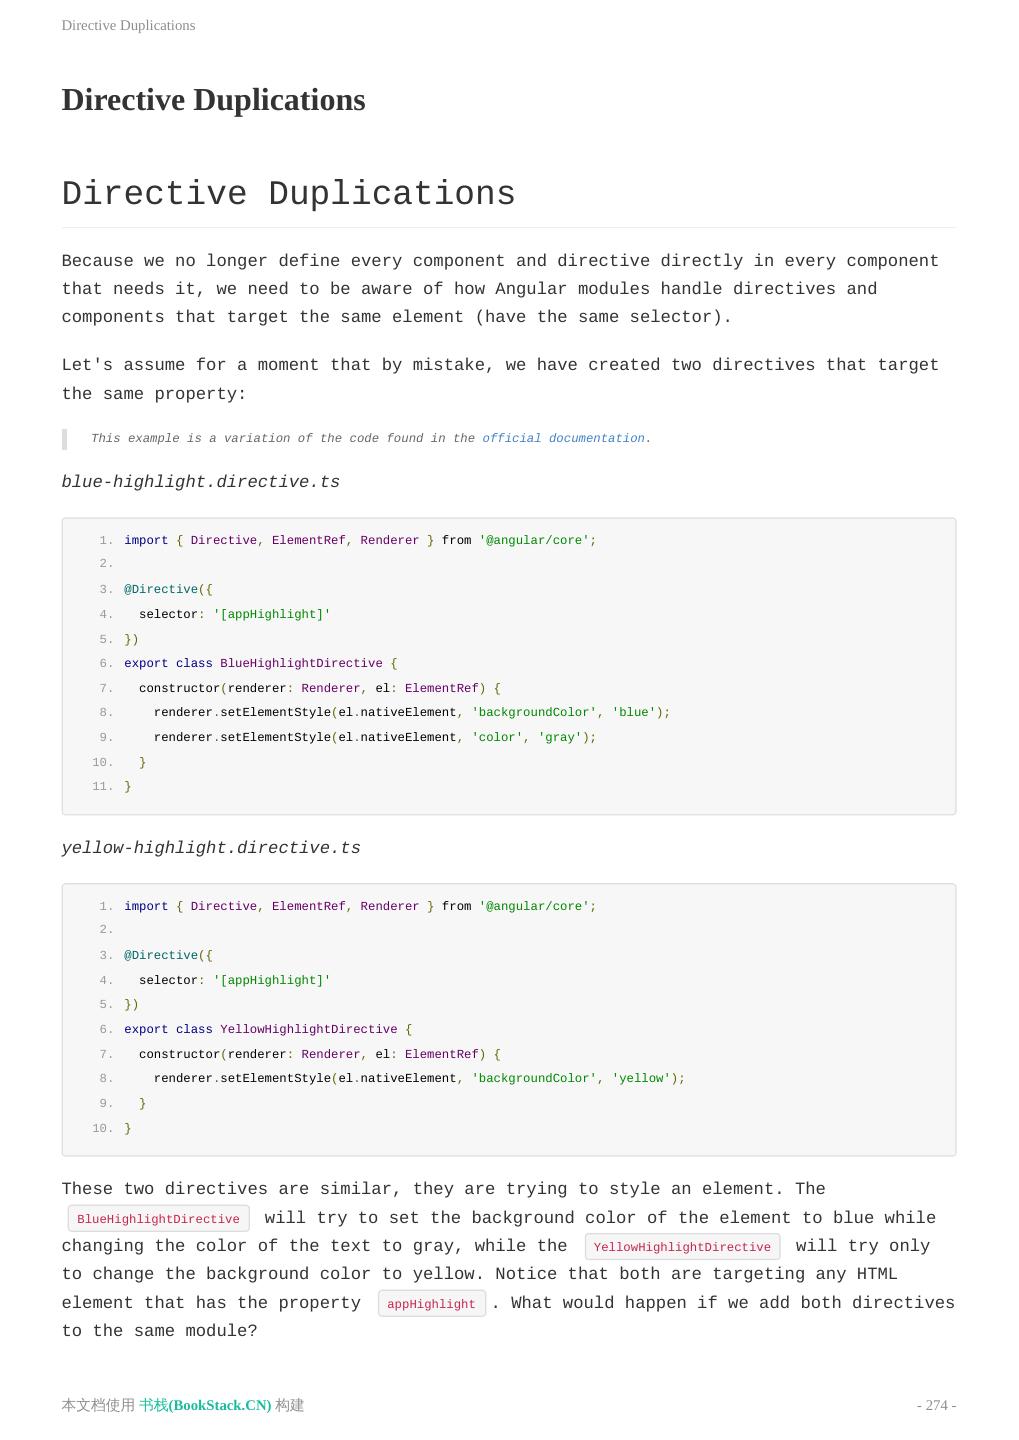
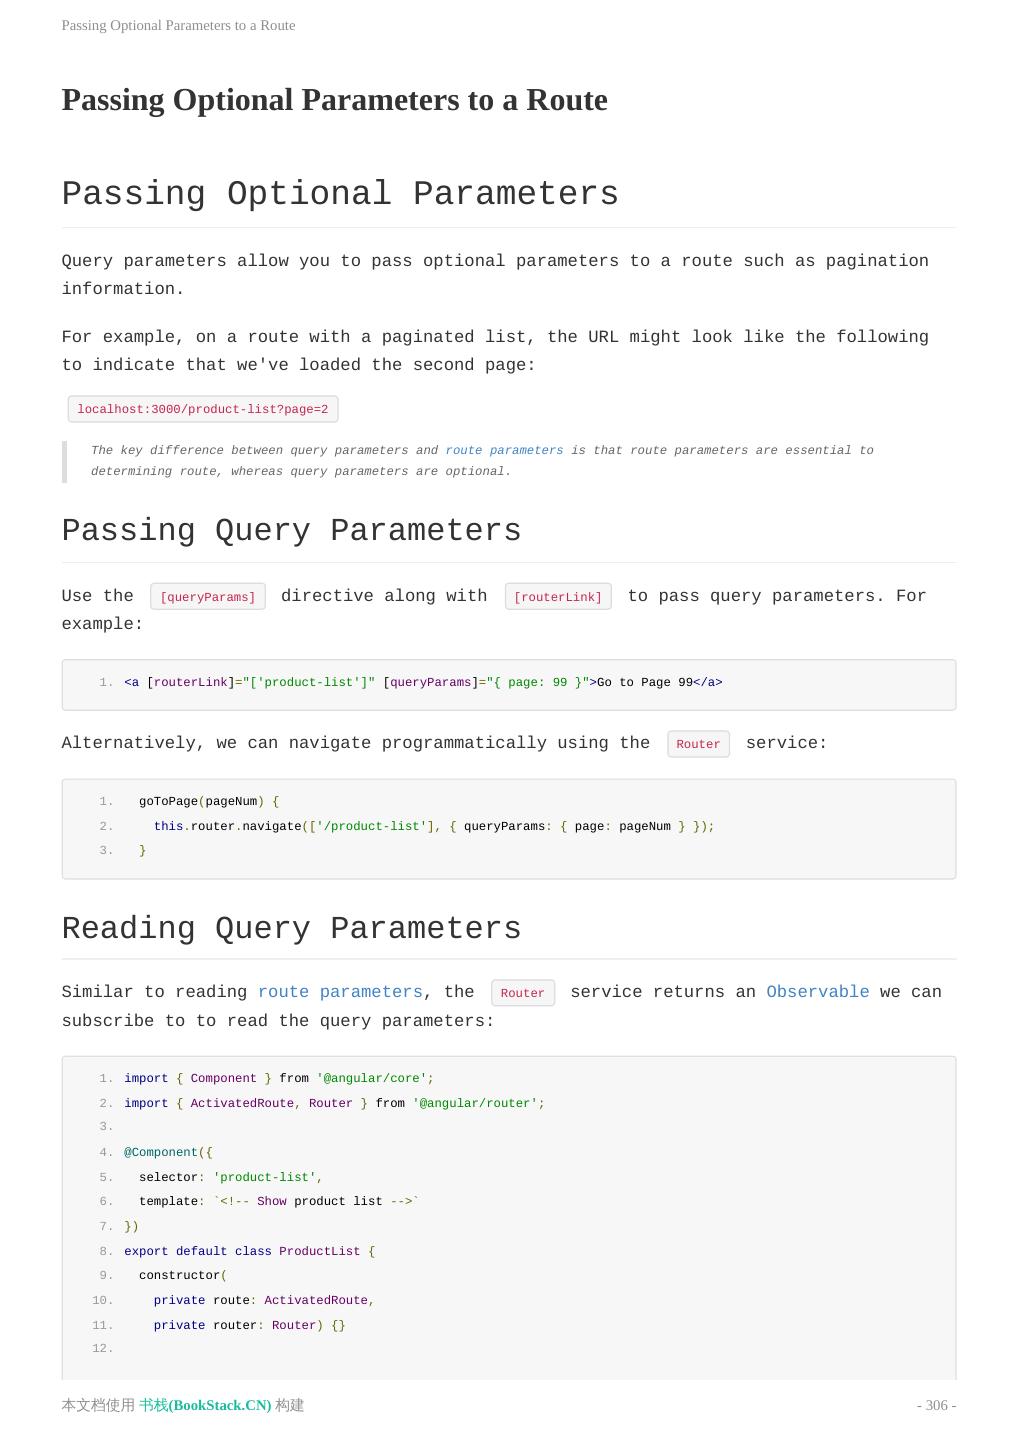
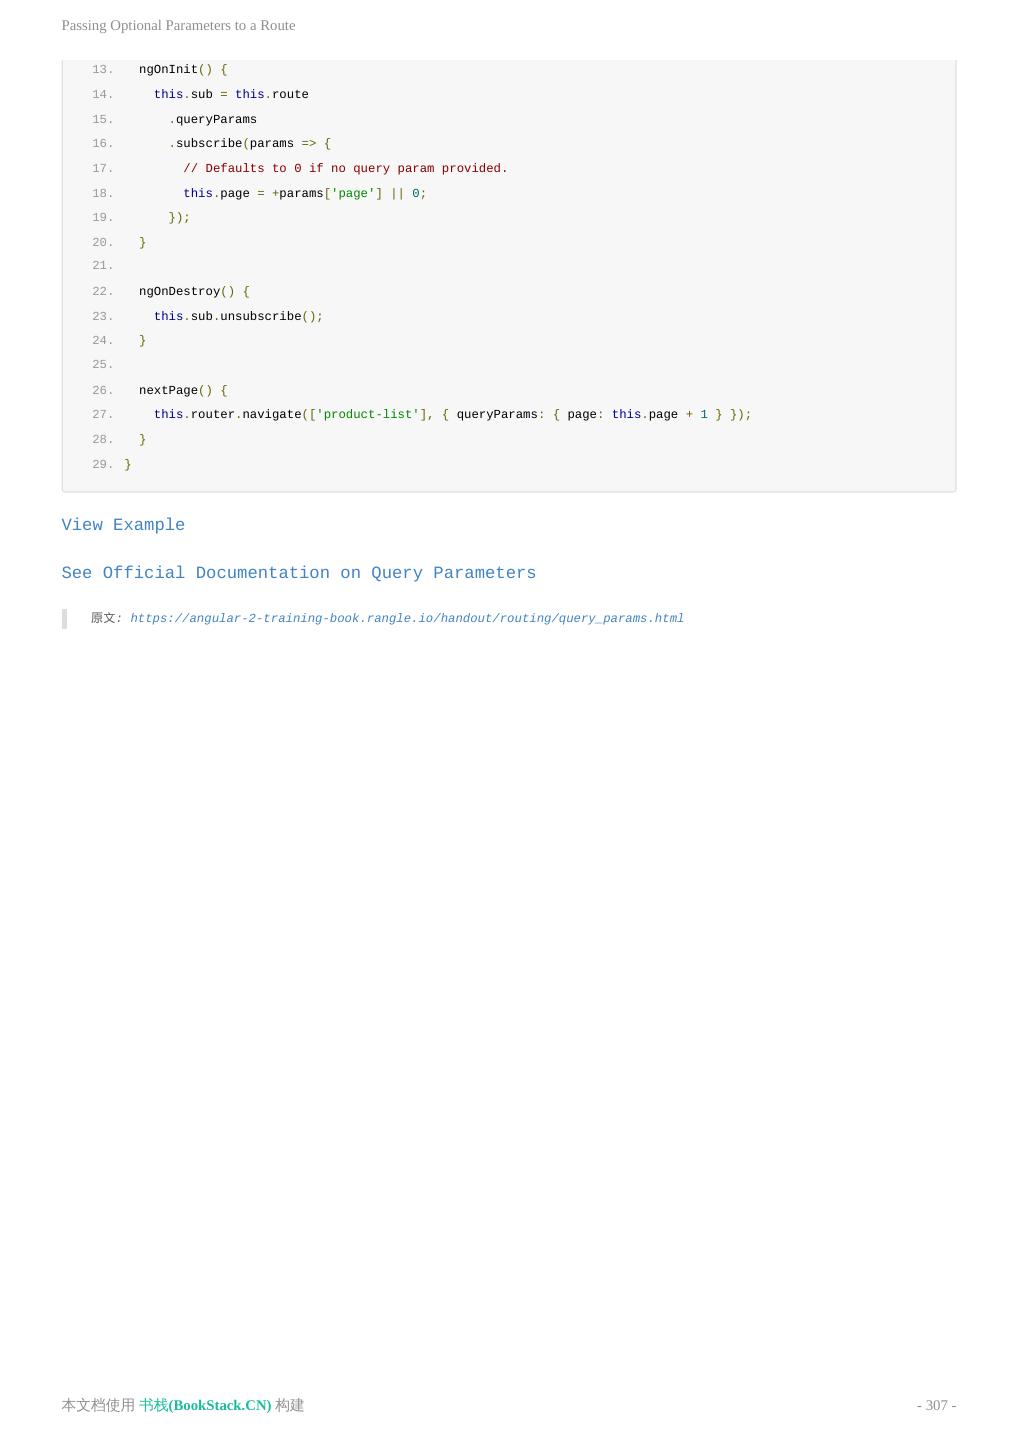
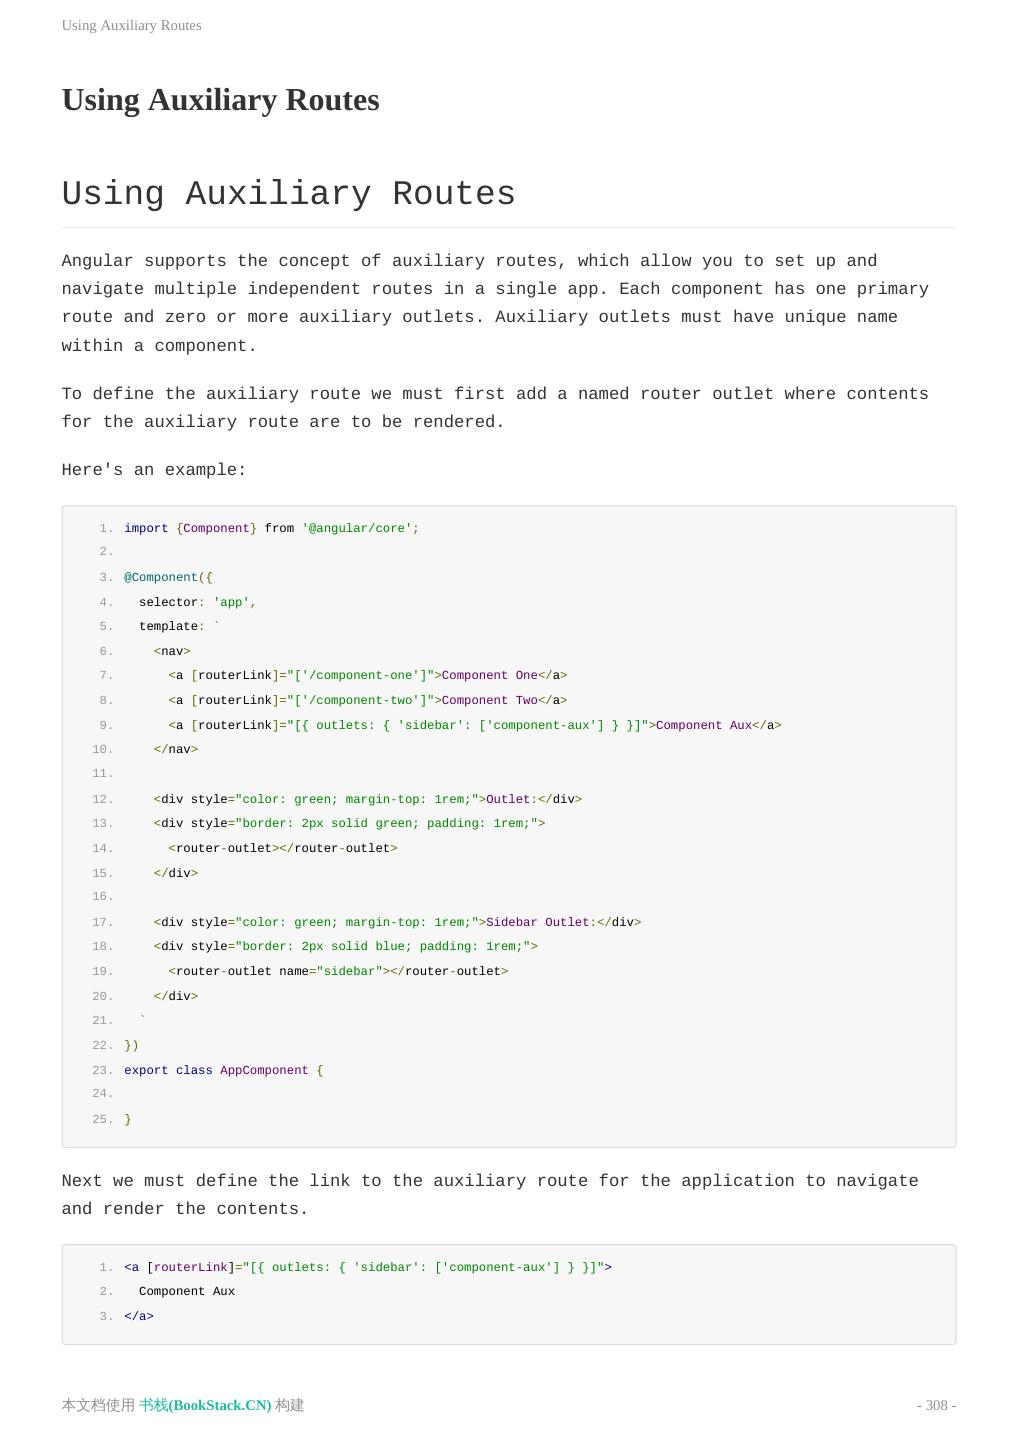
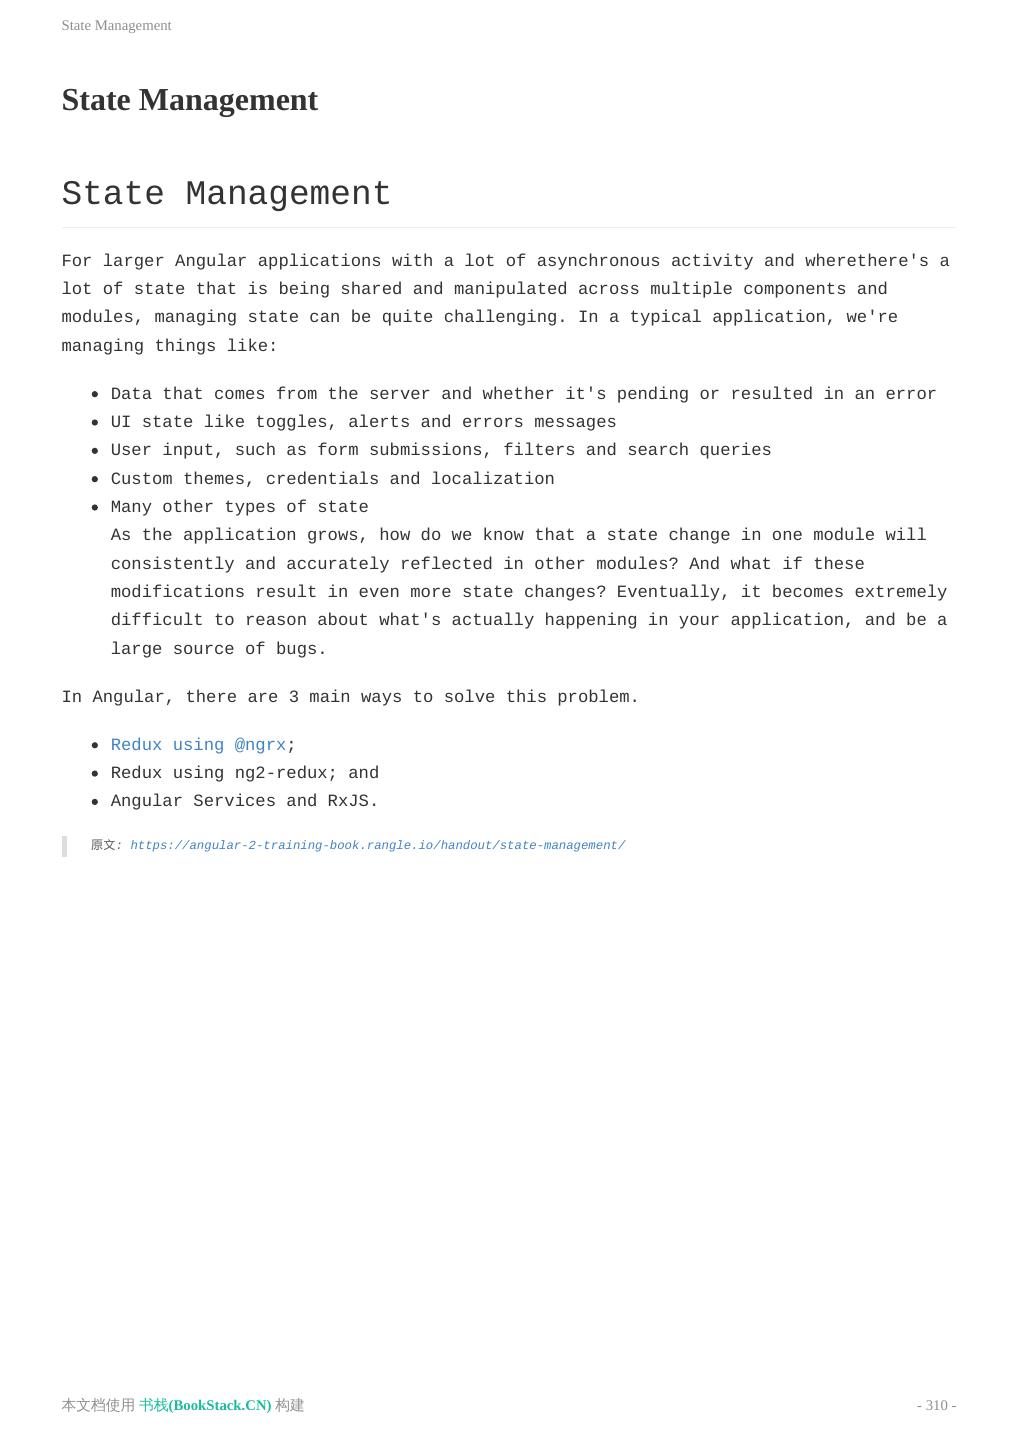
- 文档嵌入链接
- 复制
- 微信扫一扫分享
- 已成功复制到剪贴板
Rangle's_Angular2_Training_Book
展开查看详情
1 .
2 . 目 录 致谢 Introduction License Why Angular? The Architect's Guide to Angular Creating Functional Forms EcmaScript 6 and TypeScript Features ES6 Classes Refresher on 'this' Arrow Functions Template Strings Inheritance Delegation Constants and Block Scoped Variables …spread and …rest Destructuring Modules TypeScript Getting Started With TypeScript Working With tsc Typings Linting TypeScript Features TypeScript Classes Interfaces Shapes Type Inference Type Keyword Decorators Property Decorators Class Decorators Parameter Decorators The JavaScript Toolchain Source Control: git The Command Line 本文档使用 书栈(BookStack.CN) 构建 - 2 -
3 . Command Line JavaScript: NodeJS Back-End Code Sharing and Distribution: npm Module Loading, Bundling and Build Tasks: Webpack Chrome Bootstrapping an Angular Application Understanding the File Structure Bootstrapping Providers Components in Angular Creating Components Application Structure with Components Passing Data into a Component Responding to Component Events Using Two-Way Data Binding Accessing Child Components from Template Projection Structuring Applications with Components Using Other Components Directives Attribute Directives NgStyle Directive NgClass Directive Structural Directives NgIf Directive NgFor Directive NgSwitch Directives Using Multiple Structural Directives Advanced Components Component Lifecycle Accessing Other Components View Encapsulation ElementRef Observables Using Observables Error Handling Disposing Subscriptions and Releasing Resources Observables vs Promises Using Observables From Other Sources Observables Array Operations 本文档使用 书栈(BookStack.CN) 构建 - 3 -
4 . Cold vs Hot Observables Summary Angular Dependency Injection What is DI? DI Framework Angular's DI @Inject() and @Injectable Injection Beyond Classes Avoiding Injection Collisions: OpaqueToken The Injector Tree Http Making Requests Catching Rejections Catch and Release Cancel a Request Retry Search with flatMap Enhancing Search with switchMap Requests as Promises Change Detection Change Detection Strategies in Angular 1 vs Angular 2 How Change Detection Works Change Detector Classes Change Detection Strategy: OnPush Enforcing Immutability Additional Resources Zone.js Advanced Angular Directives Creating an Attribute Directive Listening to an Element Host Setting Properties in a Directive Creating a Structural Directive View Containers and Embedded Views Providing Context Variables to Directives AoT AoT limitations AoT Configuration 本文档使用 书栈(BookStack.CN) 构建 - 4 -
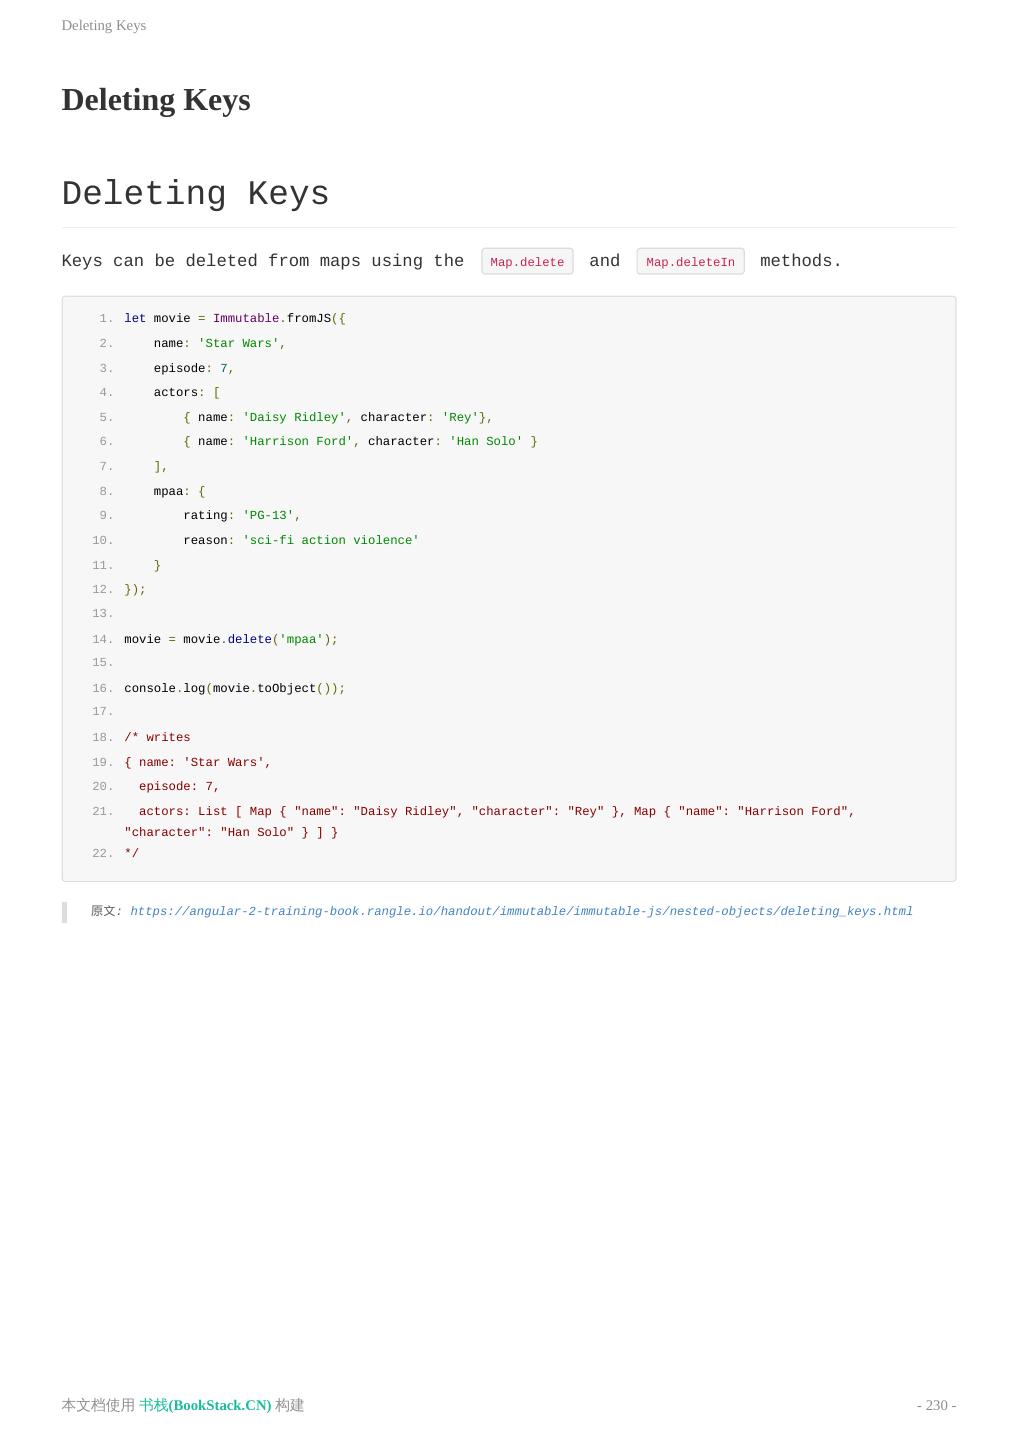
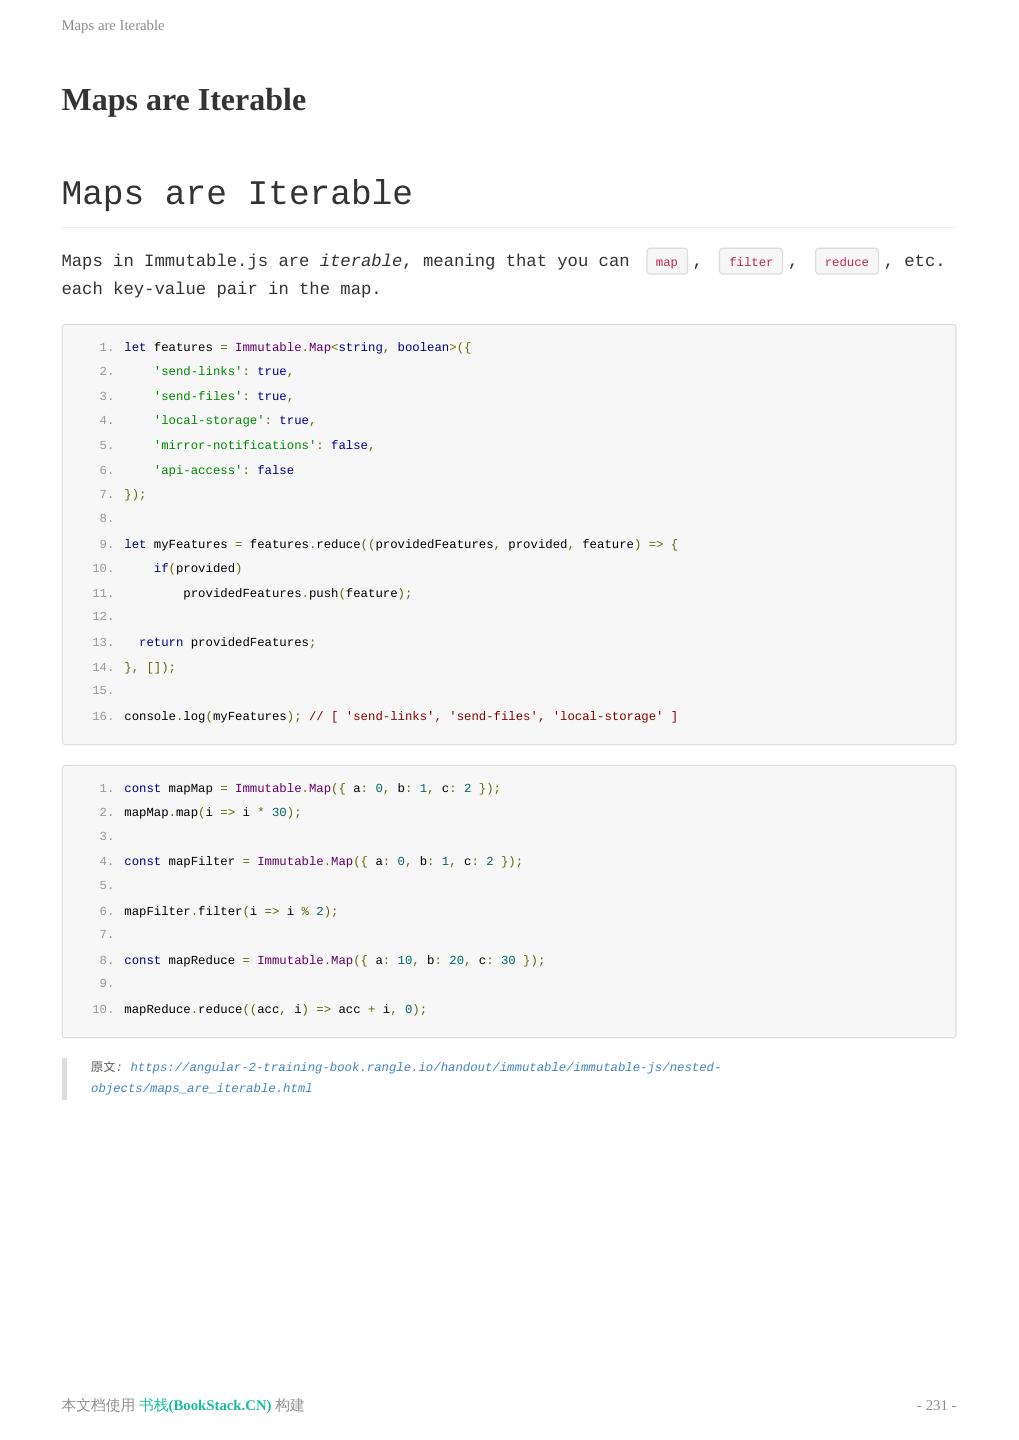
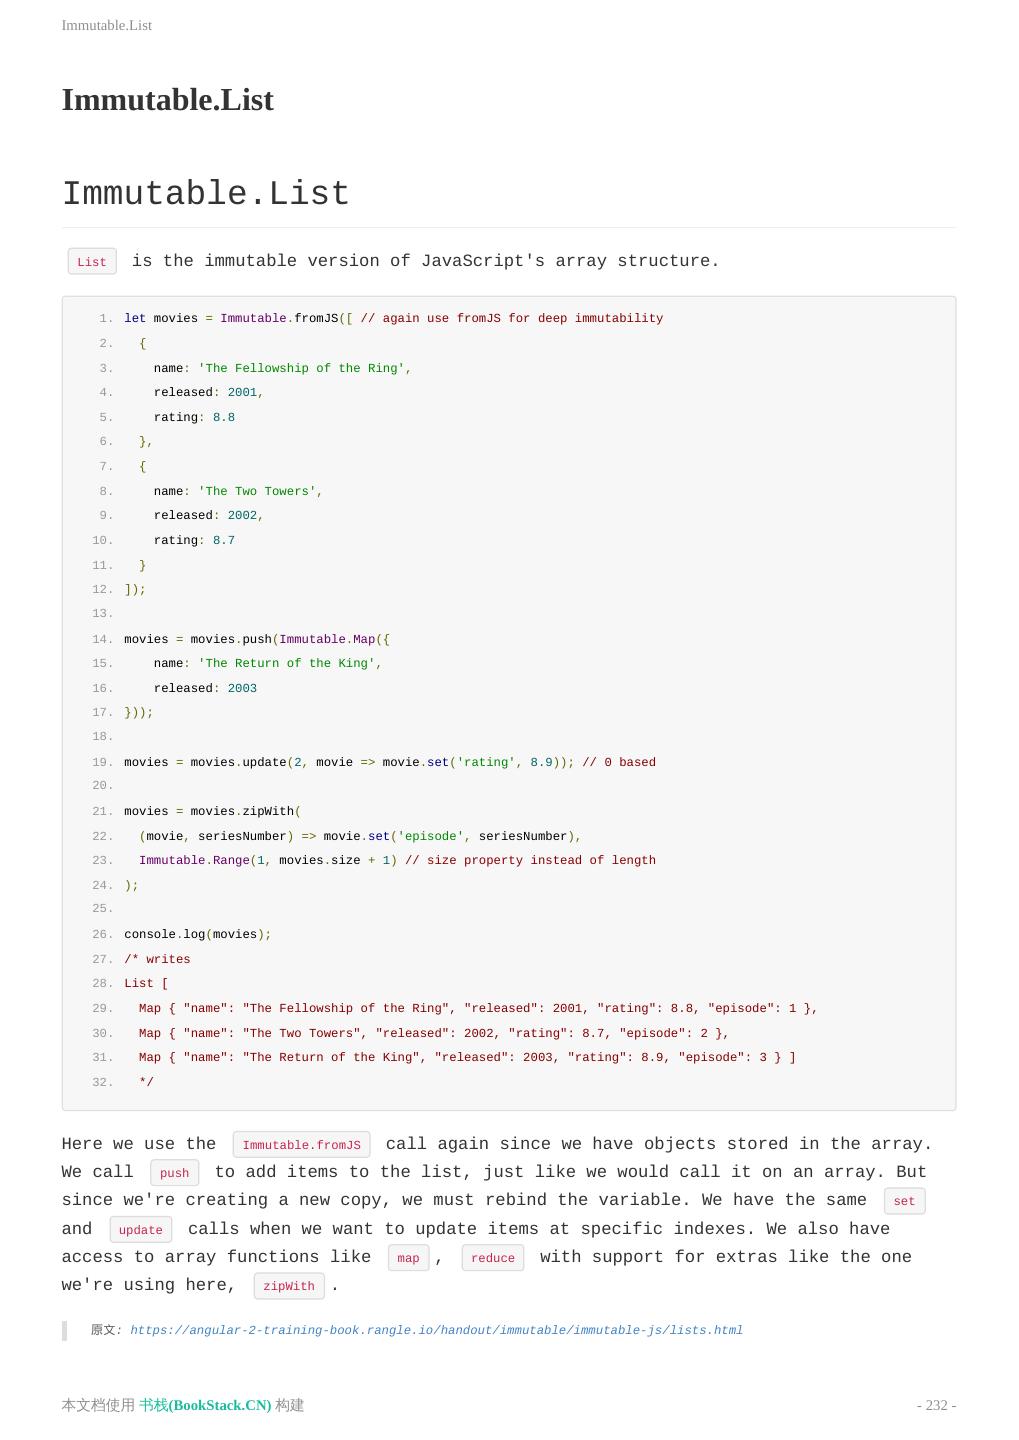
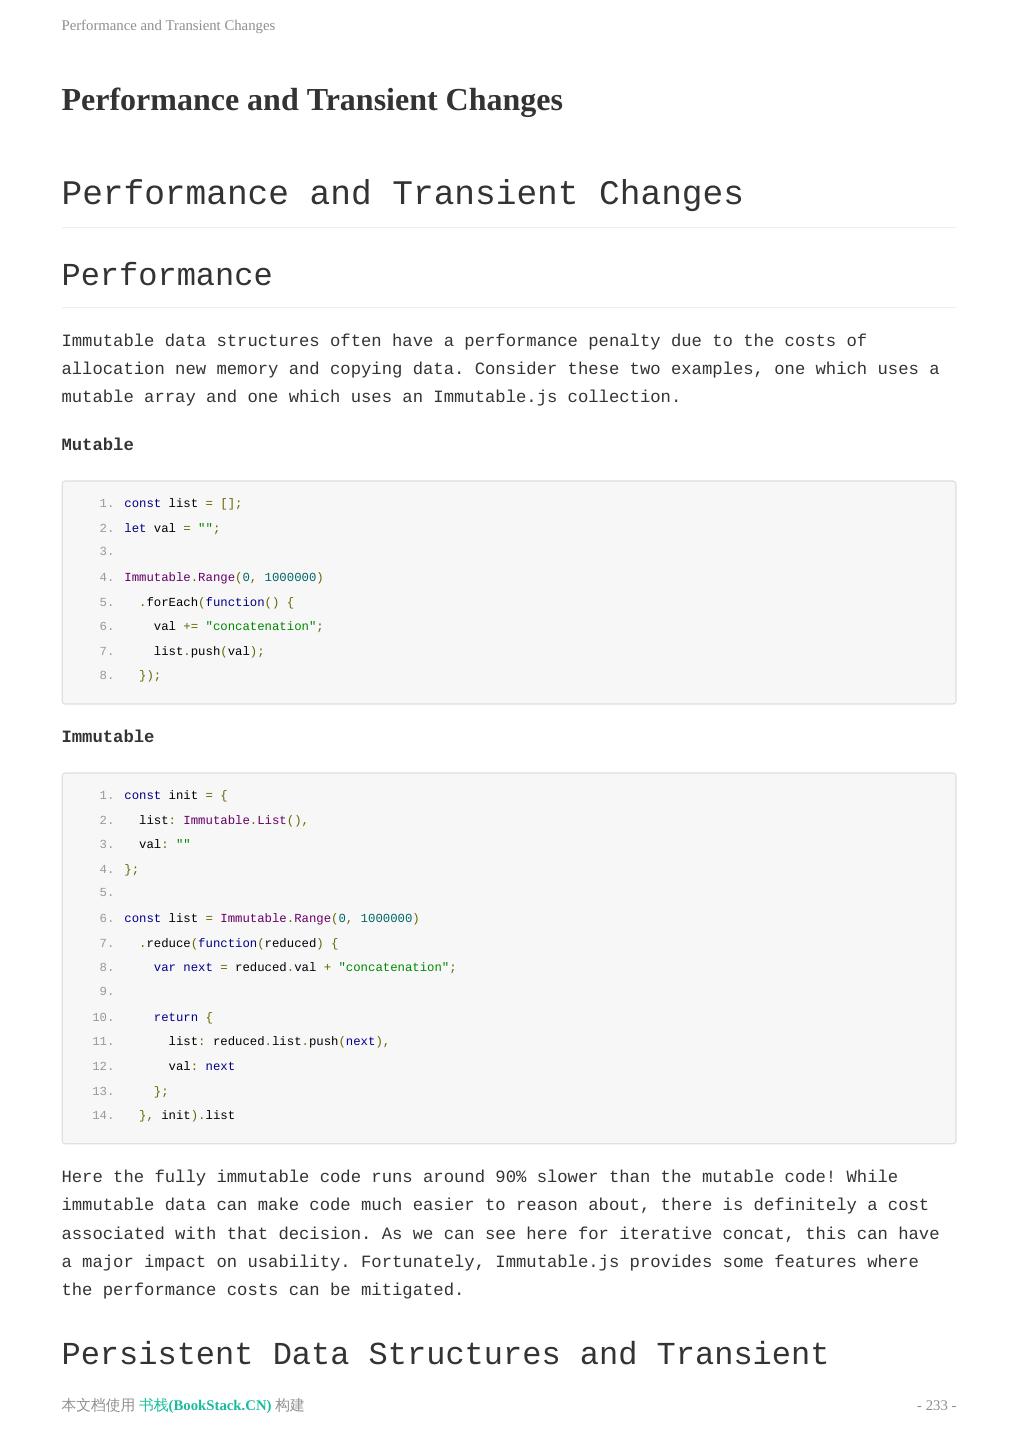
5 . Immutable.js What is Immutability? The Case for Immutability JavaScript Solutions Object.assign Object.freeze Immutable.js Basics Immutable.Map Map.merge Nested Objects Deleting Keys Maps are Iterable Immutable.List Performance and Transient Changes Official Documentation Pipes Using Pipes Custom Pipes Stateful Pipes Forms Getting Started Template-Driven Forms Nesting Form Data Using Template Model Binding Validating Template-Driven Forms Reactive/Model-Driven Forms FormBuilder Basics Validating FormBuilder Forms FormBuilder Custom Validation Visual Cues for Users Modules What is an Angular Module? Adding Components, Pipes and Services to a Module Creating a Feature Module Directive Duplications Lazy Loading a Module Lazy Loading and the Dependency Injection Tree Shared Modules and Dependency Injection 本文档使用 书栈(BookStack.CN) 构建 - 5 -
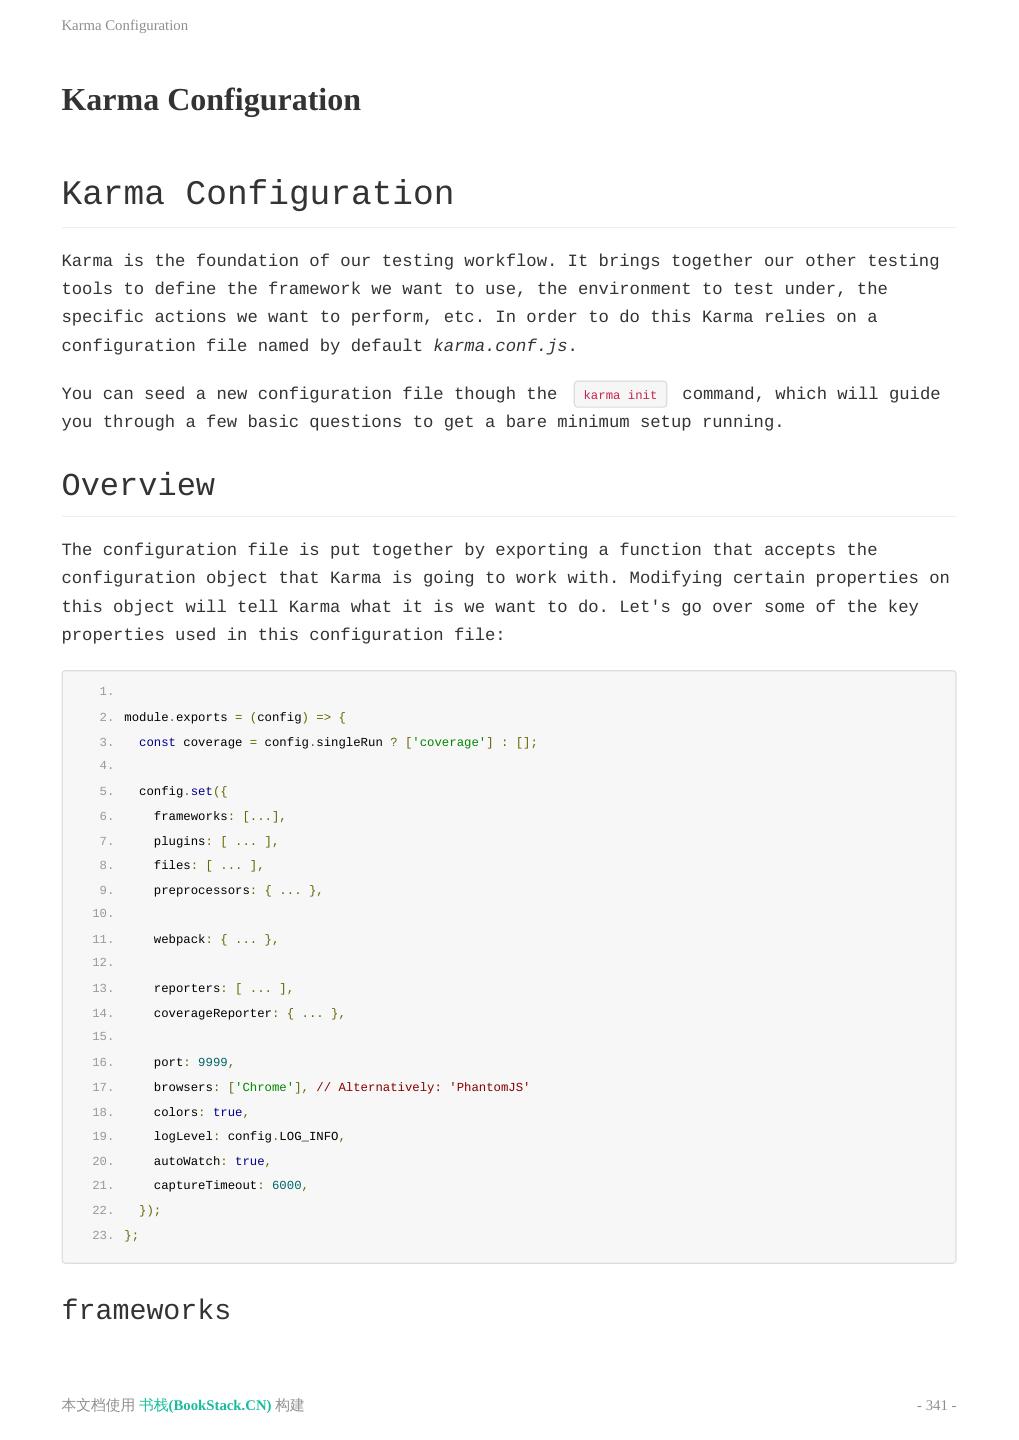
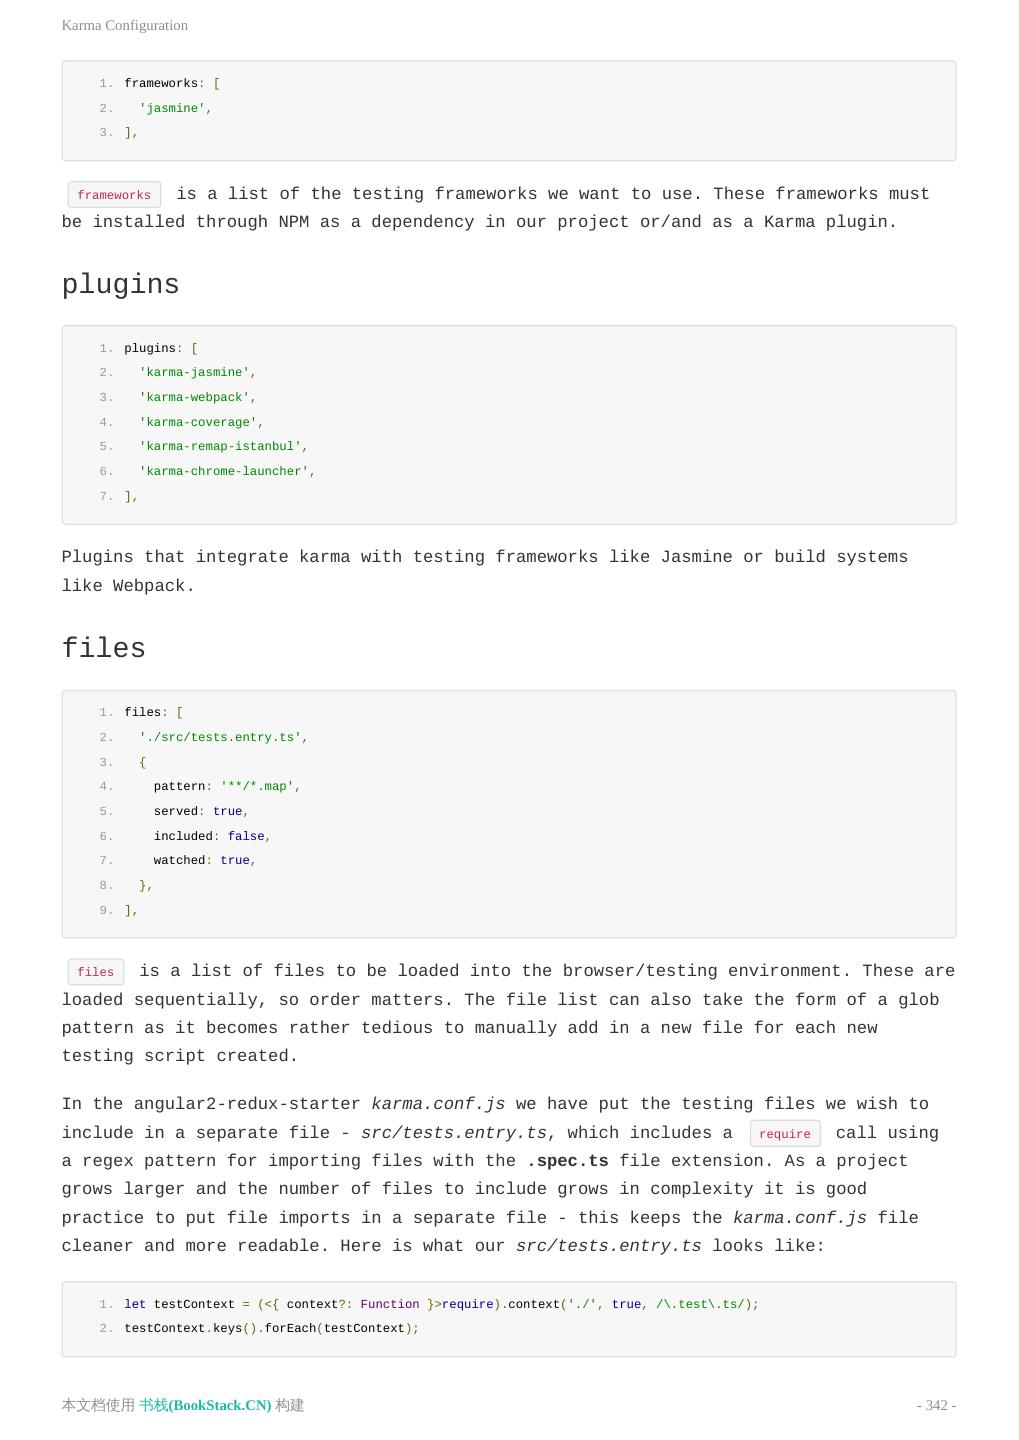
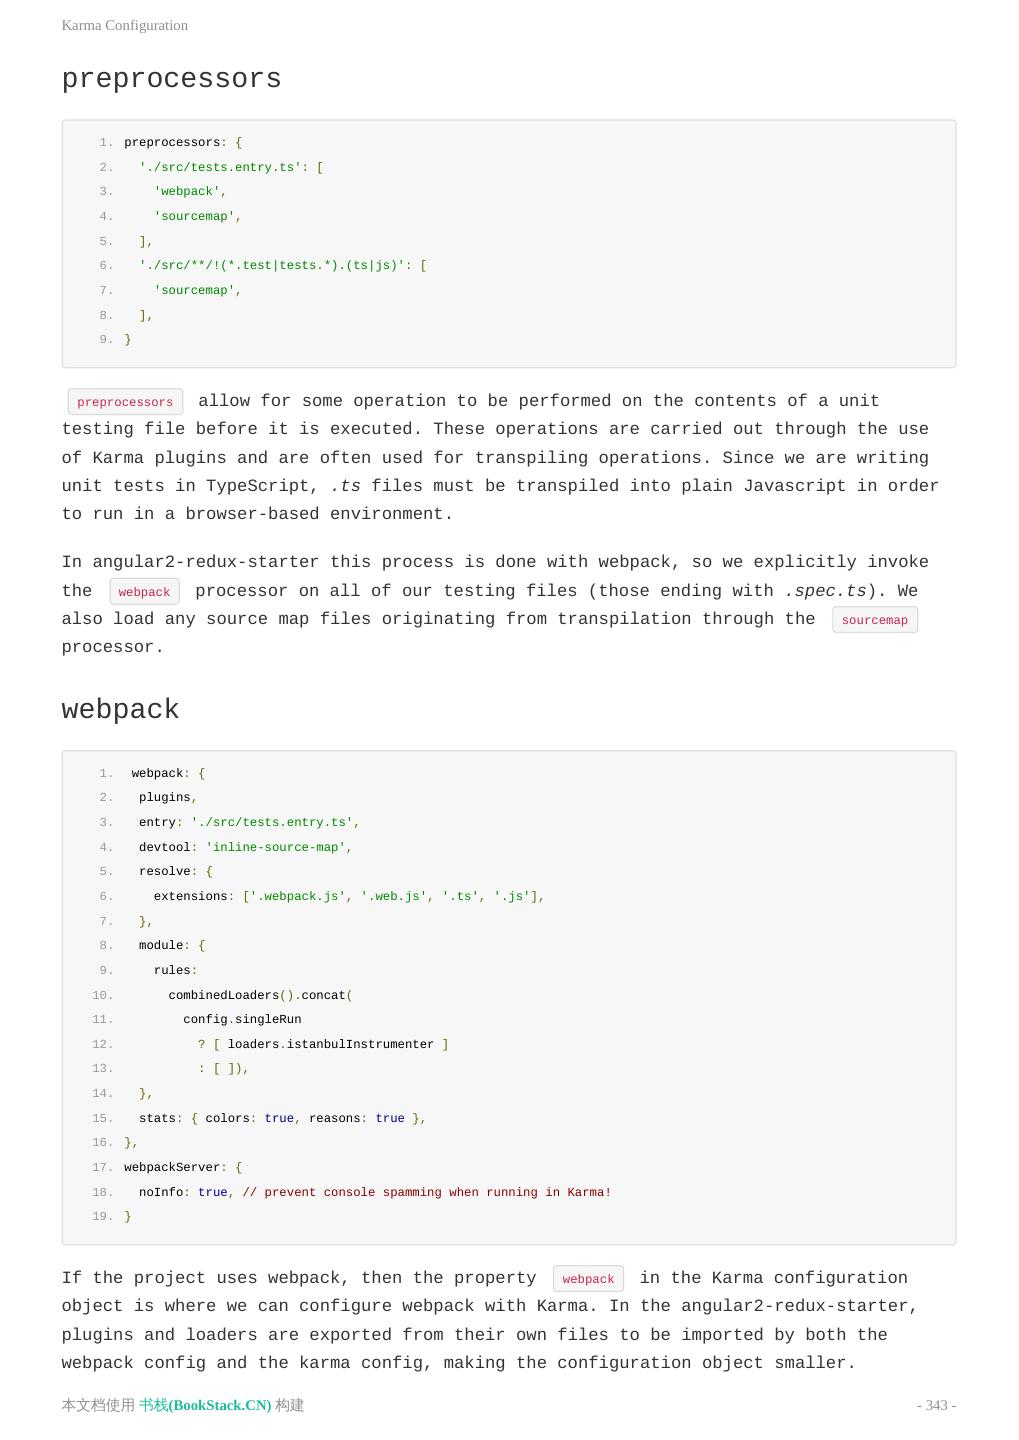
6 . Sharing the Same Dependency Injection Tree Routing Why Routing? Configuring Routes Redirecting the Router to Another Route Defining Links Between Routes Dynamically Adding Route Components Using Route Parameters Defining Child Routes Controlling Access to or from a Route Passing Optional Parameters to a Route Using Auxiliary Routes State Management Redux and @ngrx Adding @ngrx to your Project Defining your Main Application State Example Application Reading your Application State using Selectors Actions Modifying your Application State by Dispatching Actions Reducers and Pure Functions Reducers as State Management Creating your Application's Root Reducer Configuring your Application Implementing Components Component Architecture Side Effects Getting More From Redux and @ngrx TDD Testing The Testing Toolchain Test Setup Filename Conventions Karma Configuration TestBed Configuration (Optional) Typings Executing Test Scripts Simple Test Using Chai 本文档使用 书栈(BookStack.CN) 构建 - 6 -
7 . Testing Components Verifying Methods and Properties Injecting Dependencies and DOM Changes Overriding Components for Testing Testing Asynchronous Actions Refactoring Hard-to-Test Code Testing Services Testing Strategies for Services Testing HTTP Requests Using MockBackend Alternative Mocking Strategy Testing JSONP and XHR Back-Ends Executing Tests Asynchronously Testing Redux Testing Simple Actions Testing Complex Actions Testing Reducers Afterthoughts Migrating Angular 1.x Projects to Angular 2 Migration Prep Upgrading To Angular 1.3+ Style Using Webpack Migrating To TypeScript Choosing an Upgrade Path Avoiding Total Conversion Using ng-metadata (Angular 1.x Using 2 Style) Bootstrapping ng-metadata Components and Services Using ng-upgrade (Angular 1.x Coexisting With Angular 2) Order of Operations Replacing Services with TypeScript Classes Bootstrapping ng-upgrade Downgrading Components Upgrading Components Projecting Angular 1 Content into Angular 2 Components Transcluding Angular 2 Components into Angular 1 Directives Injecting Across Frameworks Project Setup 本文档使用 书栈(BookStack.CN) 构建 - 7 -
8 . Webpack Installation and Usage Loaders Plugins Summary NPM Scripts Integration Angular CLI Setup Creating a New App Serving the App Creating Components Creating Routes Creating Other Things Testing Linting CLI Command Overview Adding Third Party Libraries Integrating an Existing App Accessibility in Angular Why Make my Application Accessible? Key Concerns of Accessible Web Applications Semantic Markup Keyboard Accessibility Visual Assistance Testing for Accessibility Is my Application Readable? Is my Application Predictable? Is my Application Navigable? Testing with Screen Readers Additional Resources Internationalization in Angular What is the process like and how is involved? Marking text in our templates Extracting translation text using the Angular CLI How to import the completed translation files Using the AoT Compiler Using the JiT Compiler Glossary 本文档使用 书栈(BookStack.CN) 构建 - 8 -
9 . Further Reading And Reference 本文档使用 书栈(BookStack.CN) 构建 - 9 -
10 .致谢 致谢 当前文档 《[英文]Rangle's Angular2 Training Book》 由 进击的皇虫 使用 书栈(BookStack.CN) 进行构建,生成于 2018-07-18。 书栈(BookStack.CN) 仅提供文档编写、整理、归类等功能,以及对文档内容的生成和导出工具。 文档内容由网友们编写和整理,书栈(BookStack.CN) 难以确认文档内容知识点是否错漏。如果您在阅读文档 获取知识的时候,发现文档内容有不恰当的地方,请向我们反馈,让我们共同携手,将知识准确、高效且有效地传递 给每一个人。 同时,如果您在日常工作、生活和学习中遇到有价值有营养的知识文档,欢迎分享到 书栈(BookStack.CN) , 为知识的传承献上您的一份力量! 如果当前文档生成时间太久,请到 书栈(BookStack.CN) 获取最新的文档,以跟上知识更新换代的步伐。 文档地址:http://www.bookstack.cn/books/angular-2-training-book 书栈官网:http://www.bookstack.cn 书栈开源:https://github.com/TruthHun 分享,让知识传承更久远! 感谢知识的创造者,感谢知识的分享者,也感谢每一位阅读到此处的读者,因为我们 都将成为知识的传承者。 本文档使用 书栈(BookStack.CN) 构建 - 10 -
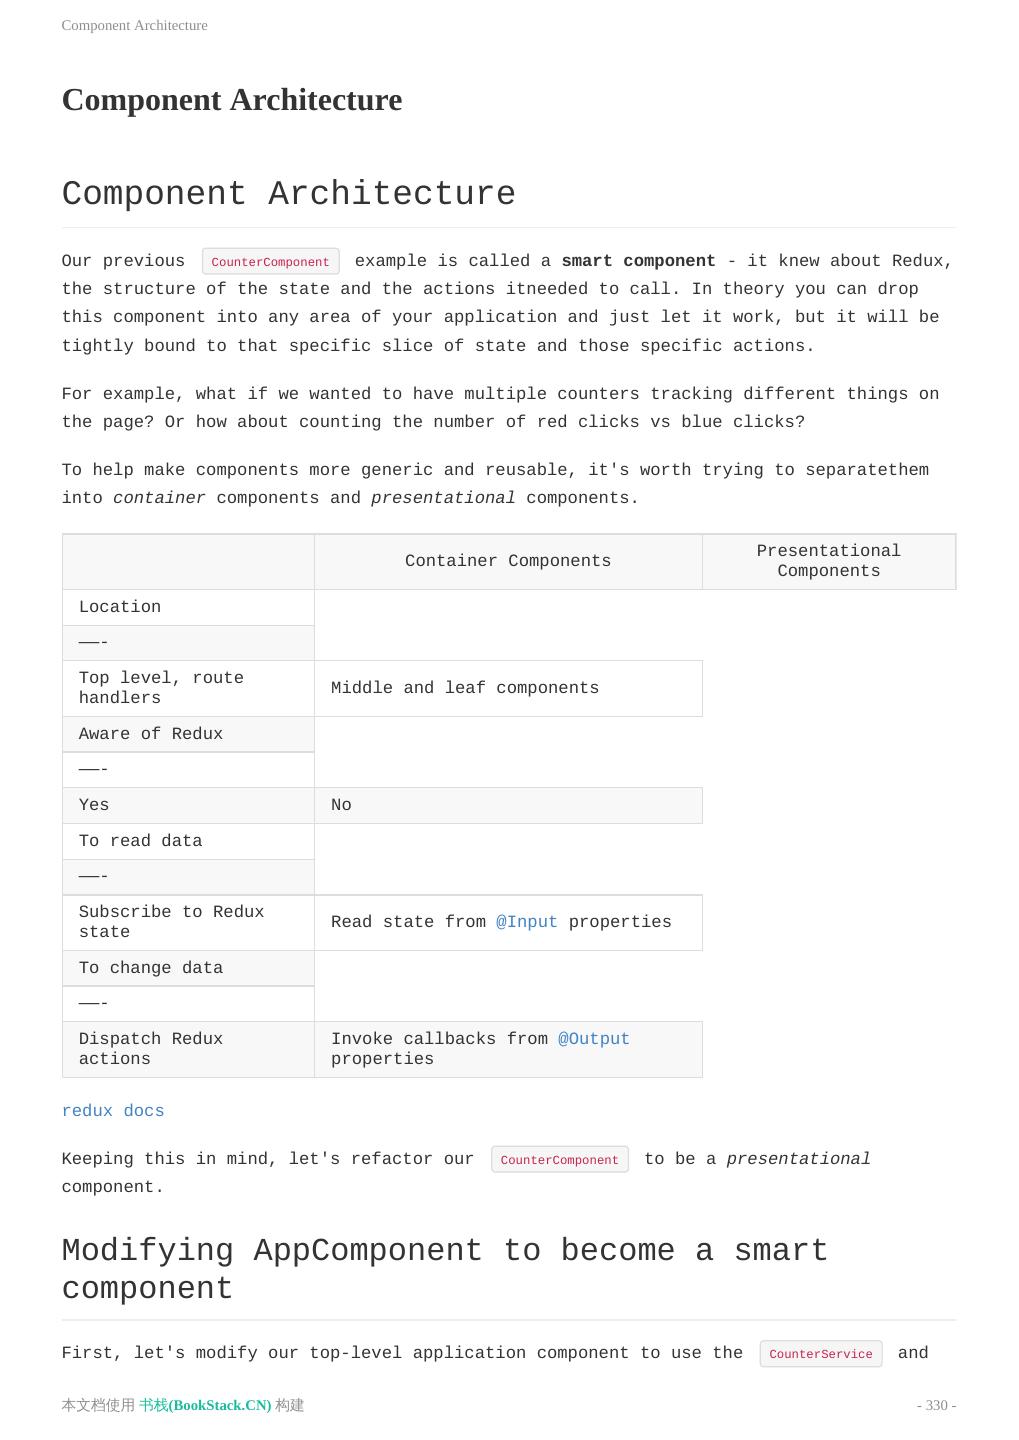
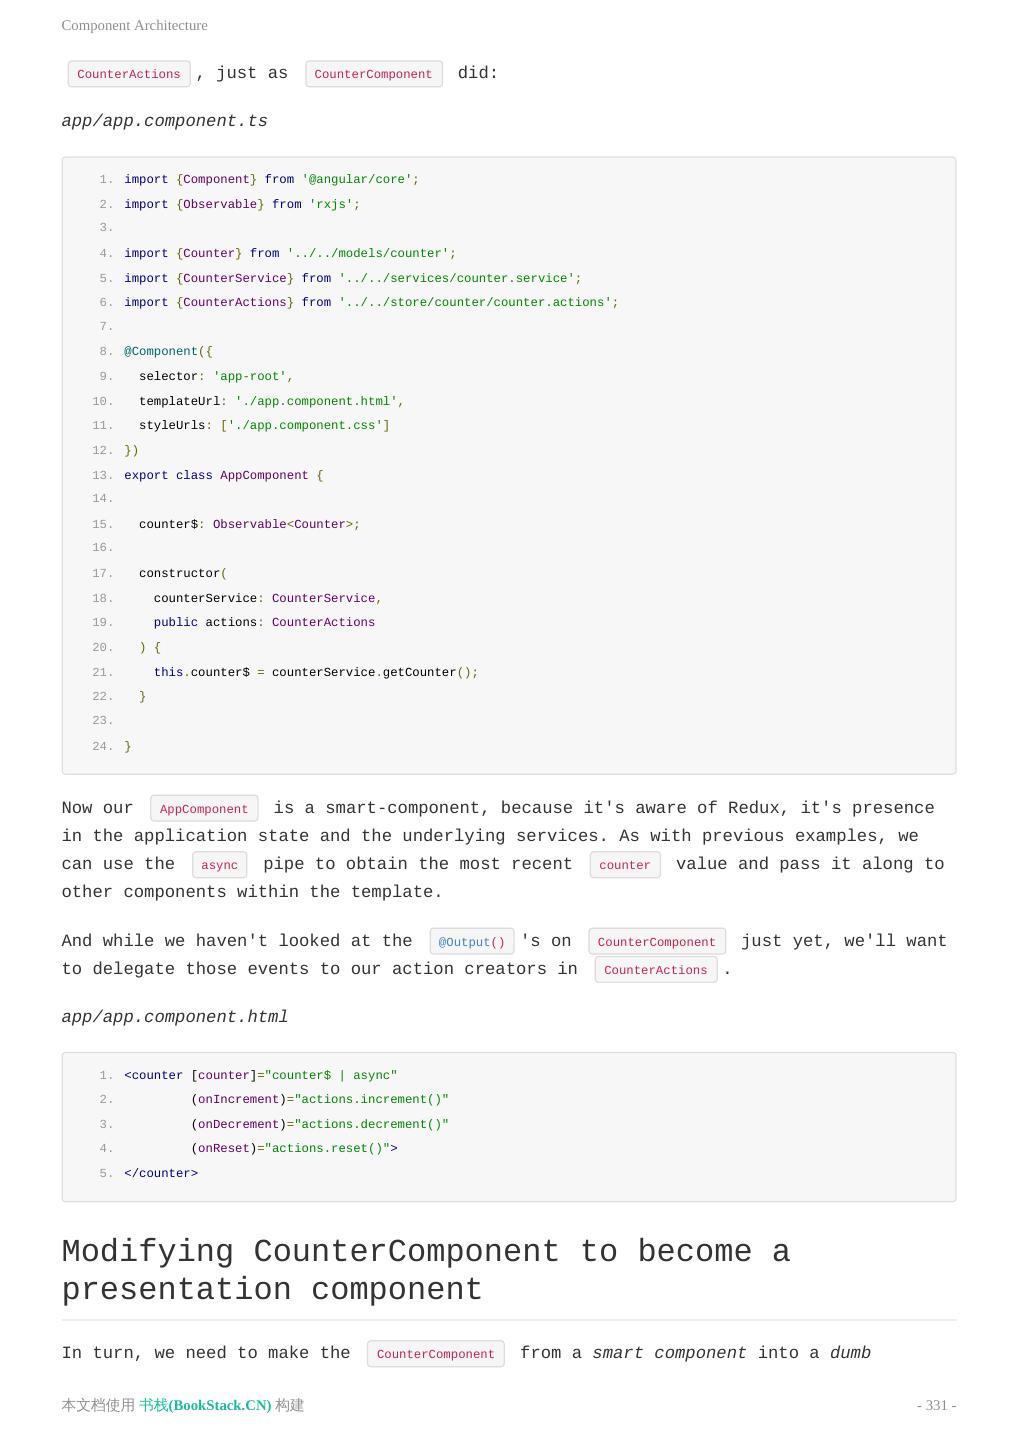
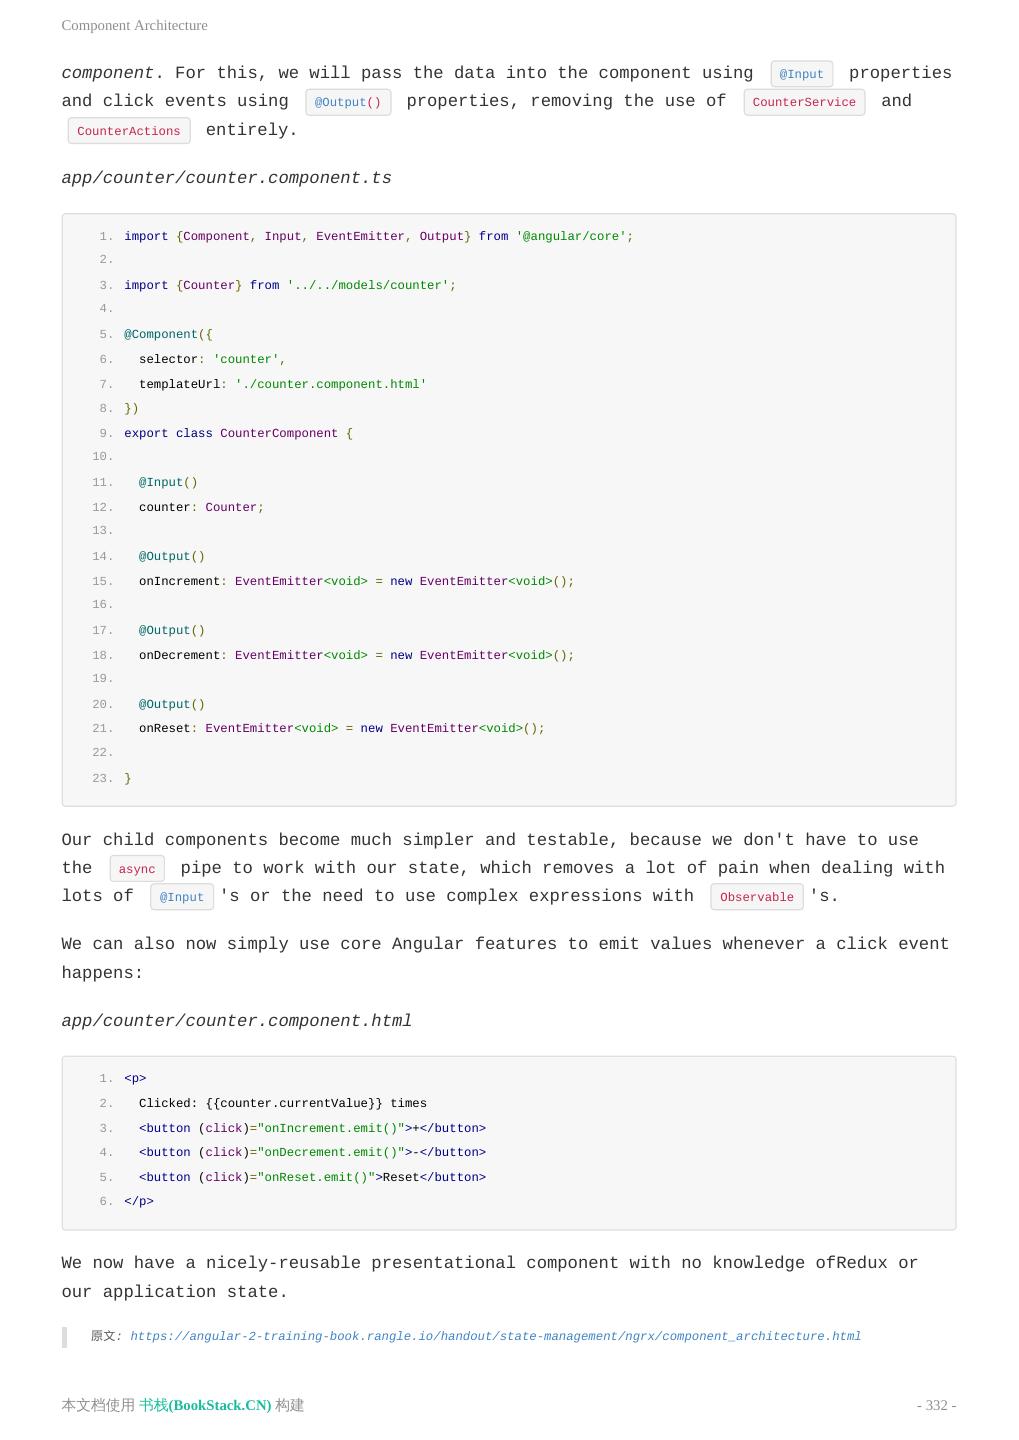
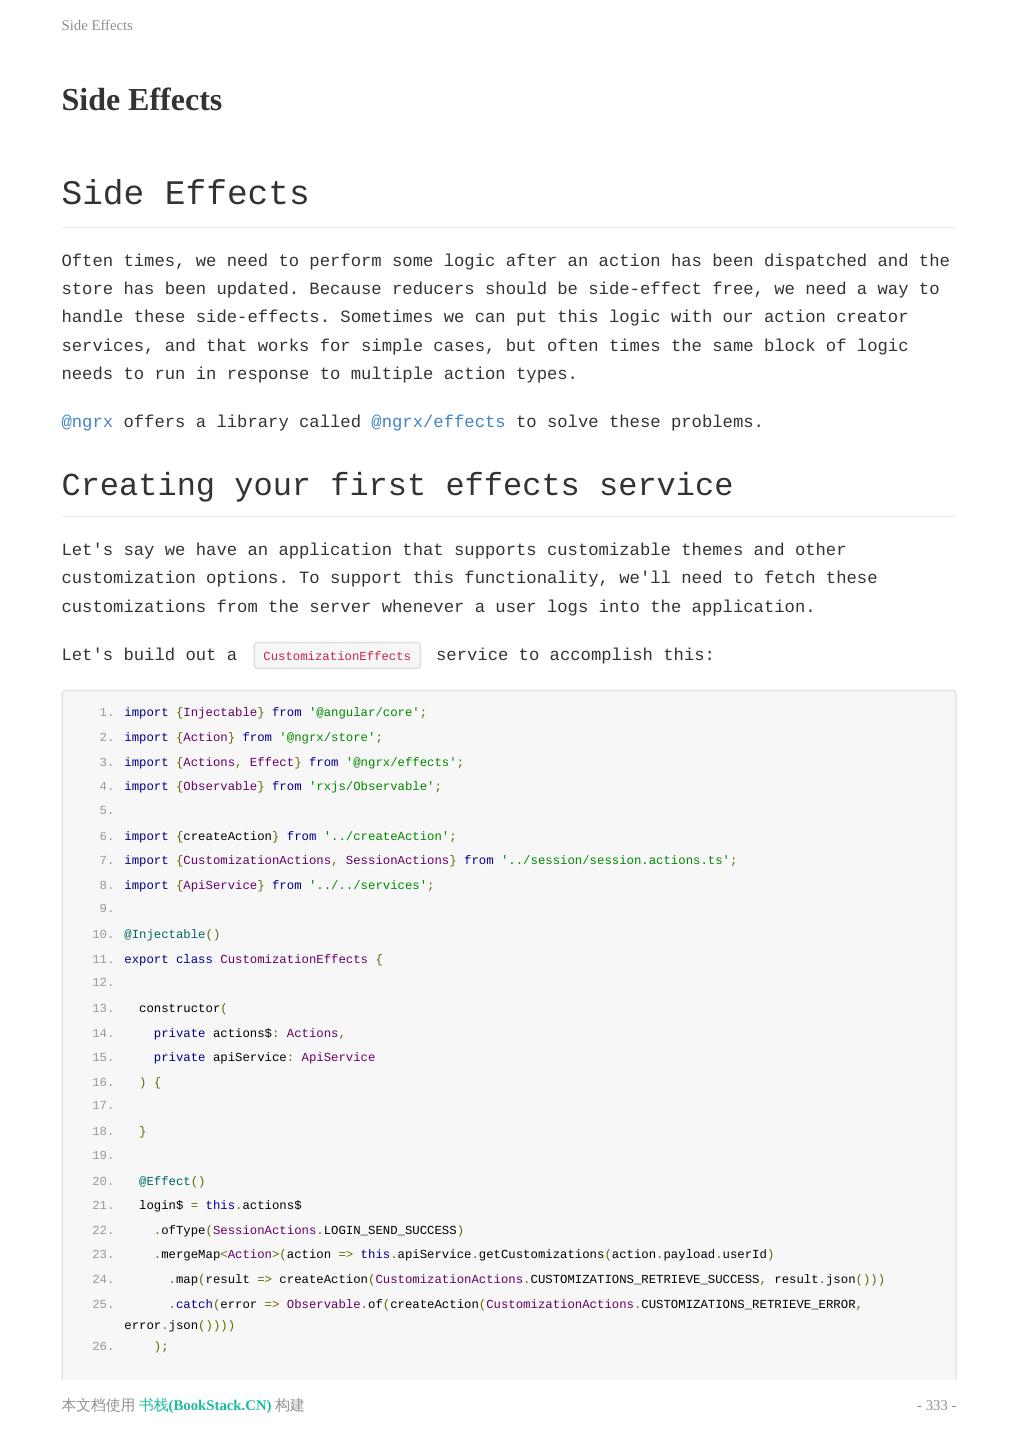
11 .Introduction Introduction Rangle's Angular Training Book Over the last three and a half years, Angular has become the leading opensource JavaScript application framework for hundreds of thousands of programmersaround the world. The "1.x" version of Angular has been widely used and becameextremely popular for complex applications. The new Angular 2.x has also announced its final release version. About Rangle’s Angular Training Book We developed this book to be used as course material forRangle's Angular training, but manypeople have found it to be useful for learning Angular ontheir own. This book will cover the most important Angular topics, fromgetting started with the Angular toolchain to writing Angular applicationsin a scalable and maintainable manner. If you find this material useful, you should also consider registering for oneof Rangle’s training courses, whichfacilitate hands-on learning and are a great fit for companies that need totransition their technology to Angular, or individuals looking to upgradetheir skills. 本文档使用 书栈(BookStack.CN) 构建 - 11 -
12 .Introduction Rangle.io also has an Angular 1.x book which isgeared towards writing Angular 1.x applications in an Angular 2 style. We hopeyou enjoy this book. We welcome your feedback in theDiscussion Area. 原文: https://angular-2-training-book.rangle.io/ 本文档使用 书栈(BookStack.CN) 构建 - 12 -
13 .License License License Creative CommonsAttribution-ShareAlike 4.0 International (CC BY-SA 4.0) This is a human-readable summary of (and not a substitute for) thelicense. You are free to: Share — copy and redistribute the material in any medium or format Adapt — remix, transform and build upon the materialfor any purpose, even commercially. The licensor cannot revoke these freedoms as long as you follow the license terms. Under the following terms: Attribution — You must give appropriate credit, provide a link to the license, and indicate if changes were made. You may do so in any reasonable manner, but not in any way that suggests the licensor endorses you or your use. ShareAlike — If you remix, transform or build upon the material, you must distribute your contributions under the same license as the original. No additional restrictions — You may not apply legal terms or technological measures that legally restrict others from doing anything the license permits. 原文: https://angular-2-training-book.rangle.io/handout/license.html 本文档使用 书栈(BookStack.CN) 构建 - 13 -
14 .Why Angular? Why Angular? Why Angular? There are many front-end JavaScript frameworks to choose from today, each with its own set of trade-offs.Many people were happy with the functionality that Angular 1.x afforded them.Angular 2 improved on that functionality and made it faster, more scalable and more modern.Organizations that found value in Angular 1.x will find more value in Angular 2. Angular's Advantages The first release of Angular provided programmers with the tools to develop and architect large scale JavaScript applications, but its age has revealed a number of flaws and sharp edges.Angular 2 was built on five years of community feedback. Angular 2 Is Easier The new Angular codebase is more modern, more capable and easier for new programmers to learn than Angular 1.x,while also being easier for project veterans to work with. With Angular 1, programmers had to understand the differences between Controllers, Services, Factories, Providers and other concepts that could be confusing, especially for new programmers. Angular 2 is a more streamlined framework that allows programmers to focus on simply building JavaScript classes.Views and controllers are replaced with components, which can be described as a refined version of directives.Even experienced Angular programmers are not always aware of all the capabilities of Angular 1.x directives.Angular 2 components are considerably easier to read, and their API features less jargon than Angular 1.x's directives.Additionally, to help ease the transition to Angular 2, the Angular team has added a .component method to Angular 1.5, which has been back-ported by community member Todd Motto to v1.3. TypeScript Angular 2 was written in TypeScript, a superset of JavaScript that implements many new ES2016+ features. By focusing on making the framework easier for computers to process, Angular 2 allows for a much richer development ecosystem.Programmers using sophisticated text editors (or IDEs) will notice dramatic improvements with auto-completion and type suggestions.These improvements help to reduce the cognitive burden of learning Angular 2.Fortunately for traditional ES5 JavaScript programmers this does not mean that 本文档使用 书栈(BookStack.CN) 构建 - 14 -
15 .Why Angular? development must be done in TypeScript or ES2015: programmers can still write vanilla JavaScript that runs without transpilation. Familiarity Despite being a complete rewrite, Angular 2 has retained many of its core concepts and conventions with Angular 1.x,e.g. a streamlined, "native JS" implementation of dependency injection.This means that programmers who are already proficient with Angular will have an easier time migrating to Angular 2 than another library like React or framework like Ember. Performance and Mobile Angular 2 was designed for mobile from the ground up.Aside from limited processing power, mobile devices have other features and limitations that separate them from traditional computers.Touch interfaces, limited screen real estate and mobile hardware have all been considered in Angular 2. Desktop computers will also see dramatic improvements in performance and responsiveness. Angular 2, like React and other modern frameworks, can leverage performance gains by rendering HTML on the server or even in a web worker.Depending on application/site design this isomorphic rendering can make a user's experience feel even more instantaneous. The quest for performance does not end with pre-rendering.Angular 2 makes itself portable to native mobile by integrating with NativeScript, an open source library that bridges JavaScript and mobile.Additionally, the Ionic team is working on an Angular 2 version of their product, providing another way to leverage native device features with Angular. Project Architecture and Maintenance The first iteration of Angular provided web programmers with a highly flexible framework for developing applications.This was a dramatic shift for many web programmers, and while that framework was helpful,it became evident that it was often too flexible.Over time, best practices evolved, and a community-driven structure was endorsed. Angular 1.x tried to work around various browser limitations related to JavaScript.This was done by introducing a module system that made use of dependency injection. This system was novel, but unfortunately had issues with tooling, notably minification and static analysis. Angular 2.x makes use of the ES2015 module system, and modern packaging tools like webpack or SystemJS.Modules are far less coupled to the "Angular way", and it's easier 本文档使用 书栈(BookStack.CN) 构建 - 15 -
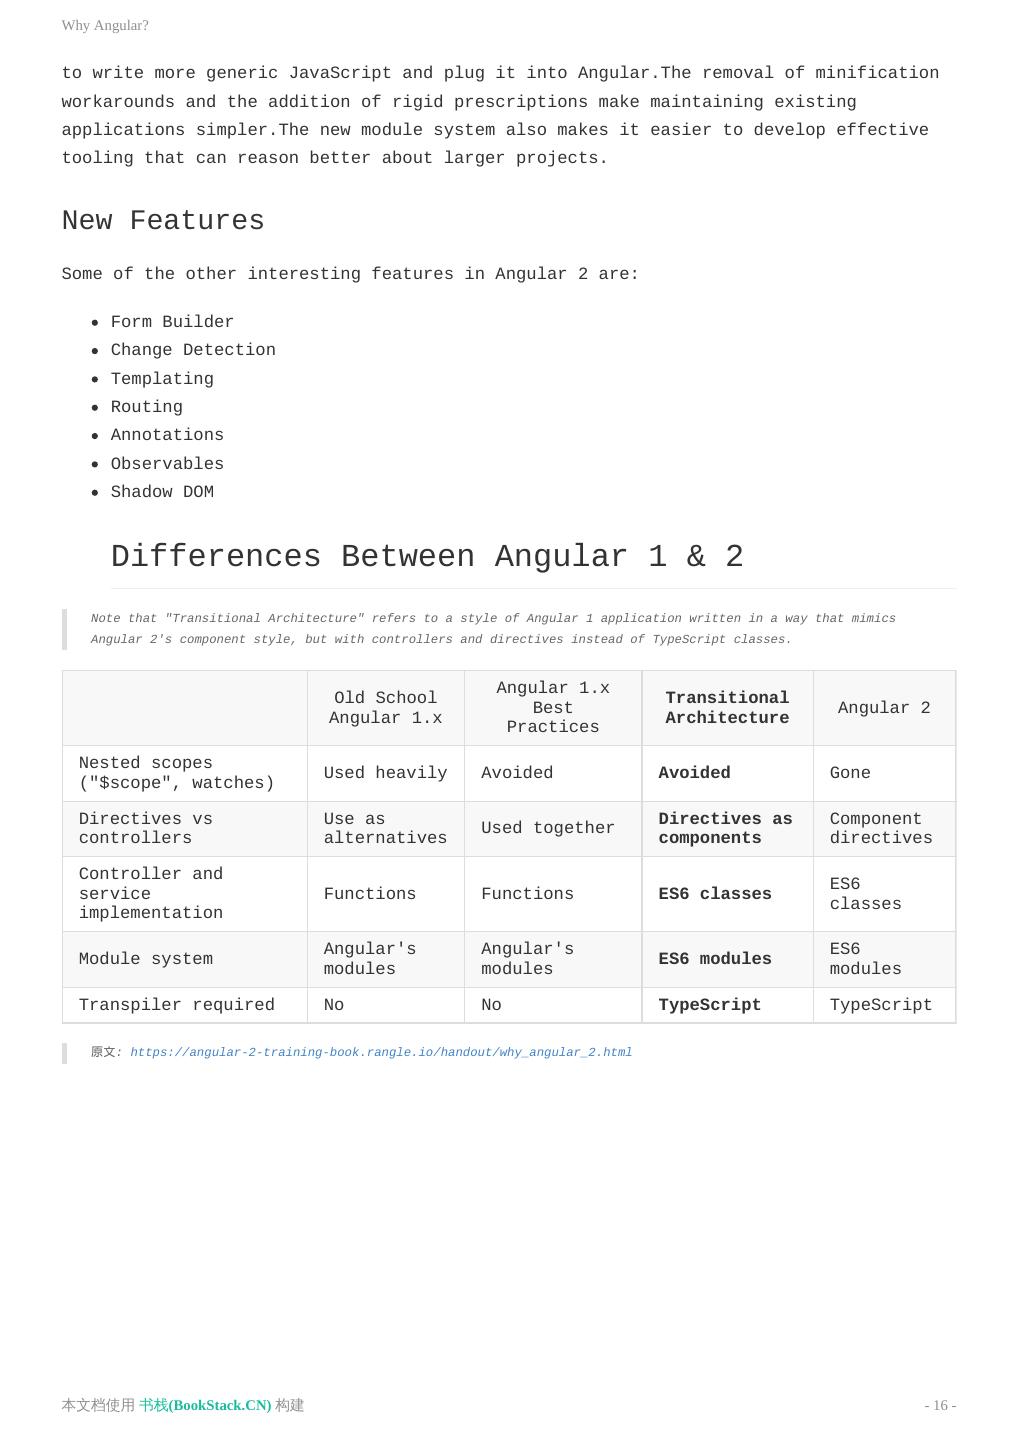
16 .Why Angular? to write more generic JavaScript and plug it into Angular.The removal of minification workarounds and the addition of rigid prescriptions make maintaining existing applications simpler.The new module system also makes it easier to develop effective tooling that can reason better about larger projects. New Features Some of the other interesting features in Angular 2 are: Form Builder Change Detection Templating Routing Annotations Observables Shadow DOM Differences Between Angular 1 & 2 Note that "Transitional Architecture" refers to a style of Angular 1 application written in a way that mimics Angular 2's component style, but with controllers and directives instead of TypeScript classes. Angular 1.x Old School Transitional Best Angular 2 Angular 1.x Architecture Practices Nested scopes Used heavily Avoided Avoided Gone ("$scope", watches) Directives vs Use as Directives as Component Used together controllers alternatives components directives Controller and ES6 service Functions Functions ES6 classes classes implementation Angular's Angular's ES6 Module system ES6 modules modules modules modules Transpiler required No No TypeScript TypeScript 原文: https://angular-2-training-book.rangle.io/handout/why_angular_2.html 本文档使用 书栈(BookStack.CN) 构建 - 16 -
17 .The Architect's Guide to Angular The Architect's Guide to Angular Software Architecture Using Angular Angular has grown steadily more popular since itsrelease, and agrowingnumberofbooks are nowavailable to teach programmers how to use it. But building anapplication involves a lot more than just writing code: in order to beperformant and maintainable, the application must have someover-arching architectural plan that ties its pieces together andgives direction to future growth. To help with this, Rangle has started to assemble aguide to software architecture using Angular. How should sets ofcomponents be organized so that they can easily be tested and re-used?How can Angular be combined with tools like Redux to simplify statemanagement in an asynchronous, event-driven world? How can we designtoday to make server-side rendering less painful to add tomorrow (andshould we be doing SSR at all)? Sooner or later, every growingapplication has to wrestle with these issues; our aim is to distillexpert knowledge so that people can make the right decisions early on. The first chapter of this new guide, based on work by DanielFigueiredo and Renee Vrantsidis, is now available. We would begrateful for feedback on its content and format, and for suggestionsabout other topics the community would like to see covered. And ifyou are interested in contributing, please get intouch: as always, we are smarter together than anyone of us is alone. Be the first to know when we release the next chapter of the Architect’s Guide to Angular. 原文: https://angular-2-training-book.rangle.io/handout/architect/ 本文档使用 书栈(BookStack.CN) 构建 - 17 -
18 .Creating Functional Forms Creating Functional Forms Creating Functional Forms Daniel Figueiredo and Renee Vrantsidis The architecture of a software system is a description ofhow to decompose it into pieces,how those pieces interact,and how that decomposition enables and constrains further development.In this chapter,we will begin our exploration of the architecture of JavaScript applicationsby looking at how to use ideas borrowed from pure functional programmingto simplify one of the most common tasks in web development:form handling.At first glance these two topics have nothing to do with each other,but paradoxically,acting as if the state of our system cannot be changedactually makes its changes easier to manage. The Problem You have probably built web applications that use forms.They are easy enough to manage if you only have a few,or a few dozen,but manual approaches fall apart by the time you havehundreds of distinct forms,each of which can update the application's state in different ways. Angular provides some good tools for building forms,but these are not enough by themselves in very large programs.In particular, NgForm leaves state management entirely in the developer's hands,which quickly results in unmanageable client-side complexity:a modern single-page application (SPA) may have to keep track ofhundreds of pieces of information,any of which may need to be updated based on the user's actionsand kept in sync with permanent storage on the server. As if that wasn't complicated enough,many of these interactions have to be done asynchronouslyin order to keep the user's FQ (frustration quotient) down.If,for example,a web page locks up for half a second every time the user types a single characterbecause it's fetching possible auto-completes from the server,the user will quickly take her business somewhere else. Our problem is therefore this: How should we manage client-side state in an asynchronous web application that uses forms? Our solution is: Use Redux to represent state as a sequence of snapshots,each of which is created in response to a single action. Redux in a Hurry 本文档使用 书栈(BookStack.CN) 构建 - 18 -
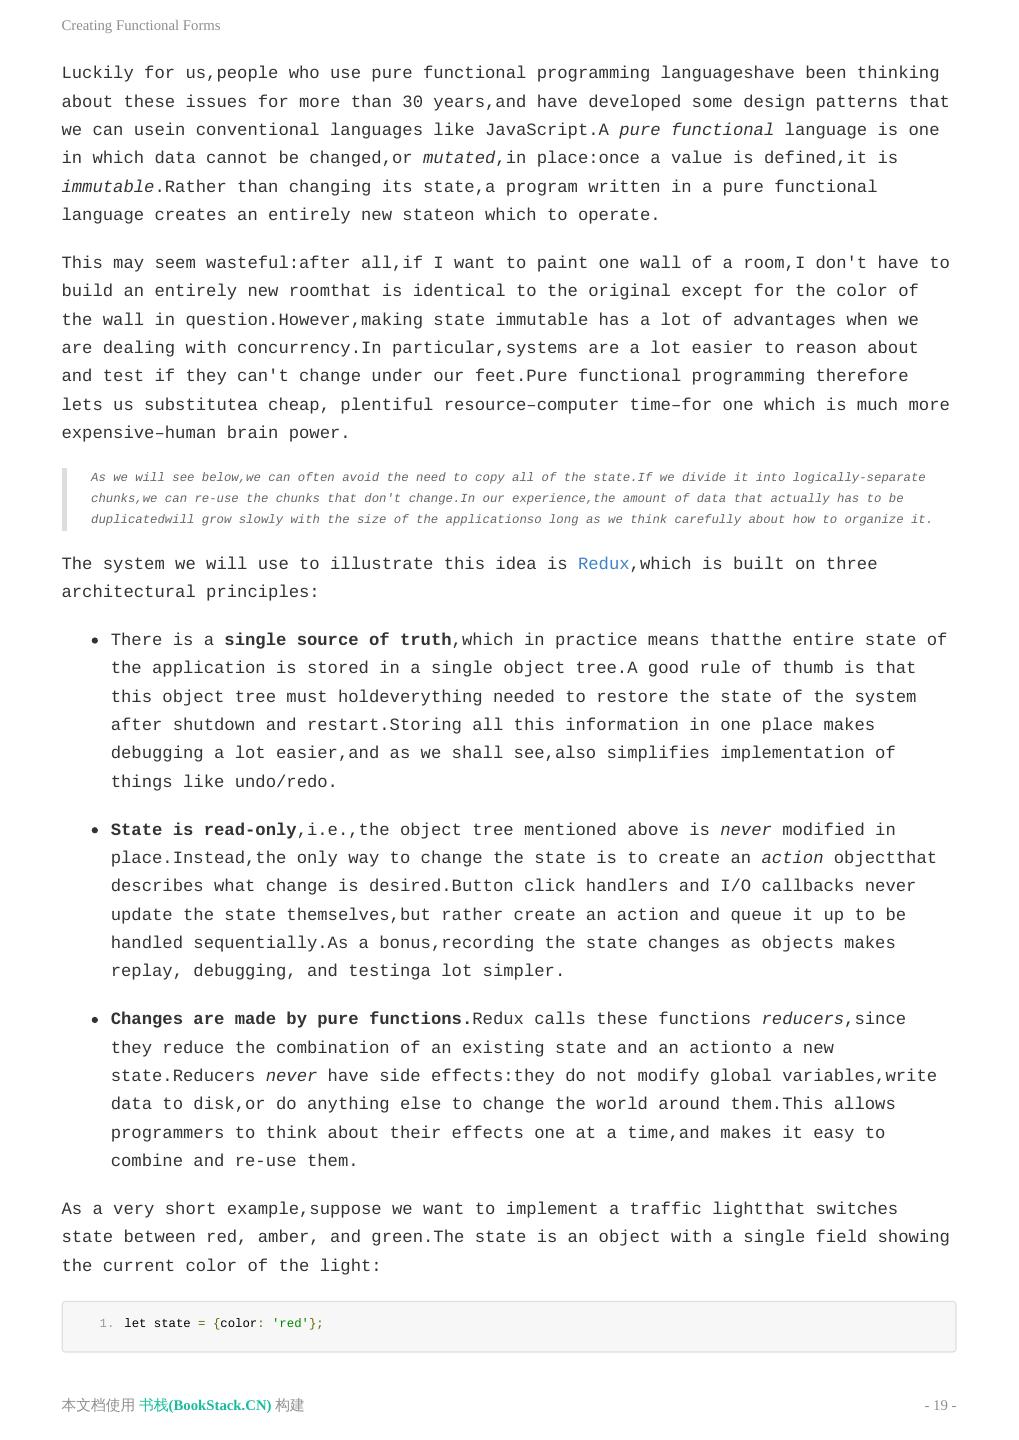
19 .Creating Functional Forms Luckily for us,people who use pure functional programming languageshave been thinking about these issues for more than 30 years,and have developed some design patterns that we can usein conventional languages like JavaScript.A pure functional language is one in which data cannot be changed,or mutated,in place:once a value is defined,it is immutable.Rather than changing its state,a program written in a pure functional language creates an entirely new stateon which to operate. This may seem wasteful:after all,if I want to paint one wall of a room,I don't have to build an entirely new roomthat is identical to the original except for the color of the wall in question.However,making state immutable has a lot of advantages when we are dealing with concurrency.In particular,systems are a lot easier to reason about and test if they can't change under our feet.Pure functional programming therefore lets us substitutea cheap, plentiful resource–computer time–for one which is much more expensive–human brain power. As we will see below,we can often avoid the need to copy all of the state.If we divide it into logically-separate chunks,we can re-use the chunks that don't change.In our experience,the amount of data that actually has to be duplicatedwill grow slowly with the size of the applicationso long as we think carefully about how to organize it. The system we will use to illustrate this idea is Redux,which is built on three architectural principles: There is a single source of truth,which in practice means thatthe entire state of the application is stored in a single object tree.A good rule of thumb is that this object tree must holdeverything needed to restore the state of the system after shutdown and restart.Storing all this information in one place makes debugging a lot easier,and as we shall see,also simplifies implementation of things like undo/redo. State is read-only,i.e.,the object tree mentioned above is never modified in place.Instead,the only way to change the state is to create an action objectthat describes what change is desired.Button click handlers and I/O callbacks never update the state themselves,but rather create an action and queue it up to be handled sequentially.As a bonus,recording the state changes as objects makes replay, debugging, and testinga lot simpler. Changes are made by pure functions.Redux calls these functions reducers,since they reduce the combination of an existing state and an actionto a new state.Reducers never have side effects:they do not modify global variables,write data to disk,or do anything else to change the world around them.This allows programmers to think about their effects one at a time,and makes it easy to combine and re-use them. As a very short example,suppose we want to implement a traffic lightthat switches state between red, amber, and green.The state is an object with a single field showing the current color of the light: 1. let state = {color: 'red'}; 本文档使用 书栈(BookStack.CN) 构建 - 19 -
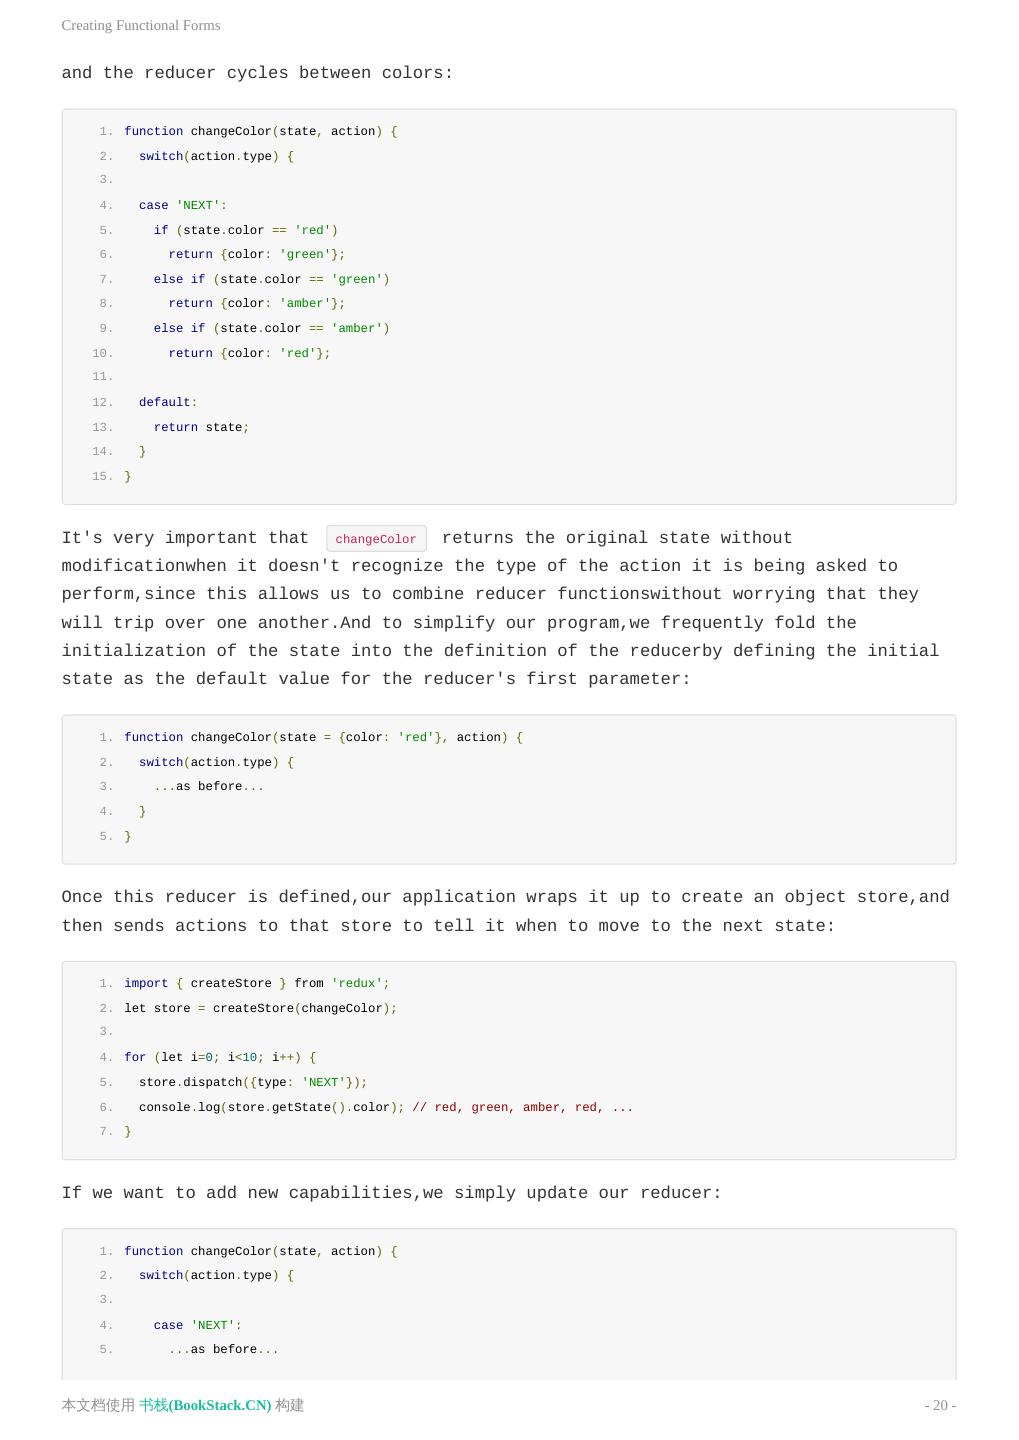
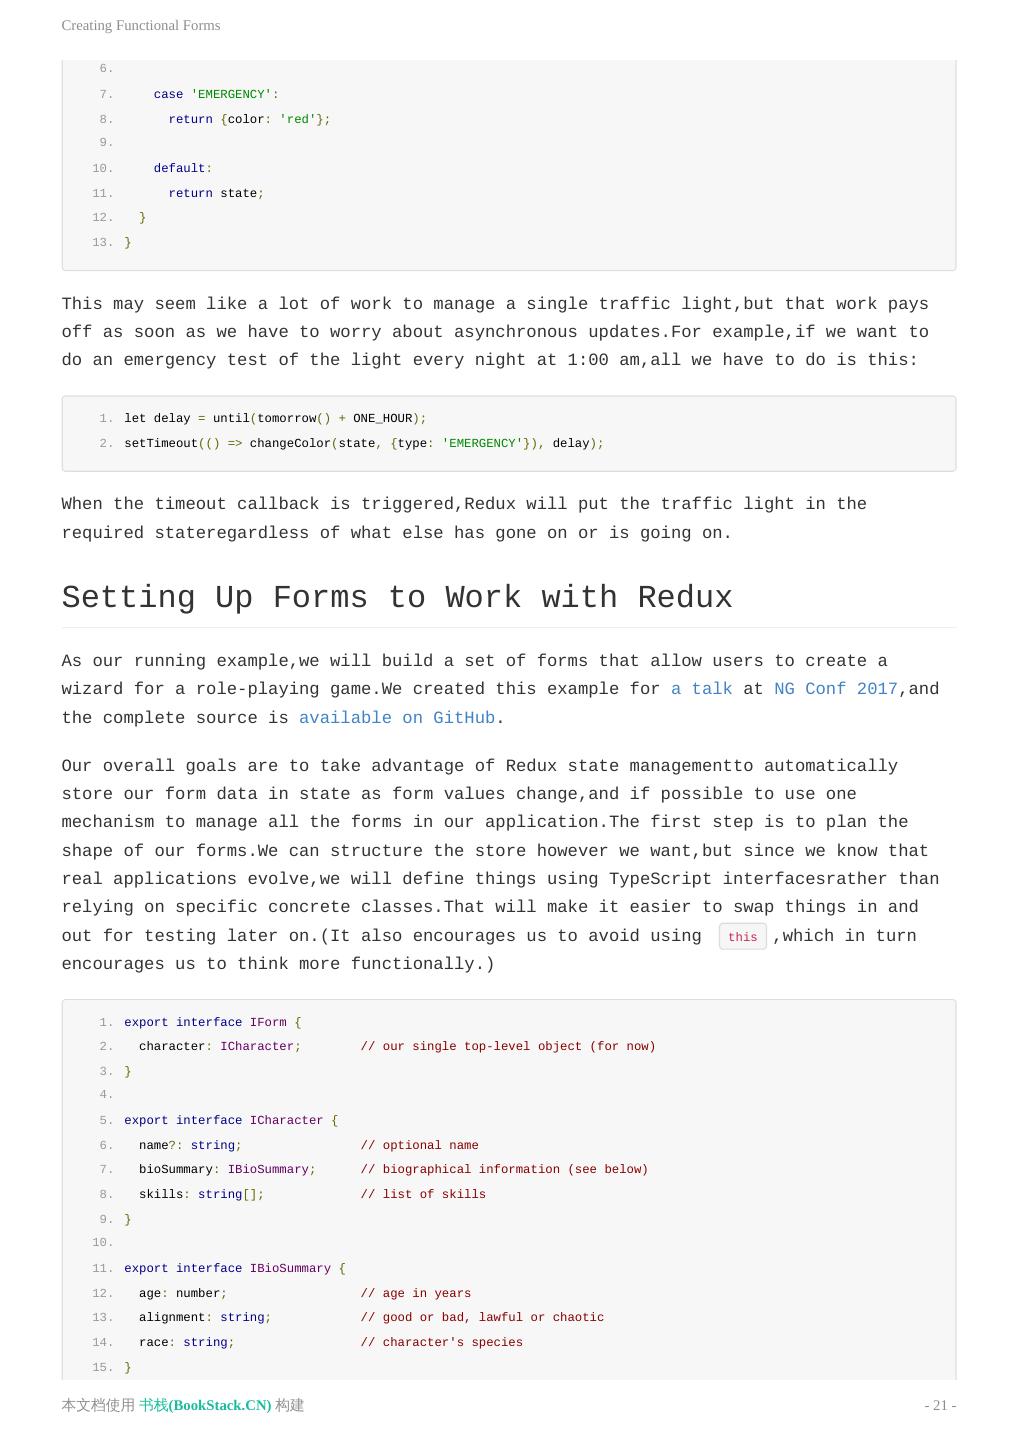
20 .Creating Functional Forms and the reducer cycles between colors: 1. function changeColor(state, action) { 2. switch(action.type) { 3. 4. case 'NEXT': 5. if (state.color == 'red') 6. return {color: 'green'}; 7. else if (state.color == 'green') 8. return {color: 'amber'}; 9. else if (state.color == 'amber') 10. return {color: 'red'}; 11. 12. default: 13. return state; 14. } 15. } It's very important that changeColor returns the original state without modificationwhen it doesn't recognize the type of the action it is being asked to perform,since this allows us to combine reducer functionswithout worrying that they will trip over one another.And to simplify our program,we frequently fold the initialization of the state into the definition of the reducerby defining the initial state as the default value for the reducer's first parameter: 1. function changeColor(state = {color: 'red'}, action) { 2. switch(action.type) { 3. ...as before... 4. } 5. } Once this reducer is defined,our application wraps it up to create an object store,and then sends actions to that store to tell it when to move to the next state: 1. import { createStore } from 'redux'; 2. let store = createStore(changeColor); 3. 4. for (let i=0; i<10; i++) { 5. store.dispatch({type: 'NEXT'}); 6. console.log(store.getState().color); // red, green, amber, red, ... 7. } If we want to add new capabilities,we simply update our reducer: 1. function changeColor(state, action) { 2. switch(action.type) { 3. 4. case 'NEXT': 5. ...as before... 本文档使用 书栈(BookStack.CN) 构建 - 20 -
21 .Creating Functional Forms 6. 7. case 'EMERGENCY': 8. return {color: 'red'}; 9. 10. default: 11. return state; 12. } 13. } This may seem like a lot of work to manage a single traffic light,but that work pays off as soon as we have to worry about asynchronous updates.For example,if we want to do an emergency test of the light every night at 1:00 am,all we have to do is this: 1. let delay = until(tomorrow() + ONE_HOUR); 2. setTimeout(() => changeColor(state, {type: 'EMERGENCY'}), delay); When the timeout callback is triggered,Redux will put the traffic light in the required stateregardless of what else has gone on or is going on. Setting Up Forms to Work with Redux As our running example,we will build a set of forms that allow users to create a wizard for a role-playing game.We created this example for a talk at NG Conf 2017,and the complete source is available on GitHub. Our overall goals are to take advantage of Redux state managementto automatically store our form data in state as form values change,and if possible to use one mechanism to manage all the forms in our application.The first step is to plan the shape of our forms.We can structure the store however we want,but since we know that real applications evolve,we will define things using TypeScript interfacesrather than relying on specific concrete classes.That will make it easier to swap things in and out for testing later on.(It also encourages us to avoid using this ,which in turn encourages us to think more functionally.) 1. export interface IForm { 2. character: ICharacter; // our single top-level object (for now) 3. } 4. 5. export interface ICharacter { 6. name?: string; // optional name 7. bioSummary: IBioSummary; // biographical information (see below) 8. skills: string[]; // list of skills 9. } 10. 11. export interface IBioSummary { 12. age: number; // age in years 13. alignment: string; // good or bad, lawful or chaotic 14. race: string; // character's species 15. } 本文档使用 书栈(BookStack.CN) 构建 - 21 -
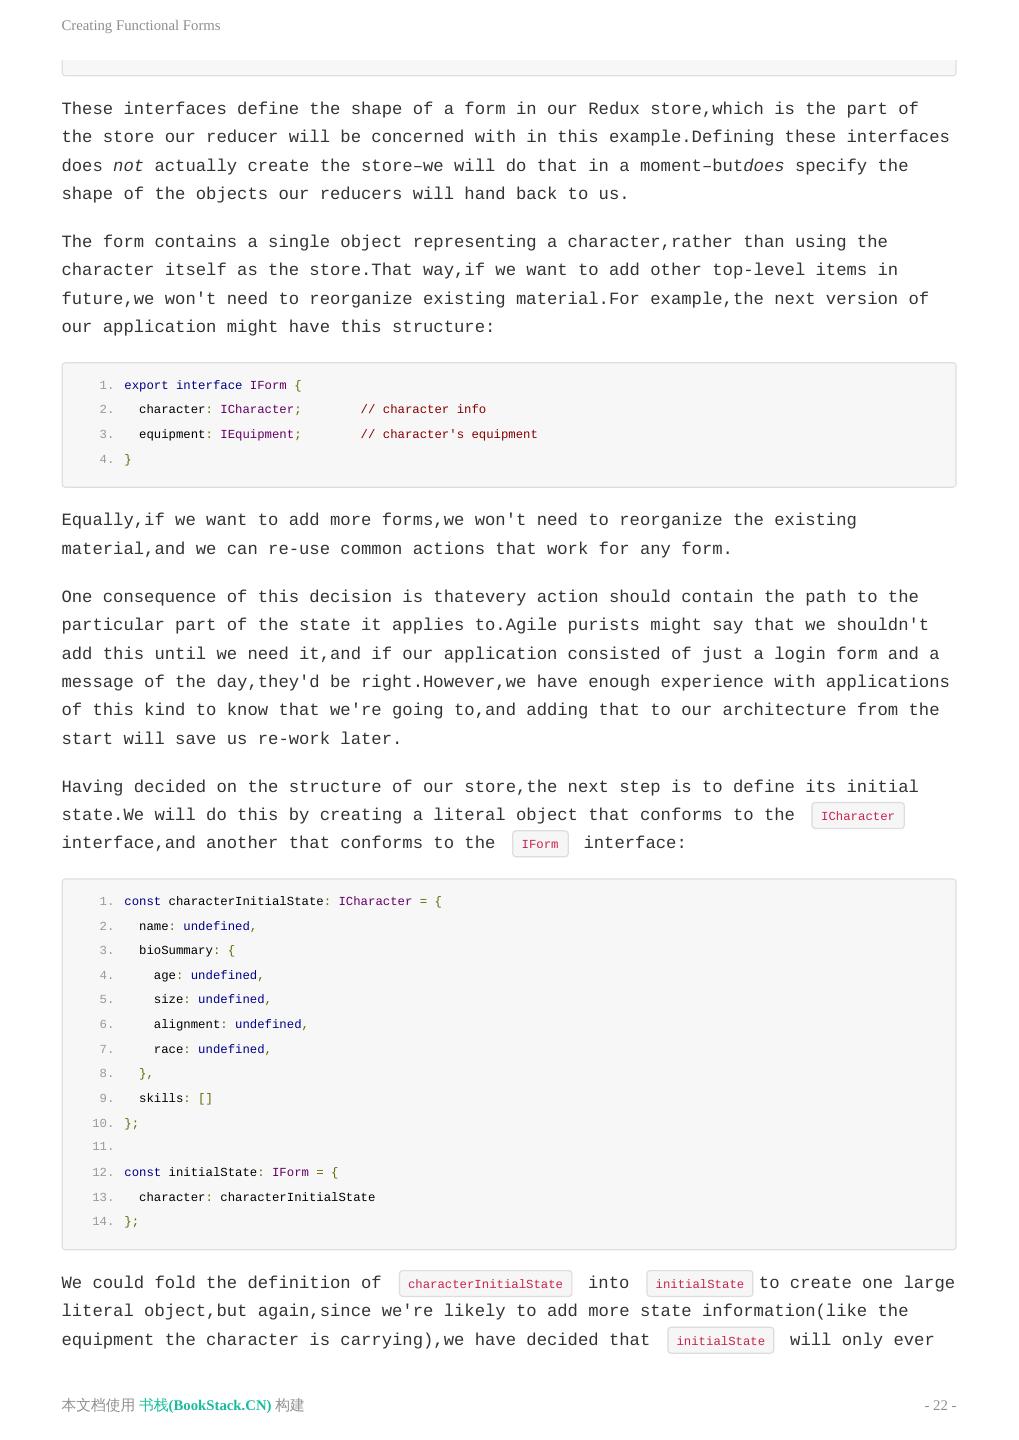
22 .Creating Functional Forms These interfaces define the shape of a form in our Redux store,which is the part of the store our reducer will be concerned with in this example.Defining these interfaces does not actually create the store–we will do that in a moment–butdoes specify the shape of the objects our reducers will hand back to us. The form contains a single object representing a character,rather than using the character itself as the store.That way,if we want to add other top-level items in future,we won't need to reorganize existing material.For example,the next version of our application might have this structure: 1. export interface IForm { 2. character: ICharacter; // character info 3. equipment: IEquipment; // character's equipment 4. } Equally,if we want to add more forms,we won't need to reorganize the existing material,and we can re-use common actions that work for any form. One consequence of this decision is thatevery action should contain the path to the particular part of the state it applies to.Agile purists might say that we shouldn't add this until we need it,and if our application consisted of just a login form and a message of the day,they'd be right.However,we have enough experience with applications of this kind to know that we're going to,and adding that to our architecture from the start will save us re-work later. Having decided on the structure of our store,the next step is to define its initial state.We will do this by creating a literal object that conforms to the ICharacter interface,and another that conforms to the IForm interface: 1. const characterInitialState: ICharacter = { 2. name: undefined, 3. bioSummary: { 4. age: undefined, 5. size: undefined, 6. alignment: undefined, 7. race: undefined, 8. }, 9. skills: [] 10. }; 11. 12. const initialState: IForm = { 13. character: characterInitialState 14. }; We could fold the definition of characterInitialState into initialState to create one large literal object,but again,since we're likely to add more state information(like the equipment the character is carrying),we have decided that initialState will only ever 本文档使用 书栈(BookStack.CN) 构建 - 22 -
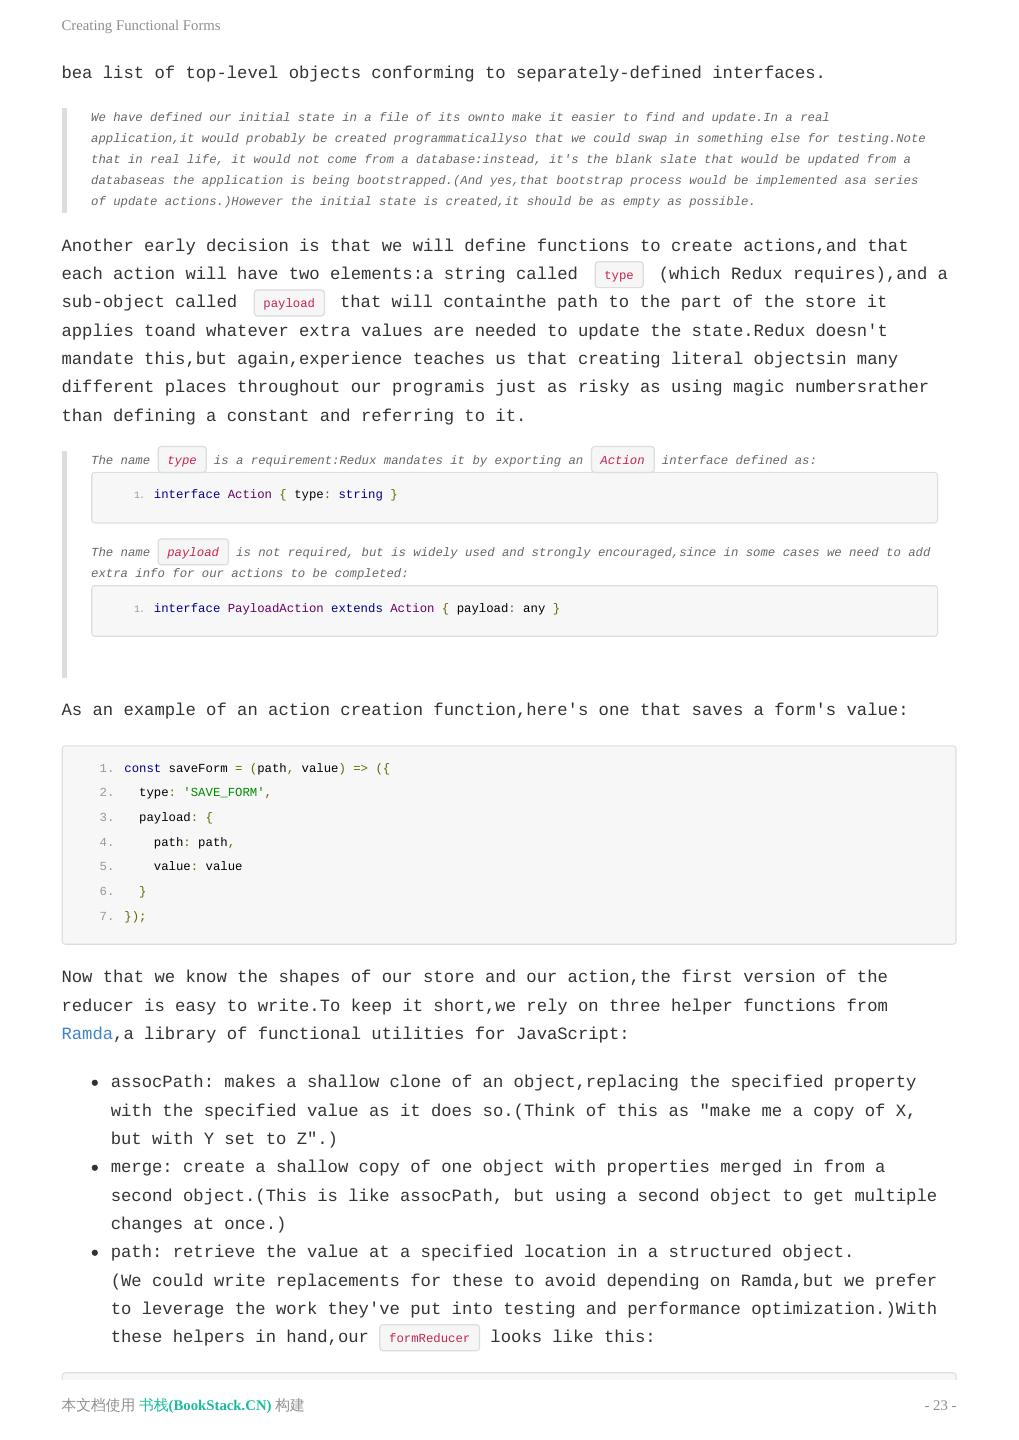
23 .Creating Functional Forms bea list of top-level objects conforming to separately-defined interfaces. We have defined our initial state in a file of its ownto make it easier to find and update.In a real application,it would probably be created programmaticallyso that we could swap in something else for testing.Note that in real life, it would not come from a database:instead, it's the blank slate that would be updated from a databaseas the application is being bootstrapped.(And yes,that bootstrap process would be implemented asa series of update actions.)However the initial state is created,it should be as empty as possible. Another early decision is that we will define functions to create actions,and that each action will have two elements:a string called type (which Redux requires),and a sub-object called payload that will containthe path to the part of the store it applies toand whatever extra values are needed to update the state.Redux doesn't mandate this,but again,experience teaches us that creating literal objectsin many different places throughout our programis just as risky as using magic numbersrather than defining a constant and referring to it. The name type is a requirement:Redux mandates it by exporting an Action interface defined as: 1. interface Action { type: string } The name payload is not required, but is widely used and strongly encouraged,since in some cases we need to add extra info for our actions to be completed: 1. interface PayloadAction extends Action { payload: any } As an example of an action creation function,here's one that saves a form's value: 1. const saveForm = (path, value) => ({ 2. type: 'SAVE_FORM', 3. payload: { 4. path: path, 5. value: value 6. } 7. }); Now that we know the shapes of our store and our action,the first version of the reducer is easy to write.To keep it short,we rely on three helper functions from Ramda,a library of functional utilities for JavaScript: assocPath: makes a shallow clone of an object,replacing the specified property with the specified value as it does so.(Think of this as "make me a copy of X, but with Y set to Z".) merge: create a shallow copy of one object with properties merged in from a second object.(This is like assocPath, but using a second object to get multiple changes at once.) path: retrieve the value at a specified location in a structured object. (We could write replacements for these to avoid depending on Ramda,but we prefer to leverage the work they've put into testing and performance optimization.)With these helpers in hand,our formReducer looks like this: 本文档使用 书栈(BookStack.CN) 构建 - 23 -
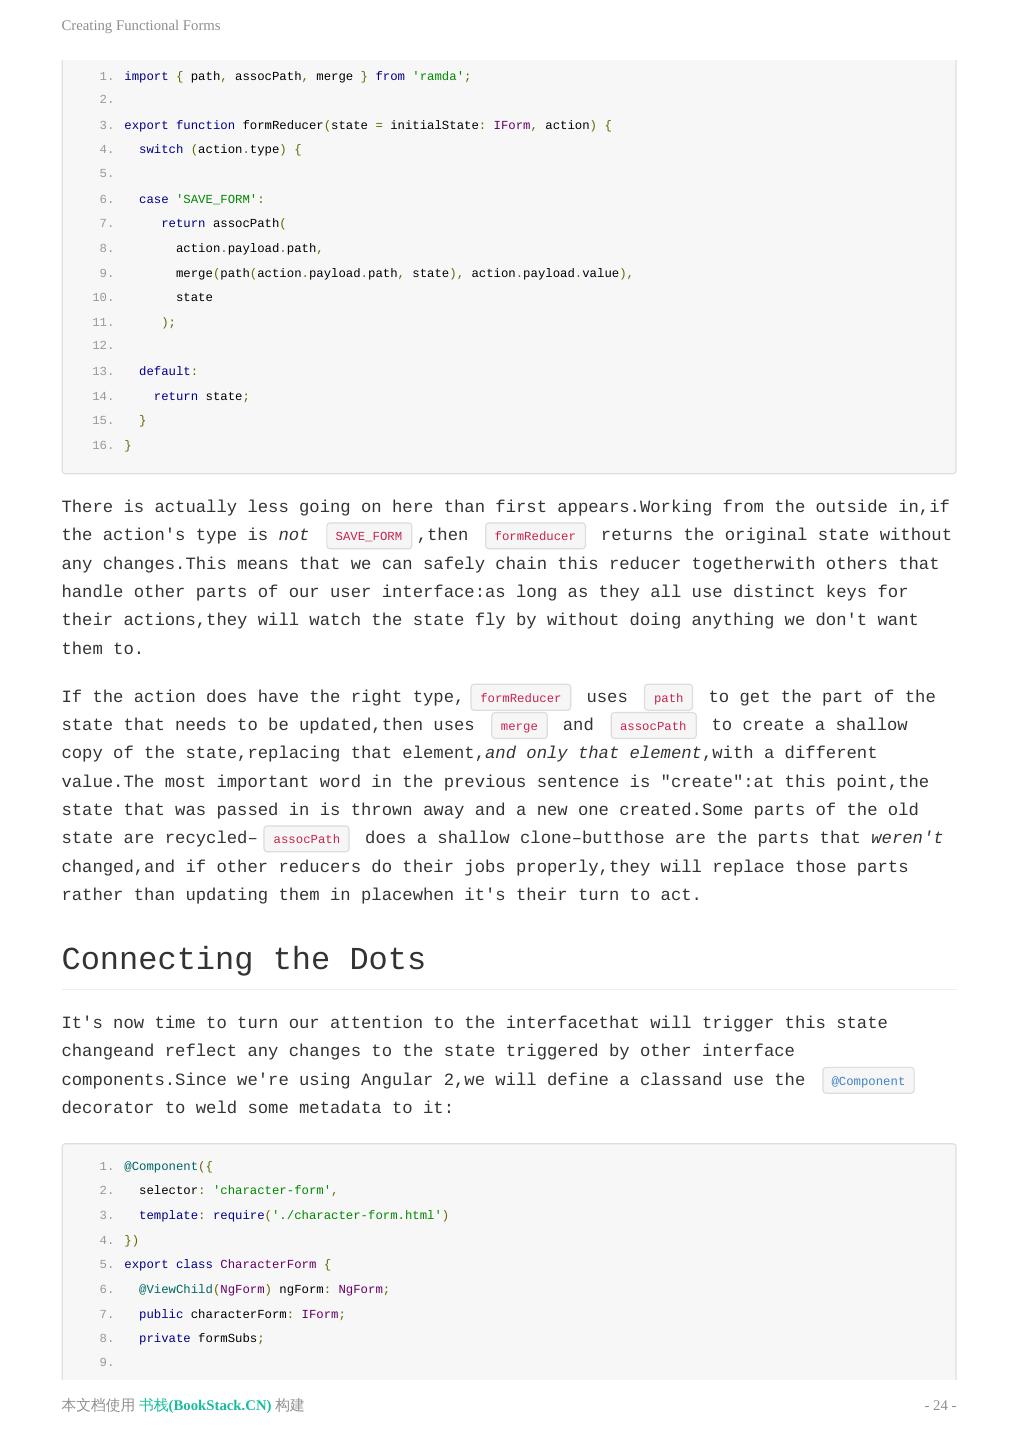
24 .Creating Functional Forms 1. import { path, assocPath, merge } from 'ramda'; 2. 3. export function formReducer(state = initialState: IForm, action) { 4. switch (action.type) { 5. 6. case 'SAVE_FORM': 7. return assocPath( 8. action.payload.path, 9. merge(path(action.payload.path, state), action.payload.value), 10. state 11. ); 12. 13. default: 14. return state; 15. } 16. } There is actually less going on here than first appears.Working from the outside in,if the action's type is not SAVE_FORM ,then formReducer returns the original state without any changes.This means that we can safely chain this reducer togetherwith others that handle other parts of our user interface:as long as they all use distinct keys for their actions,they will watch the state fly by without doing anything we don't want them to. If the action does have the right type, formReducer uses path to get the part of the state that needs to be updated,then uses merge and assocPath to create a shallow copy of the state,replacing that element,and only that element,with a different value.The most important word in the previous sentence is "create":at this point,the state that was passed in is thrown away and a new one created.Some parts of the old state are recycled– assocPath does a shallow clone–butthose are the parts that weren't changed,and if other reducers do their jobs properly,they will replace those parts rather than updating them in placewhen it's their turn to act. Connecting the Dots It's now time to turn our attention to the interfacethat will trigger this state changeand reflect any changes to the state triggered by other interface components.Since we're using Angular 2,we will define a classand use the @Component decorator to weld some metadata to it: 1. @Component({ 2. selector: 'character-form', 3. template: require('./character-form.html') 4. }) 5. export class CharacterForm { 6. @ViewChild(NgForm) ngForm: NgForm; 7. public characterForm: IForm; 8. private formSubs; 9. 本文档使用 书栈(BookStack.CN) 构建 - 24 -
25 .Creating Functional Forms 10. constructor(private ngRedux: NgRedux<IAppState>) {} 11. } There's a lot going on here,so we'll start with a high-level explanation and then dive into details.As the diagram shows,Angular will keep ngForm and characterForm in sync with each otherusing its own dark magic,which we will see in a moment.In order to synchronize that with our state,we create a standard observer/observable connectionto make characterForm watch the character portion of our Redux state. Figure: Redux Flow Looking once more at the diagram,there is a potential circularity in the updates.Angular avoids an infinite loop by breaking the cyclewhen characterForm and the form's actual internal data are the same. Looking more closely at the code used to create all of this: The @Component decorator in the code above tells Angular thatthis class is used to fill in elementsin the character-form.html template snippet. Using the @ViewChild decorator on ngFormgives this class an instance variable that watches a form.We need this because we are going to subscribe to event notifications from that formlater on. The characterForm instance variable is our working copy of the form's state. Finally, private ngRedux: NgRedux triggers Angular's dependency injectionand 本文档使用 书栈(BookStack.CN) 构建 - 25 -
26 .Creating Functional Forms gives us access to the Redux store.When our application is busy doing other things,our data will live in this store,and when we're testing,we can inject a mock object here to give us more insight. The formSubs instance variable is the odd one out in this class.Its job is to store the observer/observable subscriptionconnecting our state to our formso that we can unsubscribe cleanly when this component is destroyed.Angular 2 will automatically unsubscribe on our behalf,but it's always safer to put our own toys away when we're done playing with them… Since CharacterForm is an Angular component,it needs a template to define how it will be rendered.In keeping with Angular best practices,we will use a template-driven formand bind its inputs to objects retrieved from the Redux state.The first part of that form looks like this: 1. <form #form="ngForm"> 2. <label for="name">Character Name:</label> 3. <input 4. type="text" 5. name="name" 6. [(ngModel)]="characterForm.name"> 7. 8. <label for="age">Age:</label> 9. <input 10. type="number" 11. name="age" 12. [(ngModel)]="characterForm.bioSummary.age"> 13. </form> ngModel is a magic word meaning "the value of this field in the form".The expression [(ngModel)] therefore makes a form controland binds it to the public data member of our form object.The final step in wiring all of this together is therefore to subscribe to the Redux stateso that whenever it changes,the changes are automatically pushed into the form(which triggers a DOM update and a re-rendering of the page).Equally,since we're listening to the form for changes and writing those to our stateby creating and dispatching actions,anything the user does will be reflected in the state.The beauty of this is that if anyone else does an update anywhere,everything will keep itself in sync. For the sake of simplicity we are synchronizing the whole form object in a single action,which sets the character attribute in the state with a brand new object every time.We could instead sync specific attributes to improve performanceby using the path mechanism introduced earlier. It's tempting to put this final piece of wiring in the constructor of our component,but that doesn't workbecause Angular has to construct several objectsbefore any of them can be wired together.This is a key feature of Angular's architecture(and of the architectures of many other systems):object construction and object initialization are handled separatelyto free us from headaches related to cyclic references. The right place to connect everything is ngOnInit ,which is called after all the objects in the system have been createdbut before any of them are used.The ngOnInit 本文档使用 书栈(BookStack.CN) 构建 - 26 -
27 .Creating Functional Forms for CharacterForm does the two pieces of wiring described abovein an arbitrary order: 1. ngOnInit() { 2. 3. // Subscribe to the form in state. 4. this.formSubs = this.ngRedux.select(state => state.form.character) 5. .subscribe(characterFormState => { 6. this.characterForm = characterFormState; 7. }); 8. 9. // Dispatch an action when the form is changed. 10. this.ngForm.valueChanges.debounceTime(0) 11. .subscribe(change => 12. this.ngRedux.dispatch( 13. saveForm( 14. change, 15. ['character'] 16. ) 17. ) 18. ); 19. } The first half of this method says that when the state changes,we want to update the form.We use ngRedux.select with a fat arrow function as callbackto pick out the character portion of the state,then subscribe to that with a another fat arrow callbackthat updates the form data(which as explained above triggers redisplay). The second half of ngOnInit does the binding in the opposite direction:whenever the form changes,we dispatch an action created by saveForm that has SAVE_FORM as the changeand ['character'] as the path to the part of the state we want to modify. ngForm 's valueChanges method automatically gives us a change valuethat contains all of the form values.These values arrive in a JavaScript object that mirrors the structure of the HTML,which is exactly what we want(because we defined the name attributes to get it). And that's it:every change to our form triggers creation of a new state,and every change to our state triggered by anything elseis immediately reflected in our form.We aren't saving the state to disk,but that's best left to some kind of middleware(which can be smart about only persisting the bits of statethat have actually changed between updates). Filling in the Gaps The only meaningful way to assess an architectural decision is to askwhether it makes things comprehensible todayand easy to change tomorrow.Given all of the plumbing introduced above,you might think that our architecture falls short on both counts,but it turns out that it actually simplifies application evolution.To see this,let's have a look at how it helps us handle multi-valued forms,which Angular doesn't support out 本文档使用 书栈(BookStack.CN) 构建 - 27 -
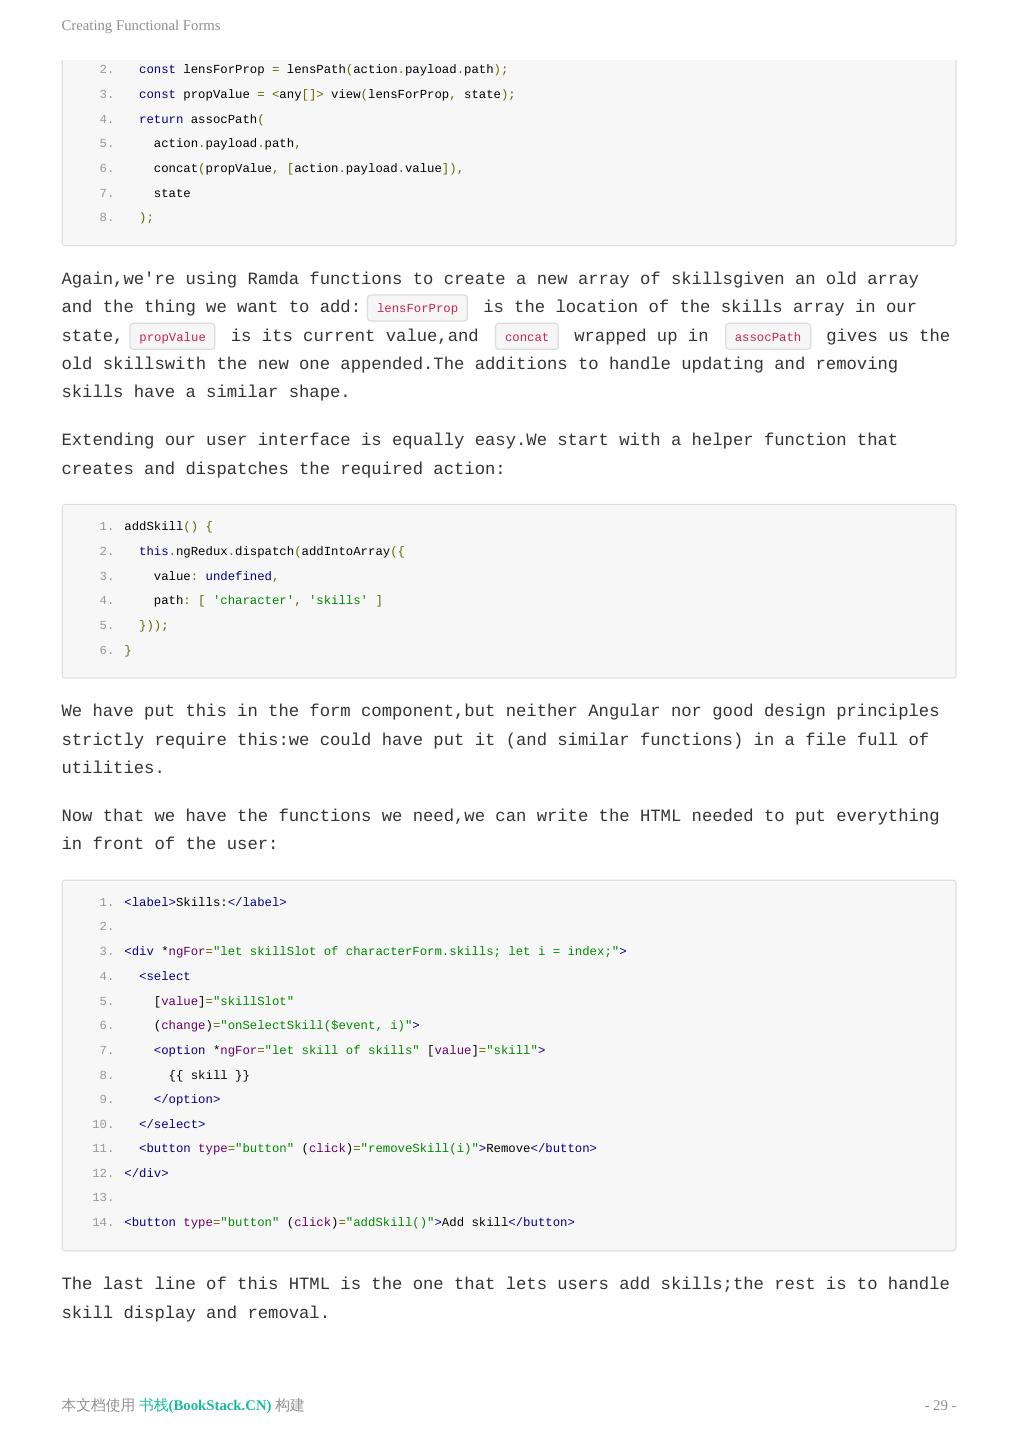
28 .Creating Functional Forms of the box. As the name suggests,a multi-valued form is one that can have many values at once,such as a multi-select dropdown list.The natural way to store these values is in an array,such as the one shown below for storing a character's skills: 1. character: { 2. skills: ['Drinking', 'Knowing Things'], 3. } The first step in adding support for multi-valued fields to our applicationis to define actions that manipulate arrays–or more precisely,to define functions that create actions that tell Reduxhow to generate a new array from an old one: 1. const addIntoArray = (path, value) => ({ 2. type: 'ADD_INDEXED_FORM_VALUE', 3. payload: { path, value } 4. }); 5. 6. const putInArray = (path, value, index) => ({ 7. type: 'UPDATE_INDEXED_FORM_VALUE', 8. payload: { path, value, index } 9. }); 10. 11. const removeFromArray = (index, path) => ({ 12. type: 'REMOVE_INDEXED_FORM_VALUE', 13. payload: { index, path } 14. }); There's nothing exciting going on here:each function creates an action with a type (again, required by Redux)and a payload (our own term).To cut down on typing,we make use of the fact that {a, b} is a shorthand for {a: a, b: b} : 1. let a = 'A'; 2. let b = 'B'; 3. let both = {a, b}; 4. console.log(both); 1. {a: 'A', b: 'B'} The payload of the action returned by addIntoArray therefore has two keys called path and value ,which are in turn bound to whatever was passed infor the parameters with the corresponding names. Once we have these actions,the next step is to update our reducer by adding the following case: 1. case 'ADD_INDEXED_FORM_VALUE': 本文档使用 书栈(BookStack.CN) 构建 - 28 -
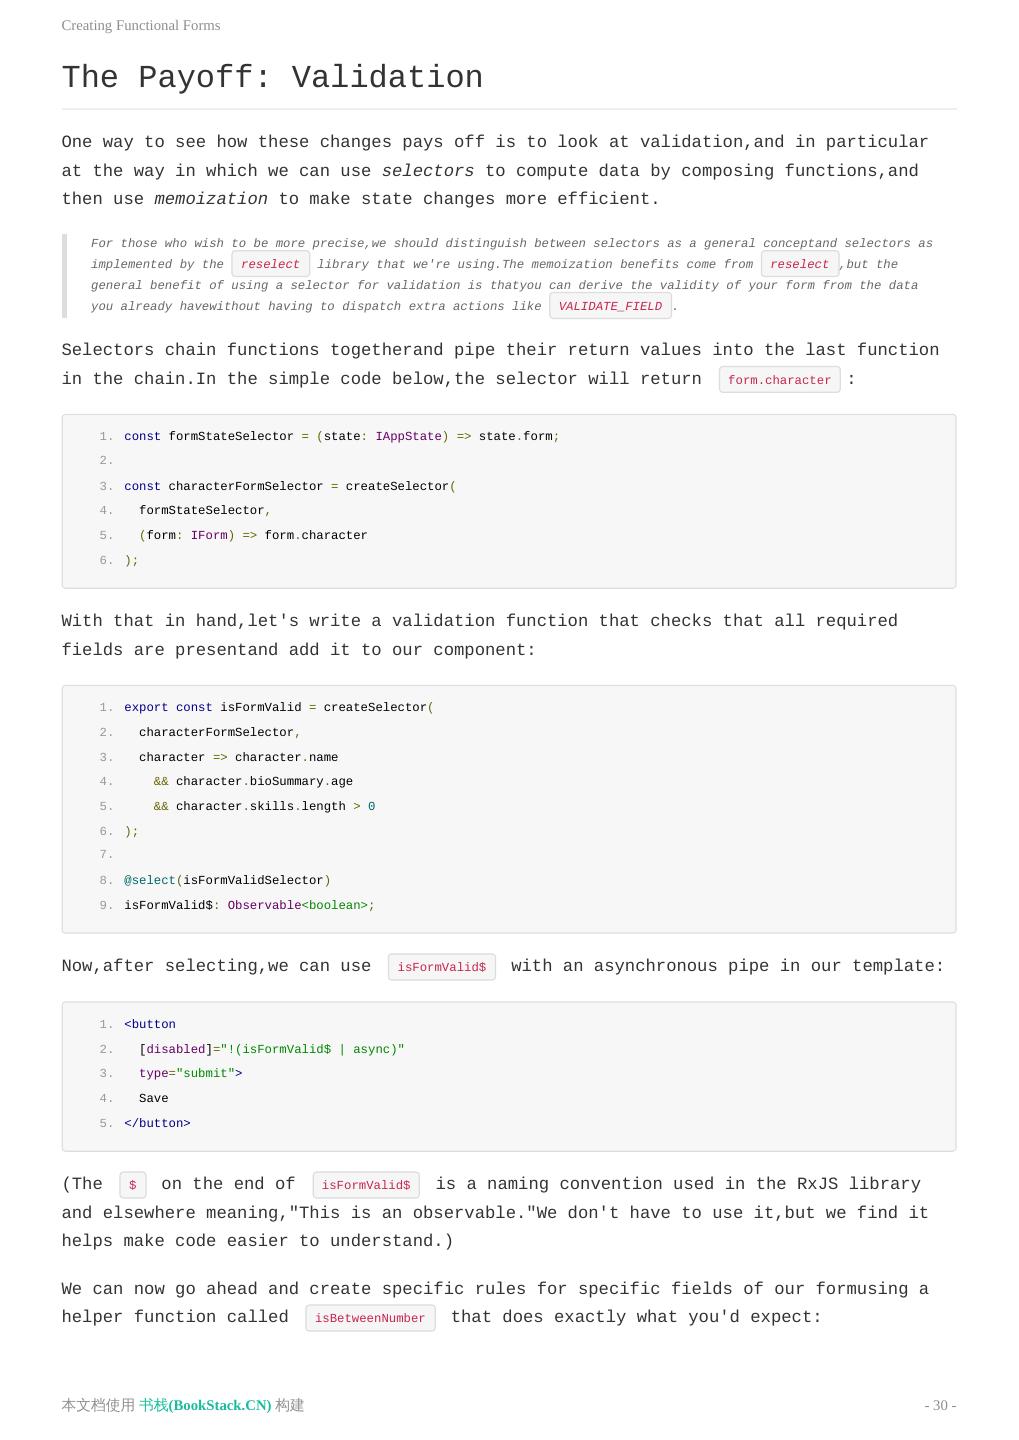
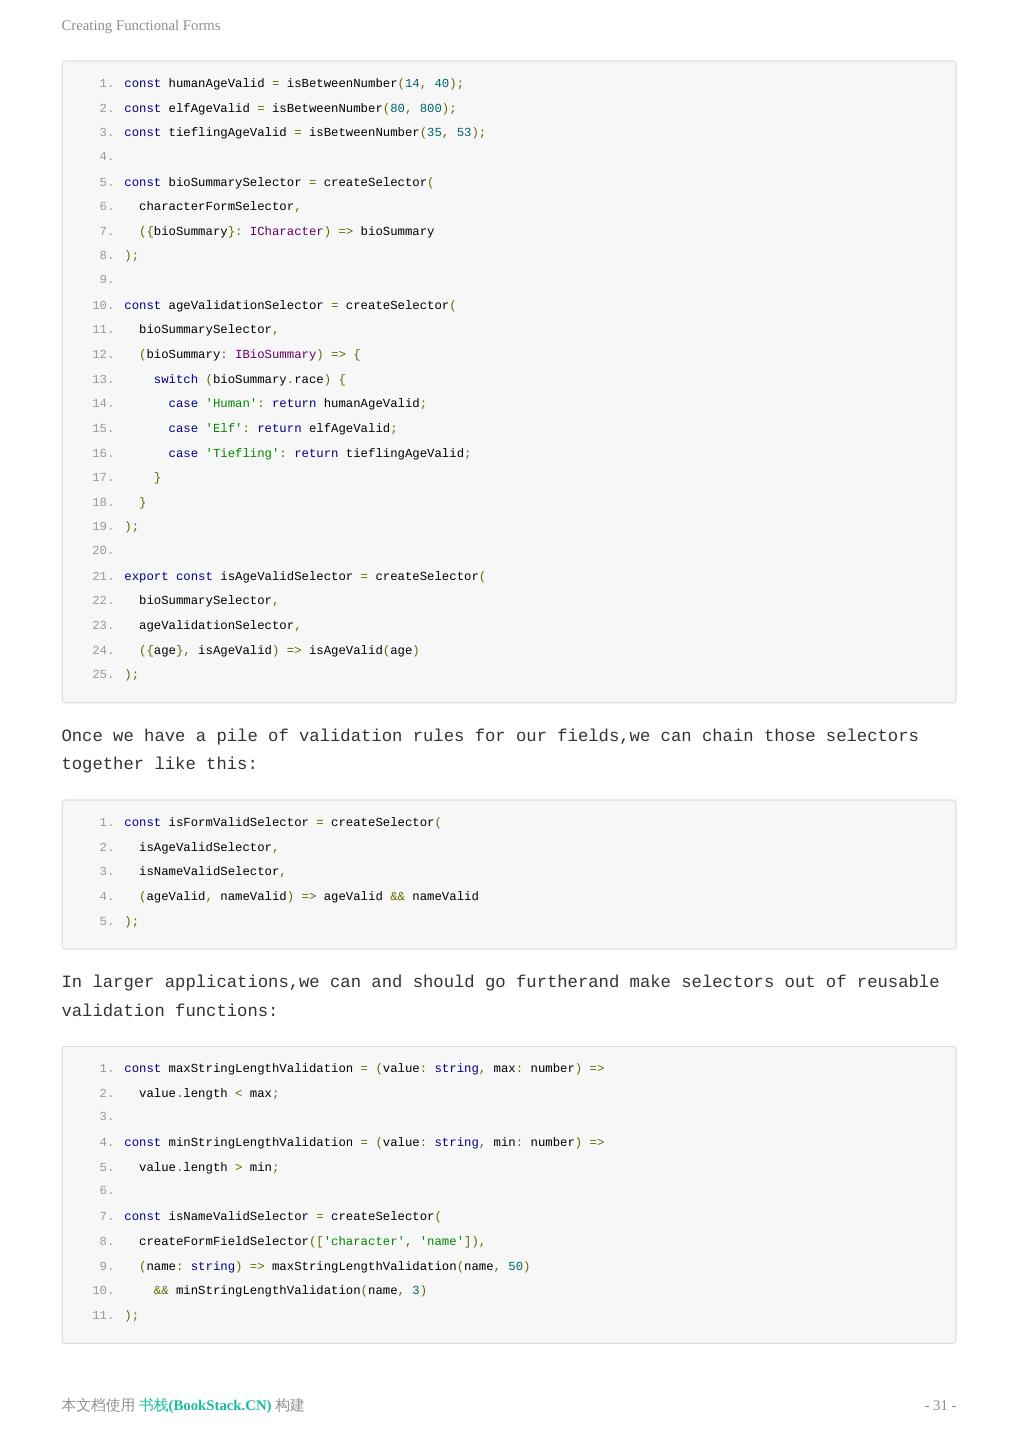
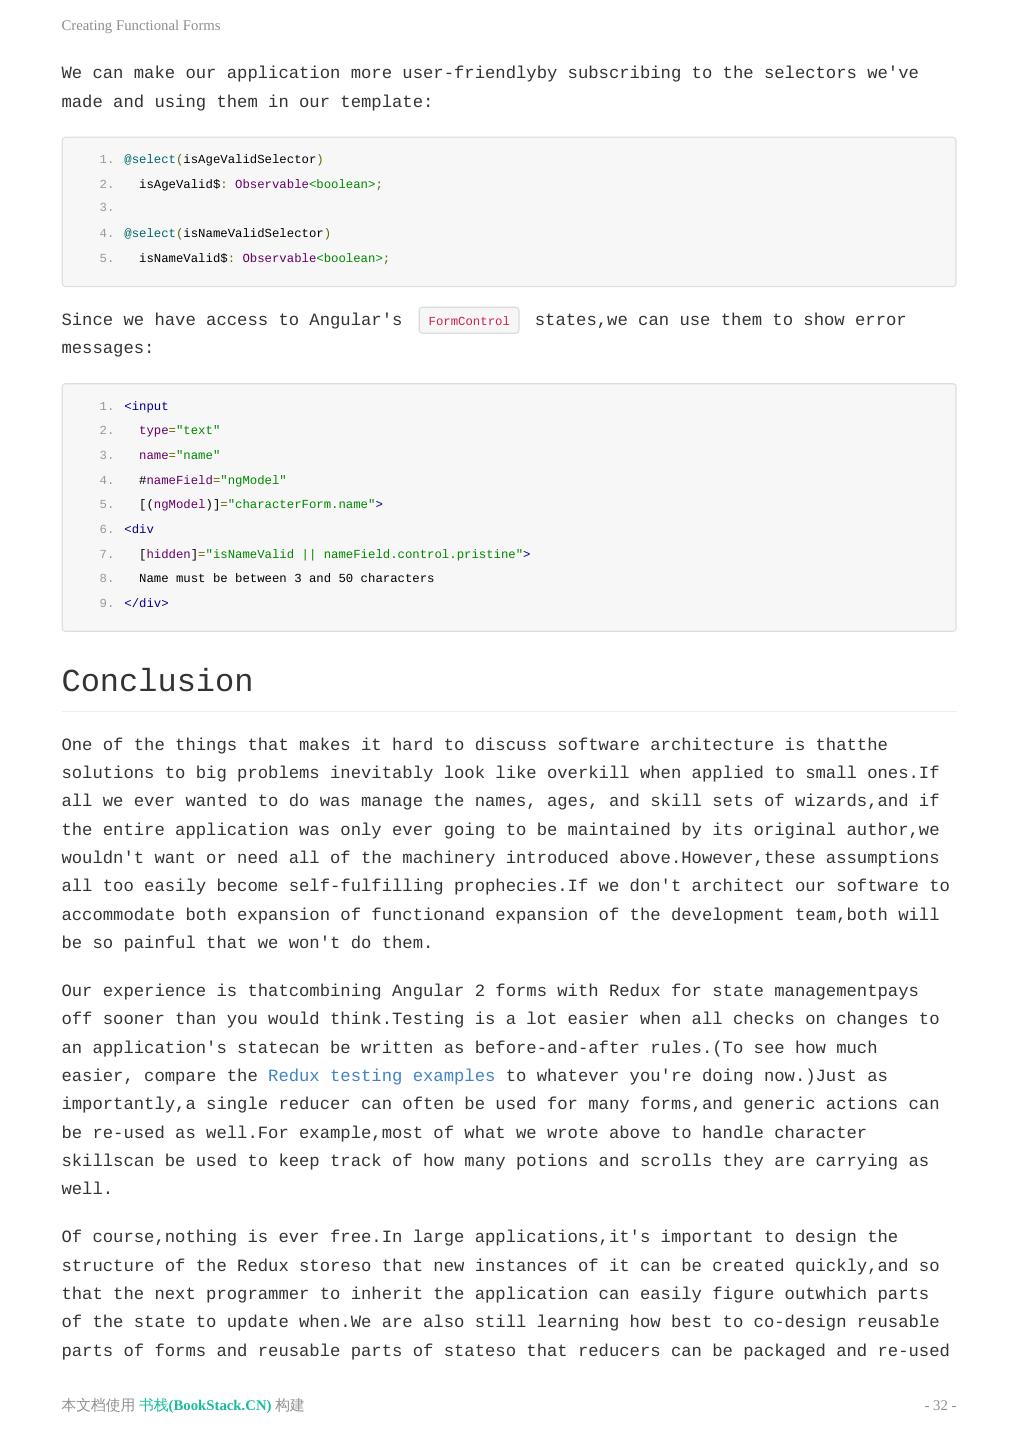
29 .Creating Functional Forms 2. const lensForProp = lensPath(action.payload.path); 3. const propValue = <any[]> view(lensForProp, state); 4. return assocPath( 5. action.payload.path, 6. concat(propValue, [action.payload.value]), 7. state 8. ); Again,we're using Ramda functions to create a new array of skillsgiven an old array and the thing we want to add: lensForProp is the location of the skills array in our state, propValue is its current value,and concat wrapped up in assocPath gives us the old skillswith the new one appended.The additions to handle updating and removing skills have a similar shape. Extending our user interface is equally easy.We start with a helper function that creates and dispatches the required action: 1. addSkill() { 2. this.ngRedux.dispatch(addIntoArray({ 3. value: undefined, 4. path: [ 'character', 'skills' ] 5. })); 6. } We have put this in the form component,but neither Angular nor good design principles strictly require this:we could have put it (and similar functions) in a file full of utilities. Now that we have the functions we need,we can write the HTML needed to put everything in front of the user: 1. <label>Skills:</label> 2. 3. <div *ngFor="let skillSlot of characterForm.skills; let i = index;"> 4. <select 5. [value]="skillSlot" 6. (change)="onSelectSkill($event, i)"> 7. <option *ngFor="let skill of skills" [value]="skill"> 8. {{ skill }} 9. </option> 10. </select> 11. <button type="button" (click)="removeSkill(i)">Remove</button> 12. </div> 13. 14. <button type="button" (click)="addSkill()">Add skill</button> The last line of this HTML is the one that lets users add skills;the rest is to handle skill display and removal. 本文档使用 书栈(BookStack.CN) 构建 - 29 -


